Essential Aspects of Rough-In for Bathtub
A bathtub rough-in, also known as a tub drain assembly, is a crucial step in the bathroom plumbing process. It involves installing pipes, drains, and valves that will later connect to the bathtub. Proper rough-in not only ensures the proper function of your bathtub but also prevents costly repairs or leaks in the future.
Determining the Tub Drain Location:
Before roughing in, it's essential to determine the exact location of the bathtub drain. Mark the drain's center point on the subfloor, ensuring it aligns with the center of the bathtub's drain hole.
Installing the Drain Pipe:
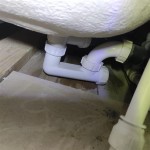
The drain pipe is the main channel through which water flows from the bathtub. Connect a P-trap to the drain pipe, which helps prevent sewer gases from entering the bathroom. Ensure the drain pipe has a slight downward slope towards the main drainage system.
Fixture Drain Assembly:
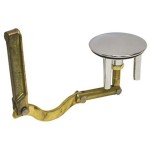
A fixture drain assembly or tub drain connects the bathtub to the drain pipe. It includes the drain flange, which fits around the bathtub drain hole, and a tailpiece that connects to the drain pipe. Install the fixture drain assembly just under the subfloor.
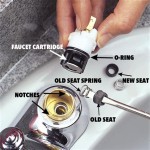
Valve Rough-In:
If your bathtub has built-in valves, this step involves roughing in the hot and cold water supply lines. Mark the valve locations on the wall behind the bathtub and install the necessary plumbing connections.
Inspecting and Testing:
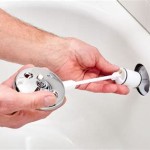
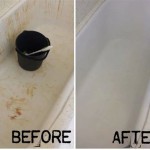
Once all the rough-in is complete, thoroughly inspect the piping, drains, and valves for any leaks or improper connections. Perform a water test by filling the tub and observing any leaks or drips. If any issues are detected, address them immediately.
Additional Considerations:
Consider the following additional factors for a successful rough-in:
- Use the correct size and type of piping and fittings.
- Ensure the drain pipe has a proper slope to facilitate water flow.
- Allow enough space around the rough-in for future bathtub installation.
- Protect all piping and connections from potential damage during construction.
Conclusion:
Rough-in for a bathtub involves essential plumbing tasks that lay the foundation for a well-functioning bathroom. By following the steps outlined above and considering the additional factors, you can ensure a successful rough-in that facilitates the smooth installation of your bathtub and eliminates the risk of future plumbing issues.

Bathtub Drain Rough In Dimensions Shower Plumbing Bathroom Floor Plans

Rough Plumbing Height For Bathtub Shower Installation Bathroom

Tub Shower Rough Plumbing Dimensions

Tub And Faucet Rough In Mister Plumber

Testing A Bathtub And Tap After Rough In Installation Mister Plumber

Rough In Plumbing Vs Finish Kulk S Heating Inc

Plumbing In The Downstairs Bathroom Blog Homeandawaywithlisa

Bathroom Plumbing Addition Shower

16 1 4 X 60 30 Enameled Steel Above Floor Rough In Right Hand Rectangle Bathtub Biscuit Proflo Plumbing Parts Supplies
Related Posts