Replace A Bathtub: Essential Aspects To Consider
Replacing a bathtub can dramatically enhance the aesthetics and functionality of your bathroom. However, it is essential to approach this project with careful planning and execution to ensure a successful outcome. Several critical aspects should be considered when replacing a bathtub to guarantee a seamless and satisfying renovation.
1. Material Selection:
The material of the bathtub plays a significant role in its durability, ease of maintenance, and aesthetic appeal. Consider the following options:
- Acrylic: Durable, lightweight, and warm to the touch, this budget-friendly material offers a glossy finish and comes in various colors and patterns.
- Fiberglass: Less expensive than acrylic, fiberglass tubs are lightweight and easy to install. However, they may be prone to scratching and discoloration over time.
- Cast Iron: Known for its durability and heat retention, cast iron tubs are heavy and require professional installation. They can be enameled in various colors and styles.
- Stone Resin: A blend of crushed stone and resin, stone resin tubs offer a luxurious look and feel. They are non-porous and resistant to stains and scratches.
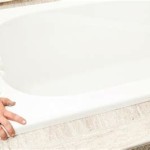
2. Size and Shape:
The size and shape of the bathtub should complement the available space and your desired bathing experience. Carefully measure the area where the tub will be installed, considering the dimensions of the tub itself as well as the space required for faucets and trim.
Various bathtub shapes are available, including rectangular, oval, round, and corner units. Choose a shape that fits the aesthetic of your bathroom and provides the desired level of comfort and functionality.
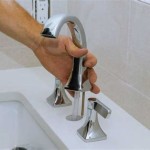
3. Installation Type:
Bathtubs can be installed in two main ways:
- Drop-in: These tubs are designed to fit into a pre-cut opening in the bathroom floor or countertop. They offer a seamless look and can be easily customized with decorative surrounds.
- Freestanding: Freestanding tubs are not built into the floor or countertop and can be placed anywhere in the bathroom. They provide a luxurious and elegant focal point but require more space and careful placement.
4. Functionality:
Consider the intended use of the bathtub and choose features that enhance its functionality. Some options to consider include:
- Whirlpool jets: For a relaxing and therapeutic bathing experience, whirlpool jets can provide a soothing massage.
- Heated backrest: For added comfort, some bathtubs feature heated backrests that maintain a warm temperature while bathing.
- Grab bars: If the bathtub will be used by someone with limited mobility, installing grab bars can provide added safety and support.
5. Style and Aesthetics:
The style and aesthetics of the bathtub should complement the overall design of your bathroom. Choose a tub that matches the color scheme, fixtures, and other design elements. Consider the lines and shapes of the tub to create a harmonious and cohesive look.
Conclusion:
Replacing a bathtub is a significant home improvement project that requires careful planning and execution. By considering the essential aspects discussed in this article, including material selection, size and shape, installation type, functionality, and style, you can ensure a successful and satisfying bathroom renovation.

How To Replace A Bathtub With Pictures Wikihow

How To Remove And Replace A Bathtub The Home Depot

Repairing Vs Replacing Your Bathtub

Bathtub Replacement Replace Tub Bath Planet

How To Remove And Replace A Bathtub Terry S Plumbing

Bathtub Replacement Perrysburg Sylvania Toledo Ohio And Michigan Bath Contractor

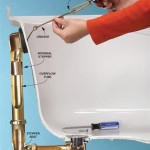
When And How You Should Replace A Bathtub Overflow Cover Plate Service Plus Plumbing

Tub Replacement Cost In 2024 Forbes Home

How To Replace A Bathtub With Pictures Wikihow

How Long Does It Take To Install A Bathtub Bathwraps