How to Remove a Bathtub Faucet
Is your bathtub faucet dripping, leaking, or just plain old? It might be time for a replacement. While replacing a bathtub faucet isn't a project for the faint of heart, it is possible to do it yourself with a little patience and some basic tools. ### Step 1: Gather Your Tools and Materials Before you start, make sure you have all the necessary tools and materials on hand. You will need: - A new bathtub faucet - A basin wrench - An adjustable wrench - Pliers - A screwdriver - A bucket - A towel - Safety glasses ### Step 2: Turn Off the Water Supply The first step is to turn off the water supply to your bathtub. This is usually done by closing the valves located under the sink. If you can't find the valves, you may need to turn off the main water supply to your home. ### Step 3: Disconnect the Water Lines Once the water supply is turned off, you can disconnect the water lines from the faucet. Use the basin wrench to loosen the nuts that hold the water lines in place. Be careful not to drop the nuts into the drain. ### Step 4: Remove the Faucet Once the water lines are disconnected, you can remove the faucet. Use the adjustable wrench to loosen the nuts that hold the faucet in place. Again, be careful not to drop the nuts into the drain. ### Step 5: Clean the Faucet Area Once the faucet is removed, you can clean the faucet area. Use the towel to wipe away any dirt or debris. You can also use a mild detergent and water to clean the area more thoroughly. ### Step 6: Install the New Faucet Now it's time to install the new faucet. Start by placing the faucet in the hole in the bathtub. Make sure the faucet is level and that the spout is pointing in the desired direction. ### Step 7: Connect the Water Lines Once the faucet is in place, you can connect the water lines. Use the basin wrench to tighten the nuts that hold the water lines in place. Be sure to tighten the nuts securely, but don't overtighten them. ### Step 8: Turn On the Water Supply Once the water lines are connected, you can turn on the water supply. Check for leaks around the faucet. If you see any leaks, tighten the nuts until the leaks stop. ### Step 9: Test the Faucet Once the faucet is installed and there are no leaks, you can test the faucet. Turn on the faucet and check the water pressure. Make sure the water flows smoothly and that the temperature is correct. ### Step 10: Enjoy Your New Faucet! Now that you've installed your new bathtub faucet, you can enjoy it for years to come. Just be sure to clean the faucet regularly to keep it looking and working its best.
How To Replace A Mobile Home Bathtub Faucet White Knight

How To Install A Tub Spout The Home Depot With Thisoldhouse

How To Replace A Bathtub Spout Diy Family Handyman

Replacing Shower Tub Faucet How To Install A New

Learn How To Remove And Install Various Tub Spouts

Fixing Faucets How To Replace A Difficult Tub Faucet Cartridge

How To Change A Bathtub Faucet 14 Steps With Pictures Wikihow

Learn How To Remove And Install Various Tub Spouts

How To Replace A Bathtub Faucet Rt Olson Plumbing

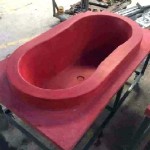
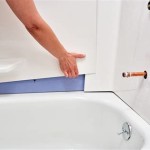
How To Remove A Bathtub Bob Vila