Re-caulking a Bathtub: A Comprehensive Guide to Restore a Watertight Seal
A well-caulked bathtub is crucial for preventing water from seeping into the surrounding areas and causing damage to the bathroom. Re-caulking your bathtub is a DIY project that can save you money and enhance the aesthetics of your bathroom. Here's a comprehensive guide to help you through the process: ### Preparations: 1.Gather the Necessary Supplies:
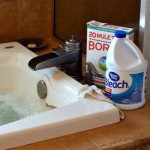
- Caulk suitable for bathrooms, such as silicone or acrylic-based caulk. - Caulk gun. - Putty knife or scraper. - Rubbing alcohol or denatured alcohol. - Clean cloths or paper towels. - Painter's tape (optional). 2.Turn off the Water Supply:
- Locate the water shut-off valve for your bathtub and turn it off. This will prevent water from leaking during the re-caulking process. 3.Prepare the Bathtub:
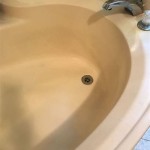
- Remove any old caulk from the bathtub using a putty knife or scraper. Be careful not to damage the bathtub's surface. - Clean the bathtub thoroughly with rubbing alcohol or denatured alcohol. Make sure to remove all dirt, grime, and soap scum. ### Applying New Caulk: 1.Apply Painter's Tape (Optional):
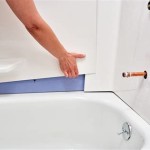
- If you want clean, straight lines, you can apply painter's tape along the edges of the bathtub where you'll be applying the caulk. 2.Prepare the Caulk Gun:
- Cut the tip of the caulk tube at a 45-degree angle. The size of the cut will determine the thickness of the caulk bead. 3.Apply the Caulk:
- Hold the caulk gun at a 45-degree angle to the bathtub and press the trigger to dispense the caulk. Move the gun along the bathtub's edges smoothly and evenly. - Make sure to apply the caulk in a continuous bead, without any gaps or breaks. 4.Smooth the Caulk:
- Use a damp finger or a caulking tool to smooth out the caulk bead. This will help create a neat and professional-looking finish. 5.Remove Painter's Tape (Optional):
- If you applied painter's tape, carefully remove it before the caulk dries completely. ### Final Steps: 1.Allow the Caulk to Dry:
- Refer to the manufacturer's instructions for the specific drying time of the caulk you're using. In general, allow at least 24 hours before using the bathtub. 2.Clean Up:
- Wipe off any excess caulk from the bathtub with a clean cloth or paper towel. By following these steps, you can successfully re-caulk your bathtub and ensure a watertight seal. Regular maintenance and re-caulking when needed will help prolong the life of your bathtub and prevent water damage in your bathroom.
How To Re Caulk A Bathtub

How To Re Caulk A Bathtub

Recaulking Failing Caulk Is Important When Should I Recaulk My Shower

How To Caulk A Bathtub On Sutton Place

How To Re Caulk Your Bathroom Denver Tub And Repairs

When How To Re Caulk Your Bathroom

How To Caulk A Shower Or Tub True Value

How To Caulk A Bathtub 13 Steps With Pictures Wikihow

Tub Recaulking Recaulk Sir Grout

How To Caulk A Shower Recaulking Bathtub