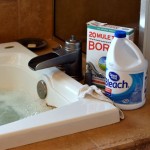
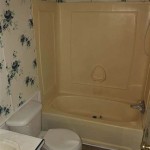
Fixing a Bathtub: A Comprehensive Guide Bathtubs, the cornerstone of many bathrooms, are prone to wear and tear over time. Whether it's a small crack or a gaping hole, patching a bathtub can be a daunting task, especially for those unfamiliar with plumbing and repair work. However, with the right tools, materials, and a step-by-step guide, you can easily tackle this project and restore your bathtub to its former glory. 1. Gather the Necessary Materials and Tools: - Acetone or rubbing alcohol - Sandpaper (fine-grit and medium-grit) - Epoxy repair kit or fiberglass repair kit - Mixing containers and stirring sticks - Putty knife or spatula - Painter's tape (optional) - Gloves and safety goggles 2. Prepare Your Bathtub: - Start by thoroughly cleaning the damaged area with acetone or rubbing alcohol to remove any dirt, grease, or grime. - Use medium-grit sandpaper to roughen the surface around the damaged area, creating a better bond for the repair material. - Rinse and dry the area completely. 3. Apply Painter's Tape (Optional): - If the damage extends beyond the bathtub's surface, consider using painter's tape to protect the surrounding areas, ensuring a clean and precise repair. 4. Prepare the Repair Material: - If using an epoxy repair kit, follow the manufacturer's instructions for mixing the epoxy resin and hardener. - For fiberglass repair kits, mix the resin and catalyst according to the instructions provided. 5. Apply the Repair Material: - Using a putty knife or spatula, apply the prepared repair material to the damaged area, ensuring it fills the crack or hole completely. - For larger holes or cracks, consider applying multiple layers, allowing each layer to cure before applying the next. 6. Smooth and Shape the Repair: - While the repair material is still wet, use the putty knife or spatula to smooth and shape it, creating a level surface that blends seamlessly with the surrounding bathtub material. 7. Allow the Repair to Cure: - Refer to the manufacturer's instructions for the specific curing time required for the repair material. Ensure you allow sufficient time for complete curing before using the bathtub. 8. Sand and Polish the Repaired Area: - Once the repair is completely cured, use fine-grit sandpaper to smooth out any rough edges or imperfections. - Apply a polishing compound to the repaired area, buffing it with a cloth or polisher to restore its original shine. With a little patience and attention to detail, you can successfully patch your bathtub, saving yourself the cost and hassle of replacing the entire fixture. Remember to prioritize safety by wearing gloves and safety goggles throughout the repair process, and always follow the manufacturer's instructions for the chosen repair material.

16 In W X 36 L Bathtub Floor Repair Inlay Kit White Wt 1636 1 The Home Depot

Fiberglass Tub Repair Service S And Holes Filled

Repairing A Ed Bathtub Or Shower

Why Do Bathtubs How To Maintain Repair Bathtub S 2024

A Smart Repairs Solution For Baths

Double The Life Of Your Tub With Professional Fiberglass Repair

Ed Bathtub Floor Repair Leaking Tub Or Shower

Bathtub Refinishing Chip Repair Tile Steam Cleaning In San Francisco Ca The Medic

Shurbond Bathtub Chip Repair

14 1 2 In W X 32 L Bathtub Floor Repair Inlay Kit White Wt 1432 The Home Depot