Moen Bathtub Faucet Installation: A Step-by-Step Guide
Upgrading your bathroom's bathtub faucet is a great way to enhance its functionality and style. With the right tools and a little know-how, you can easily install a Moen bathtub faucet yourself. Here's a step-by-step guide to help you through the process:
### 1. Gather the Necessary Tools and Materials:
- Adjustable wrench
- Basin wrench
- Pliers
- Screwdriver
- Tape measure
- Level
- Utility knife
- Plumber's putty
- New Moen bathtub faucet
- Shut-off valves (if necessary)
### 2. Turn Off the Water Supply:
- Locate the main water shut-off valve for your bathroom.
- Close the valve to stop the flow of water to the bathtub faucet.
### 3. Remove the Old Faucet:
- Use the adjustable wrench to loosen the nuts securing the old faucet to the bathtub.
- Be careful not to damage the bathtub during this step.
- Once the nuts are loose, remove the old faucet by hand or with the pliers.
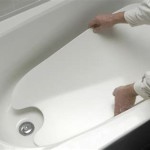
### 4. Clean the Bathtub Surface:
- Use a damp cloth to clean the area where the old faucet was installed.
- Make sure the surface is free of dirt, debris, and old sealant.
### 5. Install the New Shut-Off Valves (if necessary):
- If your old faucet didn't have shut-off valves, you'll need to install them now.
- Follow the manufacturer's instructions for installing the shut-off valves.
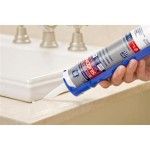
### 6. Apply Plumber's Putty to the Faucet Base:
- Roll a pea-sized amount of plumber's putty into a snake shape.
- Press the putty around the base of the new faucet, creating a seal.
- Make sure the putty is evenly distributed and there are no gaps.
### 7. Install the New Faucet:
- Carefully insert the new faucet into the bathtub hole.
- Hand-tighten the nuts that secure the faucet to the bathtub.
- Use the adjustable wrench to tighten the nuts further, but be careful not to overtighten.
### 8. Connect the Water Supply Lines:
- Connect the hot water supply line to the hot water inlet on the faucet.
- Connect the cold water supply line to the cold water inlet on the faucet.
- Use the basin wrench to tighten the connections securely.
### 9. Test the Faucet:
- Turn on the water supply and check for leaks around the faucet base and the water supply connections.
- If you notice any leaks, tighten the connections further or reapply plumber's putty.
### 10. Adjust the Faucet Handle:
- Adjust the faucet handle so that it operates smoothly and turns easily.
- Make sure the handle does not rub against the bathtub or the wall.
### 11. Clean Up and Enjoy Your New Faucet:
- Wipe away any excess plumber's putty or water from the bathtub and surrounding area.
- Enjoy your newly installed Moen bathtub faucet!
Remember:
If you're not comfortable working with plumbing, it's always best to call a professional plumber to assist you with the installation.
Moen Slip Fit Tub Spout Install Review Diy

Learn How To Remove And Install Various Tub Spouts

Repair Shower Faucet Moen Posi Temp 1222 B

Installation For Moen Cau Two Handle Low Arc Roman Tub

Infographics Knoxville Tennessee Graphic Design Motion Graphics Marketing Communication

How To Install A Shower Valve Moen Thorough Detailed

Learn How To Remove And Install Various Tub Spouts

How To Install A Tub And Shower Faucet Moen Eva

Installation S By Moen

Danco Tub Spout Diverter Repair Kit For Moen In The Bathtub Parts Department At Com