Installing Bathtub Surround: A Complete Guide
Upgrading your bathroom with a new bathtub surround can instantly transform its look and feel. Whether you're replacing an old surround or installing one for the first time, following a step-by-step guide will ensure a successful and hassle-free installation. ### Preparations1. Gather Materials:
- Bathtub surround kit - Caulk - Adhesive - Level - Tape measure - Utility knife - Screwdriver - Hammer - Safety goggles - Gloves2. Measure your Bathtub:
- Use a tape measure to determine the length and height of the bathtub area you need to cover.3. Prepare the Bathtub Area:
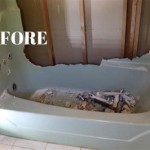
- Remove any existing surround or tiles. - Clean the bathtub surface thoroughly. ### Installation Process1. Dry Fit the Surround:
- Place the bathtub surround panels together on the floor to ensure they fit properly. - Make adjustments as needed.2. Apply Adhesive:
- Apply a thin layer of adhesive to the back of the surround panels. - Follow the manufacturer's instructions for drying time.3. Install the Surround Panels:
- Starting from the corner, carefully align the first surround panel with the edge of the bathtub. - Press firmly to ensure the panel is secure. - Repeat the process for the remaining panels, ensuring they fit snugly together.4. Secure the Surround:
- Use screws or nails to secure the surround panels to the bathtub and wall studs. - Countersink the screws or nails to create a smooth surface.5. Caulk the Seams:
- Apply a thin bead of caulk to the joints between the surround panels and the bathtub. - Use a damp cloth to smooth out the caulk.6. Install Trim Pieces:
- If your surround kit includes trim pieces, install them according to the manufacturer's instructions. - These pieces cover the exposed edges of the surround and give it a finished look.7. Allow Drying Time:
- Give the adhesive and caulk sufficient time to dry completely. - Refer to the manufacturer's recommended drying times. ### Final Touches1. Clean up:
- Wipe away any excess caulk or adhesive with a damp cloth. - Clean the bathtub and surround to remove any dust or debris.2. Enjoy your New Bathtub Surround:
- You've successfully installed your new bathtub surround, giving your bathroom a fresh and updated look. ### Safety Tips1. Wear Protective Gear:
- Always wear safety goggles and gloves when handling sharp tools and chemicals.2. Test for Mold and Mildew:
- Check for signs of mold or mildew on the old surround before removing it. If present, take appropriate measures to remove it safely.3. Use Proper Ventilation:
- Ensure adequate ventilation in the bathroom to prevent the accumulation of harmful fumes during the installation process. Remember, if you're not confident about tackling this project yourself, consider hiring a qualified professional to ensure a safe and proper installation.
How To Install A Bath Tub Surround

How To Install A Bath Tub Surround

How To Install A Bathtub An Acrylic Tub And Surround Diy

How To Install A Bath Tub Surround

3 Ways To Install A Tub Surround Wikihow Life

How To Install Wood Planking On A Bathtub Brepurposed

How To Install Tub Surround Over Tile Like A Pro

How To Install An Acrylic Bathtub And Waterproof Surround System Til Tile Shower Tiktok

How To Install A Glue Up Shower Enclosure The Home Depot With Thisoldhouse

How To Install A Bath Tub Surround


