How to Replace a Bathtub Drain
A leaky bathtub drain can be a major nuisance, wasting water and potentially causing damage to your bathroom. Fortunately, replacing a bathtub drain is a relatively simple task that can be completed in a few hours with the right tools and materials.
Before you begin, gather the following tools and materials:
- Adjustable wrench
- Slip-joint pliers
- Putty knife
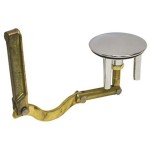
- New bathtub drain assembly
- Plumber's putty
Once you have your tools and materials, follow these steps to replace your bathtub drain:
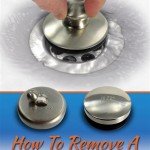
1. Remove the old drain assembly
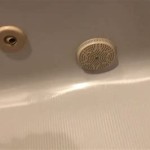
Start by placing the adjustable wrench over the drain flange (the metal ring around the drain opening). Turn the wrench counterclockwise to loosen the flange and remove it from the bathtub.
Next, use the slip-joint pliers to grip the drain shoe (the part of the drain that extends into the bathtub). Pull the drain shoe straight up to remove it from the drain assembly.
2. Clean the drain opening
Once the old drain assembly is removed, use the putty knife to scrape away any old plumber's putty or debris from the drain opening.
3. Apply plumber's putty to the new drain assembly
Roll a rope of plumber's putty between your fingers and then apply it to the bottom of the new drain flange. The putty should form a seal between the flange and the bathtub.
4. Install the new drain assembly
Place the new drain flange over the drain opening and press down firmly to seat the putty. Then, use the adjustable wrench to tighten the flange until it is snug.
Next, insert the drain shoe into the drain assembly and push it down until it is fully seated.
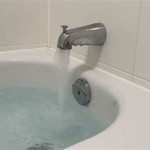
5. Test the new drain assembly
Turn on the water and let it run for a few minutes to test the new drain assembly. Check for any leaks around the flange or the drain shoe.
If you notice any leaks, tighten the flange or the drain shoe until the leak stops.
Conclusion
Replacing a bathtub drain is a simple task that can be completed in a few hours with the right tools and materials. By following the steps outlined in this article, you can easily repair a leaky bathtub drain and restore your bathroom to its former glory.

How To Replace Bathtub Drain Stopper With A Lift And Turn Diy

How To Remove A Bathtub Drain Forbes Home

How To Replace A Bathtub Drain

Easy Replacement Of A Bathtub Drain

How To Remove Any Bathtub Drain In 11 Steps Ryan Old Plumbing

Diy How To Replace Bathtub Drain Stopper Tutorial Clogged

Replacing A Bathtub Fine Homebuilding

How To Replace A Bathtub Drain Remove And Install New Step By

Tub Drain How To Seal And Unclog A Bathtub Knoxville Plumbing

How To Replace Bathtub Drain Stopper With A Lift And Turn Diy