How To Replace a Pop-Up Bathtub Drain Stopper
A malfunctioning bathtub drain stopper can be a significant inconvenience. It can fail to seal properly, leading to a slow drain or a bathtub that won't hold water. Alternatively, it can become stuck in either the open or closed position, causing frustration and potential water damage. Replacing a pop-up bathtub drain stopper is a relatively straightforward task that most homeowners can accomplish with basic tools and a little patience. This article will provide a comprehensive guide to replacing different types of pop-up bathtub drain stoppers.
Before beginning, it is crucial to identify the type of pop-up drain stopper installed in the bathtub. There are several common types, each with a slightly different removal and installation process. The most prevalent types include the linkage type, the lift-and-turn type, the toe-touch type, and the push-and-seal type. Understanding the specific mechanism will streamline the replacement procedure.
Gathering the necessary tools and materials is the first step in the process. This typically includes a new pop-up drain stopper assembly compatible with the bathtub's drain size, a flathead screwdriver, a pair of pliers or channel locks, a bathtub drain wrench (if the drain body needs to be removed), plumber's putty, a clean rag or sponge, and a bucket to catch any debris or water. It is also advisable to have a pair of gloves to protect hands and cleaning supplies readily available.
Key Point 1: Identifying the Type of Pop-Up Drain Mechanism
Accurately identifying the type of pop-up drain stopper is paramount for a successful replacement. Ignoring this step can lead to incorrect disassembly and potential damage to the drain assembly or the bathtub itself. Each type functions differently and requires a specific approach for removal.
The
linkage type
is characterized by a lever located on the overflow plate of the bathtub. This lever connects to a linkage rod that actuates the stopper. When the lever is moved, it pulls or pushes the linkage rod, which in turn opens or closes the stopper. To identify this type, look for the overflow plate with a lever or knob. The stopper itself often has a simple mushroom shape.The
lift-and-turn type
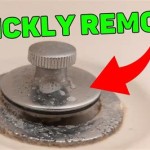
features a stopper that must be lifted slightly and then turned to either lock it in the open or closed position. This type typically has a small knob or handle on top of the stopper. Turning the knob engages or disengages a locking mechanism that keeps the stopper in the desired position. Inspect the stopper for a noticeable knob on top that can be lifted before turning.The
toe-touch type
, as the name suggests, operates by pressing the top of the stopper with a toe or foot. Pressing once seals the drain, and pressing again releases it. These stoppers usually have a flat, button-like top. Its simple design contributes to its user-friendly operation. Look for a flat, rounded top on the stopper that responds to pressure.The
push-and-seal type
is similar to the toe-touch type but often has a more sophisticated sealing mechanism. It also operates by pressing the top of the stopper, but it may use a rubber gasket or O-ring to create a more watertight seal. These stoppers often have a sleeker, more modern design. Visually, it will resemble the toe-touch type, requiring a press to activate.Once the type of drain stopper is identified, the appropriate removal procedure can be followed. If unsure, consulting the bathtub manufacturer's documentation or searching online for the specific model may provide additional clarity.
Key Point 2: Removing the Old Pop-Up Drain Stopper
The removal process varies depending on the type of stopper. However, some general principles apply to all types. Before starting, ensure the area around the drain is clean and dry. Use a clean rag or sponge to wipe away any soap scum or debris. This will improve visibility and grip during the removal process.
For the
linkage type
, the first step is to remove the overflow plate. This usually involves unscrewing one or two screws located on the plate. Once the screws are removed, carefully pull out the overflow plate, which will be connected to the linkage rod. The linkage rod will be attached to the stopper at the bottom of the drain. To remove the stopper, carefully pull it out along with the linkage rod. It may be necessary to maneuver the rod to clear any obstructions.For the
lift-and-turn type
, the removal process is usually quite simple. Lift the stopper as high as it will go and then turn it counterclockwise. This should disengage the locking mechanism and allow the stopper to be removed. If the stopper is stuck, apply gentle pressure while turning to loosen it.For the
toe-touch
andpush-and-seal
types, the removal process can vary. Some stoppers can be simply pulled out, while others may require a slight turn or twist to release them. Try pulling the stopper straight up. If it doesn't budge, try turning it slightly counterclockwise while pulling. Some models may have a small set screw located on the side of the stopper that needs to be loosened before removal. Refer to the manufacturer's instructions for the specific model.In some cases, if the stopper is stuck or corroded, it may be necessary to use pliers or channel locks to grip the stopper and gently twist it to break it free. Exercise caution to avoid damaging the bathtub's finish. Applying a penetrating oil, such as WD-40, can help loosen a stubborn stopper. Allow the oil to soak for several minutes before attempting removal.
After removing the old stopper, inspect the drain opening for any debris or corrosion. Clean the drain opening thoroughly with a clean rag or sponge to ensure a good seal with the new stopper.
Key Point 3: Installing the New Pop-Up Drain Stopper
Installing the new pop-up drain stopper is generally the reverse of the removal process, but it's important to pay close attention to the specific instructions that come with the new stopper assembly. These instructions will provide detailed guidance on how to assemble and install the new stopper correctly.
For the
linkage type
, start by inserting the new stopper, attached to the new linkage rod, into the drain opening. Ensure the stopper is properly aligned with the drain. Then, carefully insert the linkage rod into the overflow pipe. Attach the overflow plate to the overflow pipe using the screws that were removed earlier. Ensure the lever on the overflow plate is properly aligned with the linkage rod. Test the operation of the stopper by moving the lever to open and close the drain. Adjust the linkage rod if necessary to ensure the stopper seals properly.For the
lift-and-turn type
, simply insert the new stopper into the drain opening. Align the stopper so that the locking mechanism engages properly. Lift the stopper slightly and turn it clockwise to lock it in the closed position. Ensure the stopper seals properly and prevents water from draining.For the
toe-touch
andpush-and-seal
types, insert the new stopper into the drain opening. Some stoppers may simply snap into place, while others may require a slight turn or twist to lock them in. Press the top of the stopper to seal the drain. Ensure the stopper seals properly and prevents water from draining. Test the operation of the stopper by pressing it again to release it.In some cases, it may be necessary to replace the entire drain flange (the part that sits flush with the bathtub surface) if it is corroded or damaged. This involves removing the old drain flange using a bathtub drain wrench and installing a new one with plumber's putty to ensure a watertight seal. Plumber's putty should be rolled into a rope and placed around the underside of the drain flange before it is installed. This will create a watertight seal between the flange and the bathtub.
After installing the new stopper, test it thoroughly by filling the bathtub with water and observing whether the drain seals properly. If the drain leaks, double-check the installation and make any necessary adjustments. Ensure all connections are tight and that the stopper is properly aligned with the drain opening.
If the new drain stopper still leaks, the underlying drain body may need attention. While this replacement is beyond the scope of simply replacing the stopper, it involves removing the drain assembly from beneath the tub, often requiring access through an access panel or from below (if the tub is on the ground floor or in a basement). This is a more involved process, best left to a qualified plumber. It is essential to take photos as you disassemble the drain body to ensure you can reassemble it correctly. This is especially important for remembering placement of rubber gaskets and washers.
Once the new pop-up drain stopper is installed and tested, clean up any debris or spills. Dispose of the old stopper and any used materials properly. With a little patience and attention to detail, replacing a pop-up bathtub drain stopper is a manageable task that can save homeowners the cost of hiring a plumber.

How To Remove Pop Up Tub Stopper Easy Method

How To Remove A Pop Up Tub Drain Plug Stopper Easy No Tools Needed

So Easy How To Remove A Watco Pop Up Drain Plug

Bathroom Repair How To A Pop Up Tub Drain Stopper

Remove Pop Up Bath Tub Drain Stopper 3 Ways
:max_bytes(150000):strip_icc()/remove-tub-stopper-clear-a-drain-2718786-06-b651d62bfb29494a824821126579e750.jpg?strip=all)
How To Remove 6 Diffe Kinds Of Drain Stoppers
:max_bytes(150000):strip_icc()/remove-tub-stopper-clear-a-drain-2718786-18-831ab829be914b8c9765cfd14d8f993a.jpg?strip=all)
How To Remove 6 Diffe Kinds Of Drain Stoppers
:max_bytes(150000):strip_icc()/remove-tub-stopper-clear-a-drain-2718786-hero-425b2598739f43718b6905767d2616d8.jpg?strip=all)
How To Remove 6 Diffe Kinds Of Drain Stoppers

How To Remove A Bathtub Drain The Home Depot

How To Replace A Bathtub Drain Stopper Toe Touch
Related Posts

