How to Recaulk a Moldy Bathtub: A Step-by-Step Guide
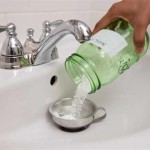
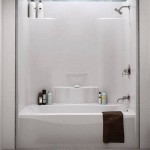
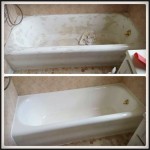
A moldy bathtub can be an unsightly and unhealthy addition to your bathroom. Not only is it unpleasant to look at, but it can also pose a health risk to you and your family. Mold can cause respiratory problems, skin irritation, and other health issues. If you have a moldy bathtub, it's important to take action to remove it as soon as possible. One of the best ways to remove mold from a bathtub is to recaulk it. Caulk is a sealant that helps to keep water out of the cracks and crevices where mold can grow. By recaulking your bathtub, you can create a barrier that prevents mold from taking hold. ## Step 1: Gather Your Supplies Before you begin recaulking your bathtub, you'll need to gather the following supplies: * New caulk * Caulk gun * Putty knife * Rags * Cleaner * Safety glasses * Gloves ## Step 2: Prepare the Bathtub The first step is to prepare the bathtub for recaulking. This involves cleaning the bathtub thoroughly to remove any dirt, grime, or soap scum. You can use a commercial cleaner or a mixture of vinegar and water. Once the bathtub is clean, rinse it well with water and let it dry completely. ## Step 3: Remove the Old Caulk Once the bathtub is dry, you can begin removing the old caulk. Use a putty knife to carefully scrape away the old caulk from the joints between the bathtub and the wall or tile. Be careful not to damage the bathtub or the wall. ## Step 4: Apply the New Caulk Once the old caulk has been removed, you can apply the new caulk. Cut the tip of the caulk tube at a 45-degree angle. Load the caulk gun with the tube of caulk and apply a bead of caulk to the joints between the bathtub and the wall or tile. Be sure to apply the caulk evenly and smoothly. ## Step 5: Smooth the Caulk Once the caulk has been applied, you need to smooth it out. Use your finger or a wet rag to smooth the caulk so that it is even and flush with the surface of the bathtub and the wall or tile. ## Step 6: Allow the Caulk to Dry Once the caulk has been smoothed out, you need to allow it to dry completely. The drying time will vary depending on the type of caulk you used. Be sure to read the manufacturer's instructions for the specific drying time. ## Step 7: Enjoy Your Mold-Free Bathtub! Once the caulk has dried completely, you can enjoy your mold-free bathtub! Be sure to clean the bathtub regularly to prevent mold from growing in the future. ## Additional Tips for Recaulking a Moldy Bathtub * If the mold is extensive, you may need to use a mold-killing cleaner before you recaulk the bathtub. * If the bathtub is made of a porous material, such as fiberglass or tile, you may need to apply a primer before you recaulk it. * If you are recaulking a bathtub that is located in a wet area, such as a shower, you should use a caulk that is specifically designed for wet areas. * If you are not comfortable recaulking a bathtub yourself, you can hire a professional to do it for you. By following these steps, you can easily recaulk a moldy bathtub and restore it to its original condition.
Diffe Methods To Safely Remove Moldy Caulk

How To Replace Bathroom Caulking Remove Mold Completely Diy Re

How To Replace Moldy Caulk In A Bathtub Or Shower

How To Remove Mold From Shower Caulking Tips Tricks And Secrets

I Found Mold In The Shower Caulking What Should Do

How To Replace Moldy Caulk In A Bathtub Or Shower

How To Remove Mold From Shower Caulking Home Like You Mean It

How To Remove And Replace Moldy Shower Caulk Diy

User1123733032559 Robin Brown Tyler S I Got You Caulk Tiktok

How To Remove Mold From Caulk Frugally