How to Fix a Leaky Bathtub Faucet With Two Handles
A leaky bathtub faucet can be a nuisance, wasting water and driving up your utility bills. Fortunately, fixing a leaky two-handle bathtub faucet is a relatively simple task that can be completed in a few steps.
Tools and Materials You'll Need:
- Adjustable wrench
- Phillips head screwdriver
- Flat head screwdriver
- Faucet washer kit
- Plumber's tape
- Petroleum jelly
- Rags or towels
Step 1: Turn Off the Water Supply
Before you start working on the faucet, you need to turn off the water supply to the bathtub. This is usually done by turning the handles on the shut-off valves located under the sink or in the basement.
Step 2: Remove the Faucet Handles
Once the water supply is turned off, you can remove the faucet handles. Use a Phillips head screwdriver to remove the screws that hold the handles in place. Once the screws are removed, pull the handles straight up to detach them from the faucet.
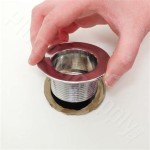
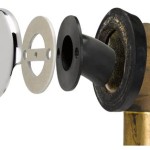
Step 3: Remove the Packing Nut
Under each handle is a packing nut. Use an adjustable wrench to loosen the packing nut and remove it from the faucet. Be careful not to overtighten the packing nut, as this can damage the faucet.
Step 4: Replace the Washer
Once the packing nut is removed, you will see the washer. Use a flat head screwdriver to pry the old washer out of the faucet. Insert the new washer into the faucet, making sure that it is seated correctly.
Step 5: Apply Plumber's Tape
Wrap a few wraps of plumber's tape around the threads of the packing nut. This will help to create a watertight seal when the packing nut is tightened.
Step 6: Reinstall the Packing Nut
Thread the packing nut back onto the faucet and tighten it with an adjustable wrench. Do not overtighten the packing nut, as this can damage the faucet.
Step 7: Reinstall the Faucet Handles
Insert the handles back into the faucet and tighten the screws to secure them in place.
Step 8: Turn On the Water Supply
Turn on the shut-off valves under the sink or in the basement to restore the water supply to the bathtub. Check for leaks around the handles and the base of the faucet.
Step 9: Lubricate the Faucet
Apply a small amount of petroleum jelly to the threads of the packing nuts and the inside of the faucet handles. This will help to keep the faucet operating smoothly and prevent future leaks.
Congratulations! You have now successfully fixed your leaky bathtub faucet. If the leak persists, there may be a more serious issue that requires professional attention.

How To Fix A Leaking Bathtub Faucet Diy Family Handyman

Repairing A Leaky Two Three Handle Tub Shower Faucet

How To Fix A Leaky Bathtub Faucet 6 Ways Stop Drips

How To Fix A Leaking Bathtub Faucet Diy Family Handyman

How To 008 Leaking Bathtub Faucet Delta Handle Removal

How To Fix A Leaky Bathtub Faucet 6 Ways Stop Drips

Old Two Handle Bathtub Faucet Mister Plumber

How To Fix A Leaky Bathtub Faucet Blue Collars

How To Fix A Leaking Bathtub Faucet Diy Family Handyman

How To Fix A Double Handle Delta Kitchen Sink Faucet Leak
Related Posts