How To Fix A Bathtub Faucet Leak
A leaking bathtub faucet is a common problem that can waste water and increase your utility bills. In most cases, it is a relatively simple repair that you can do yourself with a few basic tools.
The first step is to identify the source of the leak. There are three main places where a bathtub faucet can leak: the handle, the spout, or the base of the faucet. Once you have identified the source of the leak, you can follow the steps below to fix it.
Handle Leak
If the leak is coming from the handle, it is most likely caused by a worn-out washer. Washers are small, rubber rings that create a seal between the handle and the faucet body. Over time, washers can wear out and begin to leak. To replace a washer, you will need to remove the handle and unscrew the packing nut. Once the packing nut is removed, you can replace the washer and reassemble the handle.
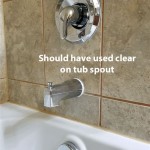
Spout Leak
If the leak is coming from the spout, it is most likely caused by a worn-out O-ring. O-rings are small, rubber rings that create a seal between the spout and the faucet body. Over time, O-rings can wear out and begin to leak. To replace an O-ring, you will need to remove the spout and unscrew the packing nut. Once the packing nut is removed, you can replace the O-ring and reassemble the spout.
Base Leak
If the leak is coming from the base of the faucet, it is most likely caused by a loose or damaged seal. To fix a loose seal, you will need to tighten the packing nut. If the seal is damaged, you will need to replace it. To replace a seal, you will need to remove the faucet from the sink and unscrew the packing nut. Once the packing nut is removed, you can replace the seal and reassemble the faucet.
Tips
Here are a few tips for fixing a bathtub faucet leak:
- Before you start, turn off the water supply to the faucet.
- Use a flashlight to help you see inside the faucet.
- Be careful not to overtighten the packing nut.
- If you are not comfortable fixing the faucet yourself, call a plumber.

Faucet Repair How To A Leaky Bath

How To Fix A Leaky Bathtub Faucet 6 Ways Stop Drips

How To Fix A Leaky Bathtub Faucet Removing The Spout From

How To Fix A Leaking Bathtub Faucet Repair Tub

How To Fix A Bathroom Faucet 14 Steps

How To Stop A Dripping Bathtub Faucet Nj Plumbing Repair Replacement And Maintenance

How To Fix A Leaky Bathtub Faucet Delta Shower Cartridge L Replace

11 Easy Steps To Fix A Leaking Bathtub Faucet In 2024 Spout

How To Fix A Leaking Bathtub Faucet Diy Family Handyman

How To Fix A Leaky Tub Shower Faucet