How to Change a Bathtub Faucet
Swapping out a bathtub faucet is a straightforward project that can be completed in an afternoon, even if you're a DIY novice. Before you begin, gather your tools and materials: a new faucet, a wrench, a screwdriver, a bucket, a pair of old towels, and plumbers putty. It also helps to have a mirror so that you can see what you're doing under the sink.Here's a step-by-step guide on how to change a bathtub faucet:
- Turn off the water supply. This is usually done by turning the valves under the sink. If there are no valves, you'll need to turn off the main water supply to your home.
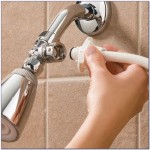
- Disconnect the old faucet. There are usually two nuts that hold the faucet in place. Use the wrench to loosen these nuts and remove the faucet from the sink.
- Clean the area where the new faucet will be installed. Remove any old plumbers putty or caulk.
- Apply plumbers putty to the base of the new faucet. This will help to seal the faucet and prevent leaks.
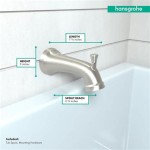
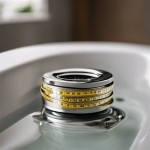
- Install the new faucet. Screw the mounting nuts onto the faucet and tighten them until they are snug.
- Connect the water supply lines. Hand-tighten the nuts until they are snug, then use the wrench to tighten them further.
- Turn on the water supply. Check for leaks. If there are any leaks, tighten the nuts until the leaks stop.
Congratulations! You've successfully changed your bathtub faucet.

How To Replace A Mobile Home Bathtub Faucet Parts Latest News

How To Replace A Bathtub Spout Diy Family Handyman

Learn How To Remove And Install Various Tub Spouts

Water Not Coming Out Of Shower Head Tub Spout Diverter Repair

Replacing Shower Tub Faucet How To Install A New

Here S How Replace A Shower Mixing Valve

How To Fix A Leaking Bathtub Faucet The Home Depot

How To Change A Bathtub Faucet 14 Steps With Pictures Wikihow

How To Replace A Bathtub Faucet

How To Repair A Shower Diverter Mr Rooter Blog
Related Posts