Bathtub Stem Replacement: A Step-by-Step Guide
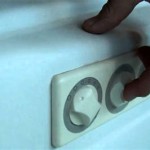
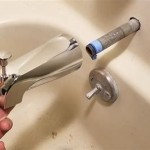
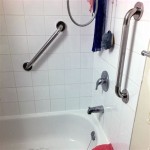
A bathtub stem is a small but essential part of your bathroom fixtures. It controls the flow of water from the faucet and allows you to adjust the water temperature. If your bathtub stem is leaking or damaged, it can cause a number of problems, including water damage and increased water bills. Replacing a bathtub stem is a relatively simple repair that you can do yourself with a few tools and materials. Here's a step-by-step guide to help you get started: 1. Gather Your Tools and Materials Before you begin, you'll need to gather the following tools and materials: * Adjustable wrench * Phillips head screwdriver * Flat head screwdriver * Pliers * New bathtub stem * Teflon tape 2. Turn Off the Water Supply The first step is to turn off the water supply to your bathtub. There should be a shutoff valve located under the sink or in the basement. Once you've found the shutoff valve, turn it clockwise until the water is completely turned off. 3. Remove the Old Bathtub Stem Once the water is turned off, you can remove the old bathtub stem. To do this, use the adjustable wrench to loosen the packing nut around the stem. Once the packing nut is loose, you can use the Phillips head screwdriver to remove the screws that hold the stem in place. 4. Clean the Bathtub Stem Assembly Once you've removed the old bathtub stem, take a moment to clean the bathtub stem assembly. Use the flat head screwdriver to scrape away any old sealant or debris. You can also use a wire brush to clean the threads on the stem assembly. 5. Apply Teflon Tape to the New Bathtub Stem Before you install the new bathtub stem, apply Teflon tape to the threads. This will help to create a watertight seal and prevent leaks. 6. Install the New Bathtub Stem Once you've applied Teflon tape to the threads, you can install the new bathtub stem. To do this, simply insert the stem into the stem assembly and tighten the packing nut. Once the packing nut is tight, use the Phillips head screwdriver to tighten the screws that hold the stem in place. 7. Turn on the Water Supply Once the new bathtub stem is installed, you can turn on the water supply. Check for leaks around the stem assembly. If you see any leaks, tighten the packing nut until the leaks stop. 8. Test the Bathtub Stem Once you're sure that there are no leaks, you can test the bathtub stem. Turn on the faucet and adjust the water temperature. Make sure that the water flows smoothly and that the temperature is consistent. If you follow these steps, you'll be able to replace your bathtub stem quickly and easily. This simple repair can save you time, money, and hassle in the long run.
How To Fix A Leaking Bathtub Faucet Diy Family Handyman

Fixing Faucets How To Replace A Difficult Tub Faucet Cartridge

How To Replace A Shower Valve Like Professional Plumber

How To Repair A Leaky Shower Or Tub Valve Faucet Dual Stem Type

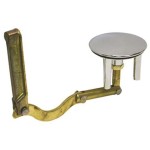
Genuine Replacement Part 910 3850 Diverter Stem For Multi Handle Tub Shower Valves Pfister Faucets

Republic Tub And Shower Stem Dea Bathroom Machineries

Danco 12h 2h C Stem For Pfister Tub And Shower Faucets 17335b The Home Depot

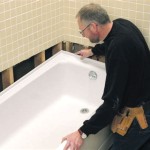
How To Replace A Bathtub Faucet In 4 Easy Steps

Shower Replacement Valves Cartridge Cold Copper Replacing Tap Replace Tub Valve Core Stem Com

How To Repair Replace Tub Water Valve Seat Fast Easy