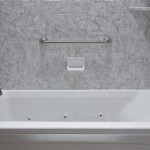
Essential Aspects of Bathtub Reglaze Kit
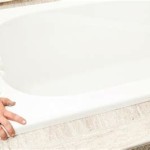
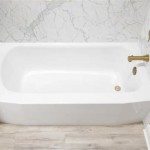
Bathtub reglazing is a cost-effective way to restore the appearance and functionality of an old or damaged bathtub. It involves applying a new layer of glaze to the bathtub's surface, giving it a fresh, glossy finish and protecting it from wear and tear. While many homeowners opt for professional refinishing services, DIY reglazing kits offer a convenient and affordable alternative.
Key Features of a Good Bathtub Reglaze Kit
Choosing the right bathtub reglazing kit is crucial for a successful refinishing project. Here are some essential features to look for:
- Durability: The glaze should be able to withstand daily use, including water, soap, and cleaning agents.
- Adhesion: The glaze must adhere tightly to the bathtub's surface to prevent peeling or chipping.
- Gloss Level: Different kits offer varying gloss levels. Choose a finish that complements your bathroom's decor.
- Ease of Use: The kit should include clear instructions and user-friendly tools for easy application.
- Warranty: Look for kits that offer a warranty to protect your investment against any premature failures.
Benefits of Using a Bathtub Reglaze Kit
Bathtub reglazing kits offer several advantages:
- Cost-Effectiveness: Reglazing is significantly less expensive than replacing a bathtub.
- Fast and Convenient: DIY reglazing can be completed in a weekend, minimizing downtime.
- Wide Range of Colors: Kits come in a variety of colors, allowing you to customize your bathtub's appearance.
- Protection and Resurfacing: Reglazing protects the bathtub from damage and scratches, while also restoring its glossy finish.
Steps for Using a Bathtub Reglaze Kit
Follow these steps for successful bathtub reglazing:
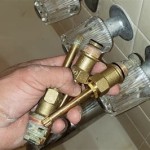
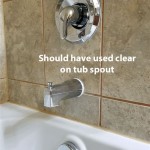
- Prepare the bathtub by thoroughly cleaning it and removing all debris.
- Sand the surface to improve the adhesion of the glaze.
- Mix the glazing components according to the manufacturer's instructions.
- Apply the glaze to the bathtub using the included brush or roller.
- Allow the glaze to dry and cure completely before using the bathtub.
- Clean regularly with mild detergents and avoid using harsh chemicals.
- Re-apply a protective coating every few years to enhance durability.
- Avoid exposing the bathtub to extreme temperatures or heavy objects.
Maintenance and Care
To maintain the longevity of your reglazed bathtub:
By following these guidelines and choosing a high-quality bathtub reglaze kit, you can restore your old bathtub to its former glory and enjoy a fresh, updated bathroom for years to come.

Bathworks Refinishing Kit Review My Honest Opinion Of Reglazing A Bathtub Diy With Christine

Bathworks Refinishing Kit Review My Honest Opinion Of Reglazing A Bathtub Diy With Christine

Bathtub Refinishing Kit Guide Diy Bathroom Update

Rust Oleum Specialty 1 Qt Gloss Coastal Fog Tub And Tile Refinishing Kit 384166 The Home Depot

Armoglaze Bathtub Refinishing Kit For Porcelain Enamel Acrylic Fiberglass Cast Iron Tubs Easy Pour On Odorless Tested Zero Voc White Tub Coating 2 7kg Standard Made Com

Homax White High Gloss Anti Skid Tub And Tile Refinishing Kit In The Paint Coatings Department At Com
:max_bytes(150000):strip_icc()/SPR-Home-best-tub-repair-kits-4158688-5f0f2377a9764effbcbed17ad02e85cf.jpg?strip=all "The 9 Best Tub Repair Kits Of 2024")
The 9 Best Tub Repair Kits Of 2024

Realinn Tub And Tile Refinishing Kit 35 2 Oz White Diy Bathtub Reglazing Refacing Bathroom Kitchen Toilet Shower Basin Sink Countertop Yahoo Ping

Rust Oleum Specialty 1 Qt Satin Coastal Fog Tub And Tile Refinishing Kit Case Of 4 385280 The Home Depot

Tub Tile Refinishing Kit Bathtub Coating Rust Oleum