Essential Aspects of Bathtub Faucet Leaking Single Handle
A leaking bathtub faucet can be a major inconvenience, but it's also a relatively easy fix. By following these steps, you can repair the leak and get your bathtub back in working order in no time.
Tools You'll Need:
- Adjustable wrench
- Phillips head screwdriver
- Flat head screwdriver
- Replacement washer
Steps to Repair:
1. Shut off the water supply.
There should be two shut-off valves under the sink, one for the hot water and one for the cold water. Turn both valves clockwise to shut off the water supply.
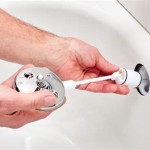
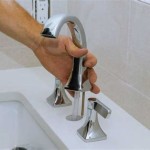
2. Remove the handle.
Use a Phillips head screwdriver to remove the screw that holds the handle in place. Pull the handle straight up to remove it.
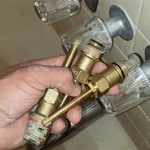
3. Remove the cartridge.
Use a flat head screwdriver to pry the cartridge out of the faucet body. Be careful not to damage the cartridge or the faucet body.
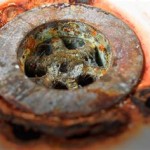
4. Inspect the cartridge.
Look for any signs of damage or wear. If the cartridge is damaged, it will need to be replaced.
5. Replace the washer.
If the cartridge is not damaged, the washer may be the problem. Remove the old washer and replace it with a new one.
6. Reassemble the faucet.
Insert the cartridge back into the faucet body. Tighten the cartridge nut by hand, then use an adjustable wrench to tighten it further.
7. Reattach the handle.
Push the handle back on the faucet body and tighten the screw that holds it in place.
8. Turn on the water supply.
Turn on the water supply valves under the sink. Check for leaks around the faucet. If there are any leaks, tighten the cartridge nut or handle screw further.
Tips:
- If you are not comfortable repairing the faucet yourself, call a plumber.
- If the leak is coming from the base of the faucet, it may be a problem with the O-rings. Replacing the O-rings is a more difficult repair, so it is best to call a plumber.
- Regularly check your faucets for leaks and make repairs as needed. This will help prevent major leaks and damage to your home.

How To Fix A Leaking Single Handle Bathtub Faucet Quick And Easy

How To Fix A Leaky Single Handle Tub Shower Faucet Danco

How To Repair A Leaky Single Lever Moen Bath Or Shower Faucet Older Style

Faucet Repair How To A Leaky Bath

How To Fix A Leaky Bathtub Faucet 6 Ways Stop Drips

How To Fix Leaking Bathtub Faucet

How To Fix A Leaky Tub Shower Faucet

How To Fix A Leaky Bathtub Faucet Delta Shower Cartridge L Replace

How To Fix A Leaky Single Handle Sink Faucet

How To Fix A Leaky Shower Faucet With Pictures Wikihow
Related Posts