Bathtub Drain Connection: A Comprehensive Guide for a Seamless Drainage System
A functional and properly installed bathtub drain connection is essential to prevent water leakage and maintain a clean and hygienic bathroom. Whether you're a homeowner, a DIY enthusiast, or a professional plumber, understanding the ins and outs of bathtub drain connections can help ensure a successful installation and avoid potential problems. In this comprehensive guide, we'll cover everything you need to know about bathtub drain connections, from choosing the right materials to step-by-step installation instructions. ### Types of Bathtub Drain Connections The most common types of bathtub drain connections are: 1.Slip Joint Connection:
Slip joint connections are commonly used for plastic and metal drain pipes. They consist of a slip nut, a washer, and a rubber gasket. The slip nut slides over the pipe and tightens against the washer to create a watertight seal. 2.Threaded Connection:
Threaded connections use threaded pipes and fittings to connect the drain to the bathtub. The threads create a tight seal that prevents leaks. 3.PVC Connection:
PVC (polyvinyl chloride) connections are commonly used in modern plumbing systems. PVC pipes and fittings are joined together using PVC glue or solvent cement. ### Choosing the Right Bathtub Drain Connection The type of bathtub drain connection you choose will depend on factors such as the material of your drain pipes, the size of the drain opening, and your personal preferences. Here are some things to consider when selecting a bathtub drain connection: 1.Material:
Choose a drain connection that is compatible with the material of your drain pipes. For example, if you have PVC pipes, you will need a PVC drain connection. 2.Size:
Make sure the drain connection you choose is the right size for your drain opening. The size of the drain connection is typically measured in inches. 3.Finish:
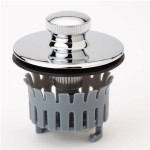
Drain connections come in various finishes, including chrome, brushed nickel, and oil-rubbed bronze. Choose a finish that matches the style of your bathroom fixtures. ### Step-by-Step Installation Instructions Once you have chosen the right bathtub drain connection, follow these steps to install it: 1.Prepare the Drain Opening:
Clean the drain opening thoroughly to remove any debris or obstructions. 2.Apply Plumber's Putty:
Roll out a rope of plumber's putty and press it around the drain opening. The putty will help create a watertight seal. 3.Insert the Drain Connection:
Insert the drain connection into the drain opening. Make sure the connection is centered and the putty is evenly distributed. 4.Tighten the Connection:
If you are using a slip joint connection, tighten the slip nut until it is snug against the washer. If you are using a threaded connection, tighten the threads until they are snug. 5.Attach the Drain Pipe:
Connect the drain pipe to the drain connection. Use a pipe wrench to tighten the connection. 6.Test the Connection:
Turn on the water and let it run for a few minutes. Check for leaks around the drain connection. If you see any leaks, tighten the connection further. ### Troubleshooting Common Bathtub Drain Connection Problems If you are experiencing problems with your bathtub drain connection, here are some common issues and their solutions: 1.Leaking Drain Connection:
Tighten the connection further using a pipe wrench. If the leak persists, you may need to replace the drain connection. 2.Clogged Drain:
The drain may be clogged with hair, soap scum, or other debris. Use a drain snake or chemical drain cleaner to clear the clog. 3.Damaged Drain Connection:
If the drain connection is damaged, it may need to be replaced. Choose a drain connection that is the same size and type as the old one. ### Conclusion A properly installed bathtub drain connection is essential for a functional and leak-free bathroom. By choosing the right materials, following the installation instructions carefully, and troubleshooting common problems, you can ensure that your bathtub drain connection is working optimally for years to come. Remember, if you are unsure about any aspect of the installation process, it is always best to consult with a qualified plumber.
How To Replace A Bathtub Drain

Bathtub Plumbing Installation Drain Diagrams

7 Bathtub Plumbing Installation Drain Diagrams

How To Replace Bathtub Drain Stopper With A Lift And Turn Diy

How To Install A Bathtub Toolrev

Part 2 Installing New Bathtub Connect Drain Waste And Overflow Plumbing Diy Atlanta Ga

Drain Overflow Assemblies Fine Homebuilding

Bathtub Plumbing Installation Drain Diagrams Shower

Replacing A Bathtub Fine Homebuilding

Bathtub Plumbing Installation Drain Diagrams Diagram

