Moen Bathtub Faucet Installation: A Comprehensive Guide
Transforming your bathroom with a new Moen bathtub faucet is a rewarding experience that can enhance both the aesthetics and Funktionalität of your space. However, it's crucial to approach the installation process with meticulous attention to detail to ensure a seamless and trouble-free experience. Here's a comprehensive guide to guide you through every step of Moen bathtub faucet installation:
1. Gather Essential Tools and Materials
Before embarking on the installation, ensure you have all the necessary tools and materials within easy reach. These typically include:
- Moen bathtub faucet
- Adjustable wrench
- Plumber's tape
- Phillips screwdriver
- Utility knife
- Measuring tape
- Level
2. Prepare the Work Area
Clear the immediate area around the bathtub and remove any existing fixtures. Shut off the water supply to the bathtub by locating the valves beneath the sink or behind the bathtub access panel. Cover the drain opening to prevent debris from entering the pipes.
3. Remove the Old Faucet
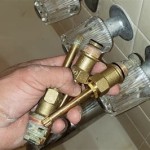
Using an adjustable wrench, loosen the nuts securing the old faucet to the bathtub deck. Carefully lift the faucet and remove any remaining seals or gaskets. Clean the mounting surface thoroughly to prepare it for the new faucet.
4. Install the Mounting Bracket
Locate the mounting bracket included with the Moen bathtub faucet. Position it on the bathtub deck and mark the screw holes. Drill pilot holes using the correct size drill bit and secure the bracket with the provided screws.
5. Install the Faucet Body
Apply plumber's tape to the threads of the faucet body and carefully thread it into the mounting bracket. Use an adjustable wrench to tighten the faucet body securely, ensuring it is level and aligned correctly.
6. Connect the Water Supply Lines
Connect the hot and cold water supply lines to the corresponding ports on the faucet body. Ensure a snug connection by hand-tightening the nuts. Use an adjustable wrench for additional tightening if necessary.
7. Install the Handle and Escutcheon
Insert the handle onto the faucet body and secure it with the provided screw. Next, place the escutcheon (the decorative plate surrounding the faucet base) over the mounting bracket and fasten it with screws.
8. Test the Operation
Turn on the water supply and check for any leaks. Inspect the connections thoroughly and tighten any loose joints as needed. Operate the faucet handle to ensure it moves smoothly and controls the water flow effectively.
9. Final Touches
Once the faucet is operating correctly, remove any excess plumber's tape or debris from the installation area. Use a clean cloth to wipe down the faucet and surrounding surfaces.
Additional Tips
- Refer to the specific Moen bathtub faucet instruction manual for detailed installation instructions.
- If you encounter any difficulties during installation, do not hesitate to contact a qualified plumber for assistance.
- Regularly clean and maintain your Moen bathtub faucet to ensure optimal performance and longevity.

Moen Slip Fit Tub Spout Install Review Diy

Learn How To Remove And Install Various Tub Spouts

Repair Shower Faucet Moen Posi Temp 1222 B

Installation For Moen Cau Two Handle Low Arc Roman Tub

Infographics Knoxville Tennessee Graphic Design Motion Graphics Marketing Communication

How To Install A Shower Valve Moen Thorough Detailed

Learn How To Remove And Install Various Tub Spouts

How To Install A Tub And Shower Faucet Moen Eva

Installation S By Moen

Danco Tub Spout Diverter Repair Kit For Moen In The Bathtub Parts Department At Com
Related Posts

