Spray Painting a Bathtub Faucet: A Comprehensive Guide
Updating the appearance of a bathroom can be an expensive undertaking. Replacing fixtures such as a bathtub faucet can quickly add to the overall cost. An alternative to replacement is spray painting the existing faucet. This method offers a cost-effective way to refresh the look of a bathroom without incurring significant expenses associated with new fixtures and professional installation. Successfully spray painting a bathtub faucet, however, requires careful preparation, the selection of appropriate materials, and the application of precise techniques.
This article provides a detailed guide to spray painting a bathtub faucet, covering essential aspects from preparation and material selection to application and finishing. By following these guidelines, individuals can achieve a professional-looking finish and extend the lifespan of their existing bathroom fixtures.
Key Point 1: Preparation is Paramount
The success of any spray painting project hinges on thorough preparation. Inadequate preparation can lead to poor adhesion, uneven coverage, and a finish that quickly deteriorates. Therefore, meticulous attention to detail during the preparation phase is crucial for achieving a durable and aesthetically pleasing result.
The first step in preparation is to thoroughly clean the faucet. Over time, mineral deposits, soap scum, and grime can accumulate on the surface, hindering the adhesion of the paint. Use a dedicated bathroom cleaner or a mixture of vinegar and water to scrub the faucet clean. A toothbrush can be helpful for reaching tight spaces and intricate details. After cleaning, rinse the faucet thoroughly with clean water and allow it to dry completely. Ensuring a clean and dry surface is a fundamental step in achieving proper paint adhesion.
Once the faucet is clean and dry, the next step is to remove any loose paint or rust. Use a wire brush or sandpaper to carefully remove any flaking paint or rust. Focus on areas where the existing finish is compromised. This process ensures a smooth and even surface for the new paint to adhere to. If the rust is extensive, consider using a rust converter to neutralize the corrosion and prevent it from spreading.
After addressing any loose paint or rust, the faucet needs to be sanded. Sanding creates a slightly roughened surface, providing a better grip for the primer and paint. Use a fine-grit sandpaper (220-grit or higher) to gently sand the entire faucet. Avoid applying excessive pressure, as this can damage the fixture. The goal is to create a uniform surface for the paint to adhere to, not to remove significant amounts of material. After sanding, wipe the faucet clean with a tack cloth to remove any sanding dust.
Masking is another critical aspect of preparation. Protect the surrounding areas from overspray by carefully masking off the wall, sink, and any other surfaces near the faucet. Use painter's tape and plastic sheeting or newspaper to create a protective barrier. Ensure that the tape is securely adhered to the surfaces to prevent paint from seeping underneath. Pay particular attention to areas where the faucet meets the wall or sink, as these are prone to overspray. Proper masking not only protects the surrounding areas but also contributes to a clean and professional-looking finish.
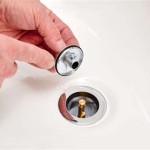
Finally, consider removing the faucet handles, if possible. Removing the handles simplifies the painting process and allows for more thorough coverage. If the handles cannot be removed, mask them off carefully with painter's tape. Taking the time to properly prepare the faucet ensures a professional-looking finish and helps to prevent future problems, such as chipping and peeling paint.
Key Point 2: Selecting the Right Materials
Choosing the correct materials is crucial for achieving a durable and long-lasting finish on a bathtub faucet. Not all spray paints are created equal, and selecting the wrong type of paint can lead to unsatisfactory results. Consider the environment to which the faucet will be exposed when selecting materials. Bathtub faucets are subjected to moisture, temperature fluctuations, and frequent contact with water, so the chosen materials must be able to withstand these conditions.
Primer is an essential component of the painting process. Primer provides a base coat that promotes adhesion between the faucet surface and the paint. It also helps to seal the surface and prevent rust or corrosion from penetrating the paint layer. Choose a primer specifically designed for metal surfaces. Epoxy primers are often recommended for their excellent adhesion and corrosion resistance. Apply the primer in thin, even coats, following the manufacturer's instructions. Allow the primer to dry completely before applying the paint.
For the topcoat, select a spray paint specifically formulated for use in bathrooms or wet environments. These paints are typically moisture-resistant and mold-resistant. Epoxy-based paints or urethane-based paints are excellent choices for bathtub faucets. These paints offer superior durability and resistance to chipping, scratching, and fading. Consider the desired finish when selecting the paint. Options include glossy, semi-gloss, and matte finishes. A glossy finish is easier to clean but may show imperfections more readily, while a matte finish provides a more subtle look but may be more prone to staining. Read the product labels carefully to ensure that the chosen paint is compatible with the primer and suitable for use on metal surfaces.
In addition to primer and paint, other essential materials include sandpaper (fine-grit, such as 220-grit or higher), painter's tape, plastic sheeting or newspaper for masking, a tack cloth for removing dust, cleaning supplies (bathroom cleaner or vinegar and water), a wire brush for removing rust, and safety equipment such as gloves and a respirator. Always wear gloves to protect your hands from chemicals and paint. A respirator is essential for preventing the inhalation of paint fumes, especially when working in enclosed spaces. Proper ventilation is also important to minimize exposure to harmful fumes.
Investing in high-quality materials may seem more expensive initially, but it can save time and money in the long run. Durable primer and paint will provide a longer-lasting finish, reducing the need for frequent touch-ups or repainting. Selecting the appropriate materials is a critical factor in achieving a professional-looking and durable finish on a bathtub faucet.
Key Point 3: Proper Application Techniques
Even with thorough preparation and the selection of high-quality materials, the success of spray painting a bathtub faucet depends on the application of proper techniques. Applying the paint correctly ensures a smooth, even finish and maximizes the lifespan of the paint job. Understanding the fundamentals of spray painting is essential for achieving professional-looking results.
Before beginning to paint, shake the spray paint can vigorously for several minutes. This ensures that the paint is properly mixed and that the pigments are evenly dispersed. A poorly mixed paint can result in uneven color and variations in the finish. Continue to shake the can periodically throughout the painting process to maintain consistent mixing.
Hold the spray paint can approximately 8-10 inches away from the faucet surface. Maintaining a consistent distance is crucial for achieving uniform coverage and preventing drips or runs. Begin spraying just before the target area and continue spraying past it. This technique helps to avoid a buildup of paint at the start and end of each stroke. Use a steady, even motion to apply the paint, overlapping each stroke slightly. Avoid spraying too much paint in one area, as this can lead to drips and runs. Multiple thin coats are preferable to one thick coat.
Apply the paint in thin, even coats, allowing each coat to dry completely before applying the next. Follow the manufacturer's recommended drying time for the paint. Applying multiple thin coats allows the paint to build up gradually, creating a smooth and durable finish. Avoid the temptation to apply a thick coat of paint to achieve faster coverage, as this can lead to runs, drips, and an uneven finish. After each coat, inspect the faucet for any imperfections, such as drips or runs. If any imperfections are present, allow the paint to dry completely and then sand them down with fine-grit sandpaper before applying the next coat.
Pay attention to the angles and curves of the faucet when spraying. Ensure that all surfaces are adequately covered, including hard-to-reach areas. Use a small hand mirror to inspect the back of the faucet and other areas that are difficult to see. Apply the paint from different angles to ensure complete coverage. Avoid spraying directly at the faucet from a single angle, as this can lead to uneven coverage and shadows.
After applying the final coat of paint, allow the faucet to dry completely for the recommended drying time. Avoid touching the faucet during this time, as fingerprints can mar the finish. Once the paint is completely dry, carefully remove the masking tape and plastic sheeting. Inspect the faucet for any imperfections and touch up any areas as needed.
Once the faucet is dry and the masking is removed, consider applying a clear coat to protect the painted surface. A clear coat provides an additional layer of protection against moisture, scratches, and fading. Choose a clear coat specifically designed for use over paint and follow the manufacturer's instructions for application. Apply the clear coat in thin, even coats, allowing each coat to dry completely before applying the next. Applying a clear coat can significantly extend the lifespan of the painted finish.
By following these application techniques, individuals can achieve a professional-looking and durable finish when spray painting a bathtub faucet. Attention to detail and patience are key to achieving satisfactory results. Remember to work in a well-ventilated area and to wear appropriate safety equipment, such as gloves and a respirator.

The Best Way To Spray Paint A Faucet Average But Inspired

The Best Way To Spray Paint A Faucet Average But Inspired

The Best Way To Spray Paint A Faucet Average But Inspired

The Best Way To Spray Paint A Faucet Average But Inspired

The Best Way To Spray Paint A Faucet Average But Inspired

Refinshing A Faucet With Spray Paint

How To Spray Paint Shower Fixtures Easy Diy Method Bless Er House

How To Spray Paint Shower Fixtures Easy Diy Method Bless Er House

How To Spray Paint Shower Fixtures Easy Diy Method Bless Er House

How To Spray Paint Bathroom Fixtures Faucet Makeover On A Budget Ep 2
Related Posts