Replacing Drywall Around Bathtub: A Comprehensive Guide
Whether you're tackling a bathroom remodel or simply repairing water damage, replacing drywall around a bathtub is a crucial task that requires careful attention to detail. Here's a comprehensive guide to help you navigate this project successfully.
1. Preparation
Before you begin, gather your tools and materials, including drywall, joint compound, mesh tape, a utility knife, a drywall saw, a drywall sander, and a spackling knife. Ensure the bathtub is removed or protected to prevent any damage.
2. Measuring and Cutting
Measure the area around the bathtub that needs to be replaced. Cut the drywall to the appropriate size using a utility knife or drywall saw. Make sure the cuts are clean and straight for a seamless fit.
3. Installing the Drywall
Securely attach the new drywall to the wall studs using drywall screws or nails. Space the screws or nails every 6-8 inches apart to ensure proper adhesion. Counter-sink the fasteners slightly below the surface of the drywall.
4. Taping and Joint Compound
Apply mesh tape over the seams where the new drywall meets the existing drywall. This will strengthen the joint and prevent cracking. Spread a thin layer of joint compound over the tape using a spackling knife.
5. Sanding
Allow the joint compound to dry completely before sanding. Use a drywall sander or sandpaper to smooth out the joint and remove any imperfections. Apply a second coat of joint compound and sand again.
6. Finishing Touches
Once the joint is thoroughly sanded and smooth, prime the area with a drywall primer. This will provide a base for the paint and prevent stains or discoloration in the future.
7. Painting
Apply two coats of paint to match the existing wall color. Allow sufficient drying time between coats. Use a brush or roller to achieve a consistent and even finish.
Tips and Precautions
- Use waterproof drywall if the area is prone to moisture.
- Wear gloves and eye protection during the process.
- Allow ample drying time for the joint compound before sanding and applying paint.
- If the damaged area is large or complex, consider seeking professional assistance.
- Dispose of the old drywall and any waste materials properly.
By following these steps and adhering to the precautions, you can successfully replace the drywall around your bathtub, ensuring a durable and aesthetically pleasing finish. Remember to take your time, pay attention to detail, and always prioritize safety.

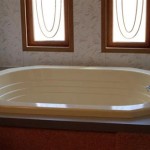
How To Repair Drywall Around Bathtub Step By Part 7

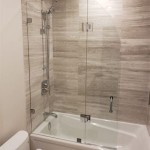
How To Finish Drywall Around A Shower Enclosure

Repair Caulk Grout And Drywall In A Weekend

How To Fill Drywall Around Tub

How To Finish Drywall Around A Shower Enclosure Fine Homebuilding

How To Repair Drywall Around Bathtub Bathroom Remodeling

How To Finish Drywall Where It Meets The Shower Wallboard Trim Tool

Repair Drywall In The Shower Home Improvement Stack Exchange

How To Finish Drywall Around Tub Or Shower Surround

Drywall Around Bath Tub Over The Lip Or Against Doityourself Com Community Forums
Related Posts