Replacing a Bathtub Drain Stopper: A Comprehensive Guide
A faulty bathtub drain stopper can be a nuisance. It can result in slow drainage or worse, a persistent leak. Replacing a bathtub drain stopper is a relatively straightforward task that can be completed in a matter of minutes. Here's a step-by-step guide to help you through the process:
Tools and Materials Required:
- New bathtub drain stopper
- Adjustable wrench
- Plumber's putty (optional)
- Clean cloth
Step-by-Step Instructions:
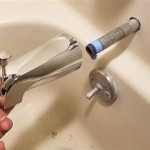
1. Remove the Existing Drain Stopper:
Using an adjustable wrench, grasp the base of the existing drain stopper and turn it counterclockwise to loosen it. Once loose, remove the stopper by pulling it straight up. If the drain stopper is secured with a set screw, use a screwdriver to remove the screw before pulling out the stopper.
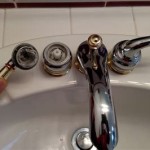
2. Clean the Drain Opening:
Using a clean cloth, wipe away any debris or old plumber's putty from the drain opening. Ensure the surface is clean and free of any obstructions to ensure a proper fit for the new drain stopper.
3. Apply Plumber's Putty (Optional):
To ensure a watertight seal, apply a small amount of plumber's putty around the base of the new drain stopper. This step is optional but recommended for added protection against leaks.
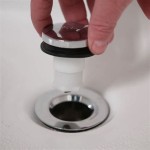
4. Install the New Drain Stopper:
Insert the new drain stopper into the drain opening and press it down firmly. Tighten the drain stopper by turning it clockwise using the adjustable wrench. Do not overtighten, as excessive force can damage the drain or the stopper.
5. Test the Drain Stopper:
Fill the bathtub with water and check for any leaks around the drain stopper. If there are leaks, remove the stopper, apply more plumber's putty, and reinstall it. Once the water level reaches the desired height, lift the stopper to drain the bathtub. Ensure it seals properly and drains water effectively.
Tips:
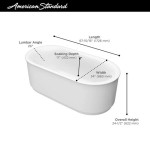
- Choose a drain stopper that matches the diameter of your drain opening.
- If the drain stopper has a rubber gasket, inspect it for any damage and replace it if necessary.
- If the new drain stopper is not sealing properly, try tightening it further or adding more plumber's putty.

How To Replace Bathtub Drain Stopper With A Lift And Turn Diy

Diy How To Replace Bathtub Drain Stopper Tutorial Clogged

How To Remove Broken Bathtub Drain Without Special Removal Tool Cross Members

How To Remove A Bathtub Drain The Home Depot

4 Easy Ways To Remove A Tub Drain Stopper Wikihow

How To Remove A Bathtub Drain Stopper

How To Remove A Bathtub Drain Forbes Home

How To Remove 6 Diffe Bath Drain Types

4 Easy Ways To Remove A Tub Drain Stopper Wikihow

How To Fix Your Tub Stopper In 5 Minutes 250 Repair The Handyman