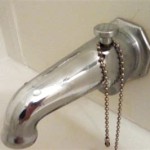
Replacing a Bathtub Faucet Handle: A Comprehensive Guide
Introduction:
A leaky or malfunctioning bathtub faucet handle not only wastes water but can also become a source of frustration in your daily routine. Replacing a bathtub faucet handle is a relatively simple plumbing task that can be completed in a few steps. This comprehensive guide will walk you through the process of replacing a bathtub faucet handle, ensuring a successful and leak-free installation.
Step 1: Gather the Necessary Tools and Materials
- New bathtub faucet handle (make sure it's compatible with your faucet model)
- Adjustable wrench
- Flat-head screwdriver
- Phillips-head screwdriver
- Pliers
- Teflon tape
- Paper towels
- Bucket or bowl to catch leaking water
Step 2: Turn Off the Water Supply
Before starting any plumbing work, it's essential to turn off the water supply to your bathtub. Locate the shut-off valves for your bathtub, which are typically located under the sink or behind the bathtub. Turn the valves clockwise until the water supply is completely closed.
Step 3: Remove the Old Faucet Handle
- Remove the Escutcheon Plate: Use a flat-head screwdriver to pry off the escutcheon plate, the decorative cover around the faucet handle.
- Locate the Set Screw: Look for a small set screw on the handle, usually located near the base of the handle. Use the appropriate screwdriver to loosen the set screw.
- Remove the Handle: Once the set screw is loose, grasp the faucet handle firmly and pull it straight off the faucet stem.
Step 4: Prepare the New Faucet Handle
- Apply Teflon Tape: Wrap a few layers of Teflon tape around the threads of the new faucet handle. This helps create a watertight seal and prevents leaks.
- Insert the Handle: Carefully insert the new faucet handle onto the faucet stem. Ensure that the Teflon tape is properly aligned and the handle is straight.
- Tighten the Set Screw: Use the appropriate screwdriver to tighten the set screw until the handle is secure. Don't overtighten, as this could damage the handle or the faucet stem.
Step 5: Reinstall the Escutcheon Plate
Replace the escutcheon plate over the new faucet handle and press firmly until it snaps into place. Ensure that it is securely fastened to prevent leaks.
Step 6: Turn On the Water Supply
Slowly turn on the water supply to your bathtub. Check for any leaks around the new faucet handle. If you notice any leaks, tighten the set screw further or reapply Teflon tape.
Step 7: Test the Faucet Handle
Turn the new faucet handle through its full range of motion. Ensure that the handle moves smoothly and that there are no leaks.
Conclusion:
Replacing a bathtub faucet handle is a straightforward task that can be completed with basic tools and a little know-how. By following these steps, you can restore your bathtub faucet to proper working condition and prevent costly water leaks. If you encounter any issues during the process, don't hesitate to consult a professional plumber for assistance.

How To Fix A Leaking Bathtub Faucet Diy Family Handyman

How To Fix A Leaking Bathtub Faucet Diy Family Handyman

How To Replace A Mobile Home Bathtub Faucet Parts Latest News

Bathroom Ideas Replace Tub And Shower Faucet Trim Repair Faucets Handles

Fixing Faucets How To Replace A Difficult Tub Faucet Cartridge

How To Change A Bathtub Faucet 14 Steps With Pictures Wikihow

Shower Handle Replacement

How To Fix A Leaky Bathtub Faucet 6 Ways Stop Drips

How To Fix A Leaking Bathtub Faucet The Home Depot

How Do I Replace Bathroom Sink Faucet Handles Cleaning More

