Replace Bathtub Surround: Essential Aspects
Renovating your bathroom can significantly enhance its aesthetics and functionality. One crucial aspect of a bathroom renovation is replacing the bathtub surround. This guide will delve into the essential aspects to consider when tackling this project.
Materials and Finishes
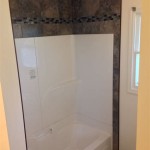
The type of material you choose for the bathtub surround will determine its durability, appearance, and ease of maintenance. Popular options include acrylic, tile, fiberglass, and solid surface materials. Each has unique advantages and disadvantages, so carefully consider your preferences and budget.
Measurements and Planning
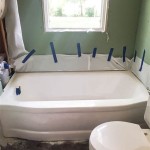
Accurate measurements are essential to ensure a perfect fit. Measure the length, width, and height of the area where the surround will be installed. Consider any obstacles, such as showerheads, windows, or towel bars, and plan accordingly.
Installation Process
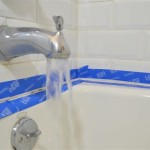
The installation process typically involves removing the old surround, preparing the surface, attaching the new surround, and sealing the joints. If you're not confident in your DIY skills, consider hiring a professional installer to ensure proper execution.
Maintenance and Cleaning
Regular cleaning and maintenance are crucial to preserving the bathtub surround's appearance and longevity. Use non-abrasive cleaning products to avoid scratching or damaging the surface. Regularly inspect for any cracks, leaks, or loose fittings to address them promptly.
Safety Considerations
Safety should always be a priority when replacing a bathtub surround. Wear protective gear, such as gloves and safety glasses, during installation. Ensure the bathtub is securely installed and that the joints are properly sealed to prevent leaks or accidents.
Additional Tips
- Consider using complementary materials for the surround and bathtub to create a cohesive look.
- Don't forget to factor in the cost of materials, labor (if needed), and any necessary tools or equipment.
- If you have any doubts or uncertainties during the process, consult a professional for guidance.

How To Install A Bath Tub Surround

How To Install A Bath Tub Surround

Bathtub Replacement Replace Tub Bath Planet

Semi Diy Bathroom Remodel Replacing A Tub Surround The Bathtub Tile

Semi Diy Bathroom Remodel Replacing A Tub Surround The Bathtub Tile

How To Install A Bath Tub Surround

How To Install A Bathtub An Acrylic Tub And Surround Diy

How To Update Bathtub Surround Single Girl S Diy

How To Replace A Bathtub Step By

3 Ways To Install A Tub Surround Wikihow Life