Repairing a Bathtub: Essential Aspects
A bathtub is an essential part of any bathroom, providing a place to relax and rejuvenate. However, even the most durable bathtubs can develop cracks, chips, or other damage over time. When this happens, it's important to know how to repair the bathtub properly to prevent further damage and restore its functionality.
The good news is that repairing a bathtub is often a relatively simple task that can be completed in a few hours. With the right tools and materials, you can fix most bathtub damage yourself, saving both time and money. Here are the essential aspects of repairing a bathtub:
Assessing the Damage
The first step in repairing a bathtub is to assess the damage. This will help you determine the best course of action and select the appropriate materials. Common types of bathtub damage include:
- Cracks
- Chips
- Rust
- Scratches
- Holes
Once you have assessed the damage, you can begin gathering the necessary materials.
Gathering the Necessary Materials
The materials you need to repair a bathtub will vary depending on the type of damage. However, some common materials include:
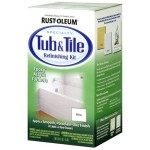
- Fiberglass repair kit
- Porcelain repair kit
- Epoxy
- Sandpaper
- Putty knife
- Caulk gun
- Caulk
Once you have gathered the necessary materials, you can begin the repair process.
Repairing the Bathtub
The specific repair process will vary depending on the type of damage. However, here are some general steps to follow:
- Clean the damaged area thoroughly.
- Apply the appropriate repair material.
- Allow the repair material to dry completely.
- Sand the repaired area to smooth it out.
Once the repair is complete, you can use caulk to seal around the edges of the repaired area.
Preventing Future Damage
Once you have repaired the bathtub, it's important to take steps to prevent future damage. Here are some tips:
- Avoid using harsh chemicals to clean the bathtub.
- Do not drop heavy objects into the bathtub.
- Keep the bathtub free of dirt and debris.
By following these tips, you can help keep your bathtub in good condition for many years to come.

16 In W X 36 L Bathtub Floor Repair Inlay Kit White Wt 1636 1 The Home Depot

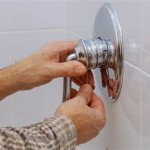
Bathtub Repair In Houston Drain Faucet

Fiberglass Tub Repair Service S And Holes Filled

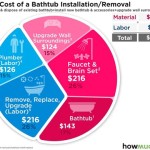
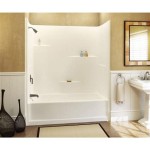
Repairing Vs Replacing Your Bathtub

Easy Ways To Fix A Chipped Bathtub 14 Steps With Pictures

Repairing A Ed Bathtub Or Shower

Bathtub Repair Virginia Refinishing Re Glazing

Bathtub Refinishing Chip Repair Tile Steam Cleaning In San Francisco Ca The Medic

16 In W X 36 L Bathtub Floor Repair Inlay Kit White Wt 1636 1 The Home Depot

Bathtub Chip Repair Tubworx And Showere Services
Related Posts