The Essential Guide to Repairing Bathtub Drains
A clogged or malfunctioning bathtub drain can be a frustrating inconvenience. Fortunately, it's often possible to repair the drain yourself with a few basic tools and materials. Here are the essential steps involved in bathtub drain repair:
Step 1: Identify the Drain Type
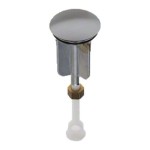
There are two main types of bathtub drains: pop-up drains and flange drains. Pop-up drains have a stopper that can be pushed up and down to open and close the drain. Flange drains have a removable cover that is screwed into place. Once you've identified the type of drain you have, you can gather the necessary tools and materials.
Step 2: Gather the Necessary Tools and Materials
For most bathtub drain repairs, you will need the following tools and materials:
- Adjustable wrench
- Pliers
- Screwdriver
- Drain cleaner
- Plumber's putty
- Replacement drain stopper or cover (if necessary)
Step 3: Remove the Pop-Up Drain Stopper
If you have a pop-up drain, you will need to remove the stopper before you can access the drain. To do this, simply pull up on the stopper until it comes loose. You may need to use a pair of pliers to grip the stopper if it is stuck.
Step 4: Remove the Flange Drain Cover
If you have a flange drain, you will need to remove the cover before you can access the drain. To do this, simply unscrew the cover by turning it counterclockwise. You may need to use an adjustable wrench to loosen the cover if it is tight.
Step 5: Clean the Drain
Once you have removed the drain stopper or cover, you can clean the drain. First, use a drain cleaner to dissolve any clogs. Then, use a brush or sponge to scrub away any debris that has accumulated in the drain. Finally, rinse the drain thoroughly with water.
Step 6: Replace the Drain Stopper or Cover
If you replaced the drain stopper or cover, you can now reassemble the drain. To do this, simply insert the stopper or cover into the drain and tighten it in place. You may need to use a screwdriver to tighten the cover.
Step 7: Test the Drain
Once you have reassembled the drain, test it to make sure it is working properly. Fill the bathtub with water and then open the drain. The water should drain quickly and smoothly. If the water does not drain properly, there may still be a clog in the drain. In this case, you may need to repeat the cleaning process.
Additional Tips
- If you have a slow-draining bathtub, it is important to clean the drain regularly to prevent clogs. You can do this by pouring a cup of baking soda down the drain followed by a cup of vinegar. Let the solution sit for 15 minutes, then flush the drain with hot water.
- If you have a stubborn clog, you may need to use a drain snake to remove it. A drain snake is a long, flexible tool that can be inserted into the drain to dislodge clogs.
- If you are not comfortable repairing the bathtub drain yourself, you can call a plumber for assistance.

How To Replace Bathtub Drain Stopper With A Lift And Turn Diy

Easy Replacement Of A Bathtub Drain

How To Fix Your Tub Stopper In 5 Minutes 250 Repair The Handyman

Diy Bathtub Drain Repair

How To Remove A Bathtub Drain Forbes Home

6 Ways To Remove Stuck Bathtub Drain Rusted Won T Budge

How To Replace A Bathtub Drain

How To Replace A Bathtub Drain Stopper With Lift And Turn Repair

Bathtub Drains Tipping Hat

How To Remove 6 Diffe Bath Drain Types

