Removing the Drain From a Bathtub: A Step-by-Step Guide
Replacing or cleaning the drain in a bathtub can be a necessary maintenance task for homeowners. Removing the drain is relatively straightforward and can be done without the need for professional assistance. This article provides a step-by-step guide to help you remove the drain from a bathtub. Follow these steps carefully to ensure a successful removal process.
Materials You'll Need:
- Pliers or adjustable wrench
- Screwdriver or hex key (if necessary)
- Bucket or bowl
- Flashlight (optional)
- Sponge or cloth
- Replacement drain (if necessary)
Before starting, turn off the water supply to the bathtub. Locate the water shutoff valves, usually located under the sink or behind the toilet. Turn both the hot and cold water valves clockwise to shut off the water.
Step 2: Open the DrainOpen the drain plug in the bathtub to drain any remaining water. This will allow you to work more easily without getting water all over the floor.
Step 3: Use Pliers or WrenchUsing pliers or an adjustable wrench, carefully grip the drain cover. Turn it counterclockwise to loosen it. If the cover is stuck, use a flashlight to check for any debris or hair that may be preventing it from moving.
Step 4: Remove the CoverOnce the cover is loose, lift it up and remove it completely. You may need to use a screwdriver or hex key to release the screws or bolts holding the cover in place.
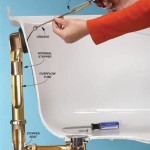
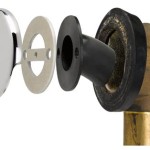
Step 5: Remove the Drain AssemblyBelow the drain cover, you will see the drain assembly. It typically consists of a strainer and a tailpiece (the pipe that connects to the drain). Use pliers or an adjustable wrench to loosen the nut or bolts that secure the assembly.
Step 6: Lift Out the AssemblyCarefully lift the drain assembly out of the tub. Be mindful of any remaining water or debris that may spill.
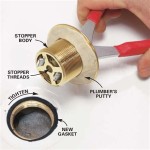
Step 7: Clean and Install the New Drain (If Necessary)If you are replacing the drain, thoroughly clean the bathtub drain opening using a sponge or cloth. Insert the new drain assembly into the opening and tighten the nut or bolts until it is secure.
Step 8: Reinstall the Drain CoverPlace the drain cover back onto the bathtub opening. Tighten it clockwise using pliers or an adjustable wrench.
Step 9: Turn On Water SupplyTurn on the water supply to the bathtub and check for any leaks around the drain. If there are no leaks, the drain removal and installation process is complete.
Tips:- Wear gloves to protect your hands.
- If you encounter any stubborn screws or bolts, use penetrating oil to loosen them.
- Be careful not to overtighten the drain assembly or cover, as this could damage the threads.
- If you are unsure about any step, do not hesitate to call a qualified plumber for assistance.

How To Remove A Bathtub Drain Forbes Home

How To Remove Any Bathtub Drain In 11 Steps Ryan Old Plumbing

6 Ways To Remove Stuck Bathtub Drain Rusted Won T Budge

How To Remove Bathtub Drain

How To Remove A Bathtub Drain In 3 Easy Steps Family Handyman

How To Remove A Bathtub Drain Stopper Mr Rooter

How To Remove A Bathtub Drain Stopper Shower

How To Remove Pop Up Tub Stopper Easy Method

How To Replace Bathtub Drain Stopper With A Lift And Turn Diy

How To Replace A Bathtub Drain

