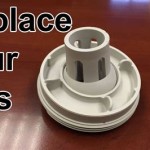
Removing a Handicap Bathtub Drain
Handicap bathtubs are designed for individuals with mobility issues, and they often feature specialized drains that allow for easier access and use. However, over time, these drains can become clogged or damaged, requiring removal and replacement. Here's a comprehensive guide on how to remove a handicap bathtub drain safely and effectively.
Safety Precautions
Before starting the removal process, it's crucial to take necessary safety precautions. Wear gloves and safety glasses, and ensure the water supply to the bathtub is turned off. If possible, place a bucket or towel under the drain to catch any water that may escape during removal.
Tools and Materials
You'll need the following tools and materials for the job:
- Adjustable wrench
- Phillips screwdriver
- Flathead screwdriver
- Plunger or drain snake
- Replacement drain stopper and gasket (if necessary)
Removing the Stopper
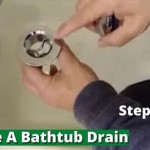
Most handicap bathtub drains have a removable stopper that can be taken out by hand or with a tool. Start by trying to unscrew the stopper with your fingers. If that doesn't work, use a Phillips screwdriver to loosen the screws securing the stopper in place. Once the screws are removed, lift the stopper straight up to detach it.
Accessing the Drain Gasket
Once the stopper is removed, you'll need to access the drain gasket. Use a flathead screwdriver to pry off the cover plate around the drain opening. Be careful not to damage the surrounding tiles or the bathtub surface.
Removing the Drain Gasket
Once the cover plate is removed, you should see the drain gasket. It's usually a rubber or silicone ring that seals the drain opening. Grip the gasket firmly with your fingers or pliers and pull it straight up to remove it.
Inspecting the Drain Opening
Before replacing the drain gasket, inspect the drain opening for any clogs or debris. If there's any blockage, use a plunger or drain snake to clear it out. Once the drain is clear, proceed with the next steps.
Installing the New Drain Gasket
Place the new drain gasket into the drain opening. Make sure it fits snugly and creates a watertight seal. Press the gasket into place with your fingers or a flathead screwdriver.
Replacing the Drain Stopper
align="justify">Align the drain stopper with the drain opening and insert it straight down. If there are any screws that secure the stopper, tighten them with a Phillips screwdriver.
Testing the Drain
Turn on the water supply and allow water to flow into the bathtub. Check for any leaks around the drain. If there are no leaks, the drain removal and replacement process is complete.

How To Remove Ada Safety Bar From Shower Non Stud Anchor

How To Remove A Bathtub Drain Stopper

How To Remove Bathtub Drain

How To Remove A Bathtub Drain Stopper

How To Remove A Bathtub Drain Stopper

How To Remove A Bathtub Drain Stopper

How To Remove Bathtub Drain Stopper

How To Remove A Bathtub Drain Stopper

Replacing A Tub Drain Bathtub Removal And Replacement

How To Remove A Bathtub Safely Step By Home Repair Tutor

