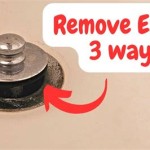
Removing a Bathtub Water Stopper: A Comprehensive Guide
The bathtub water stopper serves a crucial function in maintaining the water level during bathing or showering. However, these stoppers can occasionally malfunction, become clogged, or simply require removal for cleaning or replacement. Understanding the different types of bathtub stoppers and the appropriate techniques for their removal is essential for homeowners and maintenance personnel. This article provides a comprehensive guide to identifying and removing common types of bathtub water stoppers, offering step-by-step instructions and troubleshooting tips.
Understanding Common Bathtub Stopper Types
Before attempting to remove a bathtub stopper, it is imperative to identify the type of stopper installed in the drain. Several types of stoppers are commonly used, each with its own unique mechanism and removal process. Recognizing the specific type is crucial to avoid damaging the drain or the stopper itself.
Lift-and-Turn Stoppers: These stoppers feature a knob or handle located on top of the stopper. Turning the knob raises or lowers the stopper, sealing or opening the drain. These are often found in older bathtubs, but remain prevalent due to their simple design and ease of use.
Push-and-Pull Stoppers: Also known as push-button stoppers, these operate by pressing down on the stopper to seal the drain and pressing again to release it. They often have a chrome or metallic finish and provide a streamlined appearance.
Toe-Touch Stoppers: Similar in appearance to push-and-pull stoppers, toe-touch stoppers are activated by pressing down on them with a toe. One press seals the drain, and a subsequent press releases it. The internal mechanisms of these stoppers are often more complex than push-and-pull types.
Pop-Up Stoppers: These stoppers operate with a lever located near the overflow drain. Moving the lever up or down raises or lowers the stopper. The linkage between the lever and the stopper is typically concealed within the drainpipe.
Chain and Stopper: This is a traditional stopper design consisting of a rubber or metal stopper attached to a chain. The chain is typically connected to a lever or knob on the bathtub overflow plate. The stopper is manually placed into the drain to seal it and lifted out to drain the water.
Removing Specific Stopper Types: Step-by-Step Guides
Once the stopper type has been identified, the appropriate removal technique can be employed. The following sections provide detailed instructions for removing each type of stopper. It is recommended to have basic tools readily available, such as screwdrivers (both flathead and Phillips), pliers, and possibly a small wrench.
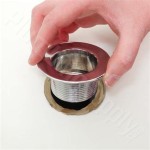
Removing a Lift-and-Turn Stopper:
1. Inspect the Stopper: Examine the base of the stopper for a small setscrew. This screw is typically located on the side of the stopper near the drain opening.
2. Loosen the Setscrew: If a setscrew is present, use a small flathead screwdriver to loosen it. Do not remove the screw completely, as it is easy to lose.
3. Unscrew the Stopper: Once the setscrew is loosened (or if no setscrew is present), firmly grasp the stopper and unscrew it counterclockwise. It might be necessary to apply some force, but avoid excessive force that could damage the drain.
4. Remove the Stopper: Once unscrewed, the stopper should lift out of the drain. If it is stuck, gently rock it back and forth while pulling upwards.
5. Clean and Inspect: After removing the stopper, clean off any debris or buildup. Inspect the stopper for damage or wear and tear.
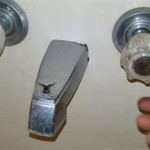
Removing a Push-and-Pull or Toe-Touch Stopper:
1. Determine the Stopper's Mechanism: Observe the stopper to determine if it's a simple push-and-pull type or a more complex toe-touch design.
2. Unscrew the Stopper Body: Most push-and-pull and toe-touch stoppers have a screw-on body. Firmly grasp the top of the stopper and rotate it counterclockwise. This may require some force to overcome any sealant or mineral buildup.
3. Remove the Internal Mechanism: After unscrewing the body, the internal mechanism of the stopper will be exposed. This typically consists of a series of springs, plungers, and seals. Carefully remove these components, noting their order and orientation for reassembly.
4. Clean and Inspect: Clean all the components thoroughly, removing any debris or mineral deposits. Inspect the parts for damage or wear, and replace them as needed.
5. Reassemble and Test: Reassemble the stopper mechanism in the correct order and screw the body back onto the drain. Test the stopper's operation to ensure it seals and releases properly.
Removing a Pop-Up Stopper:
1. Locate the Overflow Plate: Identify the overflow plate located on the bathtub wall, near the drain. This plate is connected to the pop-up stopper mechanism.
2. Remove the Overflow Plate: Remove the screws holding the overflow plate in place. Typically, there are one or two screws.
3. Pull Out the Linkage: After removing the overflow plate, carefully pull out the linkage connected to the stopper. This linkage usually consists of a metal rod and a spring.
4. Remove the Stopper: Once the linkage is removed, the stopper should lift out of the drain. It may be necessary to wiggle it gently to loosen it.
5. Clean and Inspect: Clean the stopper and the linkage thoroughly. Inspect the components for damage or corrosion.
6. Reassemble and Test: Reinsert the linkage into the drainpipe, attach the stopper, and reattach the overflow plate. Test the stopper's operation by moving the lever and observing the stopper's movement.
Removing a Chain and Stopper:
1. Lift the Stopper: Simply lift the stopper out of the drain. This method is the simplest, but sometimes the stopper can become wedged in the drain due to debris or buildup.
2. Detach the Chain: If the chain is connected to a lever, detach it from the lever mechanism on the overflow plate.
3. Clean and Inspect: Clean the stopper and the chain thoroughly. Inspect the stopper for wear or damage, and the chain for corrosion.
4. Replace or Reattach: If the stopper is damaged, replace it with a new one. Reattach the chain to the lever mechanism if it was detached.
Troubleshooting Common Stopper Removal Issues
Removing a bathtub stopper can sometimes present challenges. Mineral buildup, corrosion, or damaged components can make the removal process difficult. The following sections provide troubleshooting tips for common problems encountered during stopper removal.
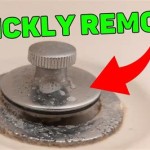
Stopper is Stuck: If the stopper is stuck and difficult to remove, try the following:
* Apply Lubricant: Spray a lubricant, such as WD-40 or a similar product, around the base of the stopper. Allow the lubricant to penetrate for several minutes before attempting to remove the stopper again.
* Use Gentle Force: Apply gentle but firm force while wiggling the stopper back and forth. Avoid using excessive force, as this could damage the drain or the stopper itself.
* Heat the Stopper: Gently heat the stopper with a hairdryer on a low setting. The heat can help to loosen any mineral buildup.
Setscrew is Stripped: If the setscrew on a lift-and-turn stopper is stripped, making it difficult to loosen, try the following:
* Use a Rubber Band: Place a rubber band over the head of the screwdriver to provide a better grip on the stripped setscrew.
* Use a Screw Extractor: If the setscrew is severely stripped, a screw extractor may be necessary. Follow the instructions on the screw extractor kit for proper use.
Linkage is Corroded: If the linkage on a pop-up stopper is heavily corroded, making it difficult to remove, try the following:
* Soak in Vinegar: Soak the linkage in white vinegar for several hours to help dissolve the corrosion.
* Use a Wire Brush: Use a wire brush to scrub away any remaining corrosion.
Broken Stopper Components: If any of the stopper components are broken, they will need to be replaced. Replacement parts can typically be found at hardware stores or online retailers. When purchasing replacement parts, it is essential to ensure they are compatible with the specific type of stopper being used.
Preventative Maintenance for Bathtub Stoppers
Regular maintenance can help prevent stopper malfunctions and extend the life of the stopper. The following tips can help maintain bathtub stoppers and prevent common problems.
Regular Cleaning: Clean the stopper regularly, using a mild detergent and a soft brush. This will help remove any debris or mineral buildup that can cause the stopper to malfunction. It is advisable to clean the stopper every few weeks, depending on usage and water quality.
Hair Removal: Hair is a common cause of clogged bathtub drains and stopper malfunctions. Regularly remove any hair that accumulates around the stopper. Using a hair catcher or drain screen can help prevent hair from entering the drainpipe.
Avoid Harsh Chemicals: Avoid using harsh chemicals or drain cleaners in the bathtub, as these can damage the stopper and the drainpipe. Natural alternatives, such as baking soda and vinegar, can be used to clear minor clogs.
Inspect Regularly: Inspect the stopper and its components regularly for signs of wear or damage. Replace any worn or damaged parts promptly to prevent further problems.
Properly removing and maintaining a bathtub stopper is crucial for ensuring the proper functioning of the bathtub drain. By understanding the different types of stoppers, following the appropriate removal techniques, and implementing preventative maintenance measures, homeowners can avoid common problems and extend the life of their bathtub stoppers.

How To Remove A Bathtub Drain The Home Depot

How To Remove A Bathtub Drain Forbes Home

How To Remove 6 Diffe Bath Drain Types

How To Remove A Bathtub Drain Stopper Mr Rooter

Bathtub How Can I Remove A Stuck Bath Stopper Assembly Home Improvement Stack Exchange

How To Remove A Bathtub Drain The Home Depot

How To Remove Bathtub Drain Stopper That Spins Freely

How To Remove Any Bathtub Stopper Pop Up Grate Or Plug

How To Remove A Bathtub Drain Stopper

Steps To Take In Order Remove A Drain Stopper Ricks Plumbing
Related Posts