Refinish Bathtub DIY Ideas: Revitalize Your Bathroom on a Budget
A worn, stained, or faded bathtub can significantly detract from the overall appeal of your bathroom. Replacing a bathtub is a costly and disruptive endeavor. Fortunately, refinishing your bathtub is a more affordable and less invasive alternative that can transform its appearance and extend its lifespan. With the right tools, materials, and a little patience, homeowners can successfully refinish their bathtubs using DIY methods.
Choose the Right Refinishing Technique
The most common DIY bathtub refinishing techniques include:
- Re-glazing: This method involves applying a new layer of enamel over the existing surface. It is a relatively straightforward process that yields a smooth, glossy finish.
- Epoxy coating: Epoxy coatings are more durable than re-glazing and can withstand higher temperatures and chemicals. They offer a thicker, more textured finish that can help hide imperfections.
- Bath liner: This technique involves installing a pre-molded liner over the existing bathtub surface. Liners are available in various colours and textures and offer a quick and relatively easy installation.
The choice of technique depends on the extent of damage to the bathtub, the desired finish, and the homeowner's skill level. Re-glazing is suitable for minor imperfections, while epoxy coatings are ideal for more significant damage. Bath liners are advantageous if the bathtub shows extensive wear or has structural issues.
Prepare the Bathtub for Refinishing
Before applying any refinishing product, it is crucial to thoroughly prepare the bathtub surface. This involves the following steps:
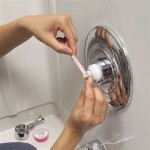
- Clean the bathtub: Remove all soap scum, grime, and mildew using a strong cleaner specifically designed for bathtub surfaces.
- Sand the bathtub: Sand the entire surface with a fine-grit sandpaper to create a roughened texture that will allow the refinishing product to adhere better.
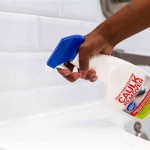
- Mask off surrounding areas: Protect surrounding areas, such as walls, floors, and fixtures, with masking tape and drop cloths to prevent accidental spills or splashes.
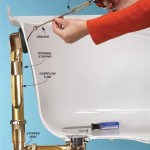
- Repair any chips or cracks: Use a bathtub repair kit to fill in any chips or cracks before applying the refinishing product.
Proper preparation is essential for a successful outcome. A clean, smooth, and properly prepped surface will ensure that the refinishing product adheres well and provides a durable finish.
Apply the Refinishing Product
Following the manufacturer's instructions, apply the chosen refinishing product. Here are general guidelines:
- Re-glazing: Apply several thin coats of glaze, allowing each coat to dry completely before applying the next. Avoid applying too much glaze at once, as this can cause dripping and unevenness.
- Epoxy coating: Mix the epoxy according to the manufacturer's instructions and apply it using a roller or brush. Spread the epoxy evenly, ensuring complete coverage.
- Bath liner: Install the liner according to the manufacturer's instructions. Typically, this involves applying adhesive to the bathtub and carefully positioning the pre-molded liner.
Pay close attention to the manufacturer's instructions for drying times and curing periods. It is crucial to allow the refinishing product to dry completely before using the bathtub. This may take several days, depending on the product and environmental conditions.
Safety Precautions
Refinishing bathtubs involves using chemicals that can be harmful if not handled properly. Here are some essential safety precautions:
- Wear protective gear: Always wear gloves, a mask, and eye protection when working with refinishing products.
- Work in a well-ventilated area: Ensure proper ventilation when applying and drying the refinishing product.
- Keep children and pets away: Do not allow children or pets near the work area until the refinishing product has fully dried.
- Follow manufacturer's instructions: Always read and follow the manufacturer's instructions carefully.
By adhering to these safety precautions, homeowners can minimize the risk of exposure to harmful chemicals and ensure their safety during the refinishing process.

How To Paint A Tub With Rustoleum What Not Do

Reglaze A Cast Iron Tub Like Pro Tips For Beginners

Diy Painted Bathtub Follow Up Your Questions Answered Addicted 2 Decorating

Re Enameling A Maroon Bathtub

How To Refinish Your Bathtub For 50

Bathroom Makeover Day 11 How To Paint A Bathtub Addicted 2 Decorating

How To Paint A Bathtub Yourself The Strongest Est Way Refinish Your

Fiberglass Bathtub Refinishing Porcelain Tub

Diy Shower Remodel Start To Finish Part 1 Of 2

An Expert Guide To Bathtub Reglazing Costs Process And More
Related Posts