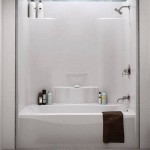
Re-Caulking a Bathtub: A Step-by-Step Guide
Re-caulking a bathtub is a relatively simple task that can make a big difference in the appearance and functionality of your bathroom. Caulk is a sealant that helps to prevent water from leaking around the edges of the bathtub. Over time, caulk can become cracked or damaged, allowing water to seep in and cause damage to the subfloor or walls.
If you notice any cracks or gaps in the caulk around your bathtub, it's important to re-caulk it as soon as possible. Re-caulking is a quick and easy way to prevent water damage and keep your bathroom looking its best.
Materials You'll Need
- Caulk gun
- Caulk
- Utility knife
- Rubbing alcohol
- Paper towels
Step-by-Step Instructions
1. Prepare the surface. Start by cleaning the area around the bathtub with rubbing alcohol. This will help to remove any dirt or debris that could interfere with the adhesion of the caulk.
2. Remove the old caulk. Use a utility knife to carefully cut away the old caulk. Be careful not to damage the bathtub or surrounding surfaces.
3. Apply the new caulk. Load the caulk gun with a new tube of caulk. Apply a bead of caulk around the edge of the bathtub, starting at one corner and working your way around.
4. Smooth the caulk. Use your finger or a caulk-smoothing tool to smooth out the caulk. Make sure to press the caulk firmly into the joint between the bathtub and the wall.
5. Allow the caulk to dry. Allow the caulk to dry completely before using the bathtub. The drying time will vary depending on the type of caulk you use, but it typically takes several hours.
Tips for Re-Caulking a Bathtub
- Use a high-quality caulk that is specifically designed for bathtubs.
- Apply the caulk in a smooth, even bead.
- Press the caulk firmly into the joint between the bathtub and the wall.
- Allow the caulk to dry completely before using the bathtub.

How To Re Caulk A Bathtub

How To Re Caulk A Bathtub

How To Caulk A Bathtub On Sutton Place

Recaulking Failing Caulk Is Important When Should I Recaulk My Shower

How To Caulk A Bathtub 13 Steps With Pictures Wikihow

How To Caulk A Bathtub On Sutton Place

Caulking A Bathtub Simple Steps For Successful Seal

How To Re Caulk Your Bathroom Denver Tub And Repairs

How To Use Bathroom Caulk For A Fresh New Seal

How To Caulk A Bathtub 13 Steps With Pictures Wikihow