Plumbing for a Bathtub: Essential Aspects
Remodeling or installing a new bathtub is an exciting project, but it also involves a significant amount of plumbing work. Proper plumbing is crucial to ensure a leak-free, functional, and enjoyable bathing experience. Here are some essential aspects to consider when plumbing for a bathtub:
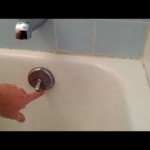
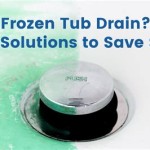
Tub Drain Assembly
The tub drain assembly is responsible for draining water from the bathtub. It typically consists of a drainpipe, drain shoe, overflow tube, and stopper. The drainpipe is connected to the bathtub's drain hole and carries water to the main drain line. The drain shoe prevents debris from clogging the drain, while the overflow tube prevents water from overflowing the bathtub.
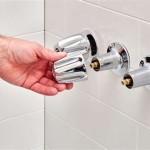
Bathtub Faucet
The bathtub faucet provides hot and cold water to the bathtub. It can be mounted on the bathtub's rim or wall. The faucet consists of a spout, handle(s), and cartridge or valves. The spout dispenses water, the handle(s) control the flow and temperature of water, and the cartridge or valves regulate water flow.
Water Supply Lines
Water supply lines connect the bathtub faucet to the main water lines. These lines can be made of copper, PEX (cross-linked polyethylene), or CPVC (chlorinated polyvinyl chloride). The type of material used depends on the specific requirements and preferences. It is important to ensure that the water supply lines are properly sized and securely connected to prevent leaks.
P-Trap
A P-trap is a curved pipe that is installed under the drainpipe. It creates a water seal that prevents sewer gases from entering the bathroom through the drain. The P-trap needs to be properly sized and installed to ensure proper drainage and prevent clogging.
Vent Pipe
A vent pipe is a vertical pipe that extends from the P-trap to the roof. It allows air to enter the plumbing system, which helps prevent siphoning and keeps the drains flowing smoothly. Vent pipes are typically installed through the bathroom ceiling and extend above the roof.
Additional Considerations
In addition to the essential aspects mentioned above, there are a few other considerations to keep in mind:
- Tub filler: A tub filler is an alternative to a traditional bathtub faucet and can add a touch of luxury to the bathroom. It is typically mounted on the bathtub's rim and uses a long neck to fill the bathtub.
- Handheld shower: A handheld shower can be attached to the bathtub faucet or installed separately. It provides a convenient way to shower without standing in the bathtub.
- Bathtub skirt: A bathtub skirt is a decorative panel that conceals the space between the bathtub and the floor. It can enhance the aesthetics of the bathroom.
Properly plumbing a bathtub requires a combination of expertise and attention to detail. It is recommended to consult with a qualified plumber to ensure a seamless and leak-free installation that meets all applicable codes and standards.

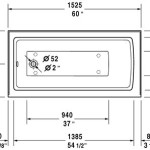
Bathtub Plumbing Installation Drain Diagrams Shower

Bathtub Parts Everyone Should Know About Part Names 2024

7 Bathtub Plumbing Installation Drain Diagrams

Home Fix Gurgling Sound Erupts From Bathtub Drain

Parts Of A Bathtub With Diagram Homenish Plumbing Drain

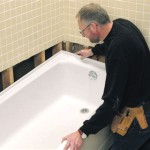
Replacing A Bathtub Fine Homebuilding

Plumbing In The Walls

Replacing A Bathtub Fine Homebuilding

Proper Ways To Relocate Plumbing When Renovating A Bathroom Kevin Szabo Jr Services Local Plumber Tinley Park Il

Bathtub Plumbing Installation Drain Diagrams