Plumbing A Bathtub: A Step-by-Step Guide
Installing or replacing a bathtub can be a daunting task, but it's a task that can be easily accomplished with the right knowledge and preparation. Here's a comprehensive guide to plumbing a bathtub, covering all the essential aspects and providing step-by-step instructions.
1. Gathering Materials and Tools
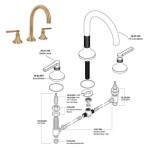
Before you begin, gather all the necessary materials and tools. These include:
- Bathtub
- Bathtub drain
- Bathtub overflow drain
- P-trap
- PVC pipes
- PVC cement
- Wrench
- Pipe cutter
- Level
- Plumber's putty
2. Preparing the Bathtub and Drain
Start by placing the bathtub in its desired location and ensuring that it's level. Then, install the bathtub drain. Apply plumber's putty around the base of the drain and insert it into the drain hole. Tighten the drain using a wrench.
3. Installing the Overflow Drain
Next, install the overflow drain. Apply plumber's putty around the base of the overflow drain and insert it into the overflow hole. Tighten the overflow drain using a wrench.
4. Connecting the Drain to the P-Trap
Connect the bathtub drain to the P-trap. Apply PVC cement to the end of the drain pipe and insert it into the P-trap. Hold the connection firmly for several minutes until the cement sets.
5. Connecting the P-Trap to the Drainpipe
Now, connect the P-trap to the drainpipe. Apply PVC cement to the end of the P-trap and insert it into the drainpipe. Hold the connection firmly for several minutes until the cement sets.
6. Finishing Touches
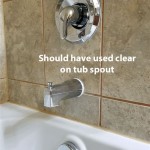
Once the plumbing is complete, check for any leaks. Run water into the bathtub and observe if there are any drips or leaks. If there are, tighten the connections and reapply plumber's putty where necessary. Finally, seal the gap between the bathtub and the wall using caulk or grout.
Conclusion
By following these steps, you can successfully plumb a bathtub. This guide provides a comprehensive overview of the necessary materials, tools, and instructions, allowing you to approach the task with confidence. Remember, if you encounter any difficulties, do not hesitate to seek professional assistance from a qualified plumber.

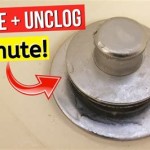
Tub Drain How To Seal And Unclog A Bathtub Knoxville Plumbing

7 Bathtub Plumbing Installation Drain Diagrams

Replacing A Bathtub Fine Homebuilding

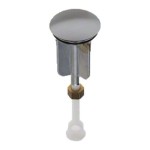
Bathtub Parts Everyone Should Know About Part Names 2024

Replacing A Bathtub Fine Homebuilding

Home Fix Gurgling Sound Erupts From Bathtub Drain

Adding A Tub Or Shower

Parts Of A Bathtub With Diagram Homenish Plumbing Sizes Drain

Plumbing In The Walls

Plumbing Repair Gerard Heating
Related Posts