Painting a Fiberglass Bathtub: A Comprehensive Guide
Fiberglass bathtubs, prized for their lightweight construction, durability, and affordability, are a common fixture in many bathrooms. However, over time, these tubs can become stained, scratched, or simply outdated in appearance. Replacing a bathtub is a significant and costly undertaking. Painting a fiberglass bathtub offers a viable alternative to revitalize its look and extend its lifespan. This article provides a detailed guide to the process, covering preparation, materials, application, and preventative measures to ensure a long-lasting and aesthetically pleasing result.
Successfully painting a fiberglass bathtub requires meticulous preparation, careful material selection, and precise application techniques. Rushing any stage of the process can lead to premature coating failure, peeling, or blistering. Therefore, understanding the intricacies involved is crucial for achieving a professional-looking and durable finish. The following sections delve into each aspect of the painting process, offering practical advice and best practices.
Key Point 1: Preparing the Fiberglass Bathtub Surface
Surface preparation is arguably the most critical step in painting any surface, and fiberglass bathtubs are no exception. A poorly prepared surface will compromise the adhesion of the paint, leading to peeling and a short lifespan for the new finish. The preparation process involves cleaning, sanding, and repairing any existing damage.
The initial cleaning phase aims to remove all traces of soap scum, mildew, mineral deposits, and other contaminants. These substances can create a barrier that prevents the paint from bonding properly to the fiberglass. A dedicated bathroom cleaner specifically formulated for removing soap scum and lime scale is recommended. Apply the cleaner according to the manufacturer's instructions, allowing sufficient dwell time for the product to dissolve the grime. Thoroughly rinse the bathtub with clean water, ensuring that no residue remains.
Following the initial cleaning, a more aggressive cleaning step is necessary to remove any remaining stubborn stains or embedded dirt. Abrasive cleaners like powdered cleansers or scouring pads can be used sparingly, but it is crucial to avoid scratching the fiberglass surface. Exercise caution and apply gentle pressure to minimize the risk of damage. Rinse thoroughly after using any abrasive cleaner.
Once the bathtub is clean, the sanding process begins. Sanding is essential for creating a slightly roughened surface, providing the paint with a better grip. Use wet/dry sandpaper with a grit of around 320-400. Wet sanding is preferable as it minimizes dust and reduces the risk of scratching. Keep the sandpaper wet and apply even pressure, sanding the entire surface of the bathtub. The goal is not to remove the existing finish entirely but to create a profile that the new paint can adhere to. After sanding, rinse the bathtub thoroughly to remove any sanding residue and allow it to dry completely.
Before painting, inspect the bathtub for any chips, cracks, or other damage. These imperfections must be repaired to ensure a smooth and uniform finish. Fiberglass repair kits are readily available at most hardware stores. Follow the instructions provided with the repair kit to fill any cracks or chips. Allow the repair material to cure completely before sanding it smooth to blend seamlessly with the surrounding surface. The repaired areas should be sanded with the same grit sandpaper as the rest of the bathtub.
Finally, after all repairs are completed and the surface is sanded, wipe down the entire surface with a tack cloth to remove any remaining dust or debris. This ensures a clean and dust-free surface ready for priming.
Key Point 2: Selecting the Right Primer and Paint
Choosing the right primer and paint is paramount for achieving a durable and aesthetically pleasing finish on a fiberglass bathtub. Not all paints are created equal, and selecting the wrong type can lead to premature failure and unsatisfactory results. The ideal primer and paint should be specifically formulated for use on fiberglass and designed to withstand the harsh environment of a bathroom, including humidity and frequent exposure to water and cleaning products.
Priming is a crucial step that should not be skipped. A primer provides a bonding layer between the prepared fiberglass surface and the topcoat of paint. It enhances adhesion, seals the surface, and helps to create a uniform color base. An epoxy primer is generally recommended for fiberglass bathtubs due to its excellent adhesion properties and resistance to moisture. Ensure the primer is compatible with the topcoat paint you intend to use. Apply the primer in thin, even coats, following the manufacturer's instructions. Allow the primer to dry completely before proceeding to the next step.
When selecting paint for a fiberglass bathtub, two-part epoxy paints or specialized acrylic urethane paints are generally preferred. Two-part epoxy paints offer superior durability, chemical resistance, and hardness. They are designed to withstand frequent exposure to water, cleaning products, and the wear and tear associated with regular use. These paints require mixing two components together according to the manufacturer's instructions. Acrylic urethane paints are another viable option, offering good durability and ease of application. They are also typically more readily available than two-part epoxy paints.
Regardless of the paint type chosen, ensure it is specifically formulated for use in wet environments like bathrooms. Look for paints that are mold and mildew resistant to prevent the growth of these organisms in the humid bathroom environment. Consider the desired finish – gloss, semi-gloss, or matte – and choose a paint that provides the desired aesthetic. Gloss and semi-gloss finishes are typically easier to clean but may show imperfections more readily than matte finishes.
Before applying the paint to the entire bathtub, it is advisable to test it in an inconspicuous area to ensure compatibility with the primer and to assess the color and finish. This test also allows you to evaluate the paint's adherence and drying time.
Key Point 3: Applying the Paint and Ensuring a Long-Lasting Finish
The application of the paint requires patience and attention to detail. Proper technique is essential to achieve a smooth, even, and durable finish. Several thin coats are generally better than one thick coat, as thick coats are more prone to runs, drips, and bubbling.
Before starting to paint, ensure the bathroom is well-ventilated. Open windows and use a fan to circulate air and remove fumes. Protect surrounding surfaces, such as walls, floors, and fixtures, with drop cloths or plastic sheeting. Use painter's tape to mask off any areas that you do not want to paint, such as the drain, overflow plate, and caulk lines.
Apply the paint using a high-quality brush, roller, or spray gun. A brush is suitable for smaller areas and touch-ups, while a roller is ideal for larger, flat surfaces. A spray gun can provide the smoothest and most even finish but requires more skill and preparation. When using a brush or roller, apply the paint in smooth, even strokes, overlapping each stroke slightly to avoid gaps. When using a spray gun, hold the nozzle at a consistent distance from the surface and move it in a steady, overlapping motion. Avoid applying too much paint at once, as this can lead to runs and drips.
Allow each coat of paint to dry completely before applying the next. Follow the manufacturer's instructions for drying times. Lightly sand between coats with fine-grit sandpaper (400-600 grit) to remove any imperfections and create a smoother surface for the next coat. Wipe down the surface with a tack cloth to remove any sanding dust before applying the next coat.
Apply at least two coats of paint, and potentially three coats, depending on the paint's coverage and the desired finish. Once the final coat is dry, carefully remove the painter's tape. Allow the paint to cure completely before using the bathtub. Curing times can vary depending on the type of paint used, but it typically takes several days to a week for the paint to fully harden and achieve its maximum durability.
To further prolong the lifespan of the painted fiberglass bathtub, consider applying a clear topcoat. A clear topcoat can provide an extra layer of protection against scratches, stains, and chemical damage. Choose a clear topcoat that is compatible with the paint you used and follow the manufacturer's instructions for application.
Regular cleaning and maintenance are essential for preserving the appearance and durability of the painted fiberglass bathtub. Avoid using harsh abrasive cleaners, as they can scratch or damage the paint. Use mild soap and water or a dedicated bathroom cleaner formulated for painted surfaces. Wipe down the bathtub after each use to prevent the buildup of soap scum and mineral deposits. Repair any chips or scratches promptly to prevent further damage and extend the life of the paint job.

How To Paint A Bathtub Yourself The Nifty Nester

How To Paint Your Bathtub Yes Seriously Love Renovations

How To Paint A Tub Shower Surround Before After Fiberglass Refinishing Diy Power Couple

How To Refinish Your Bathtub For 50

How To Paint Your Bathtub Yes Seriously Love Renovations

How To Paint A Tub Shower Surround Before After Fiberglass Refinishing Diy Power Couple

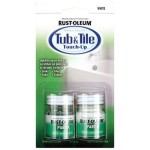
How To Paint A Tub With Rustoleum What Not Do

Painting A Tub Shower Fiberglass Using All In One Paint Color Cashmere

Painting A Fiberglass Bathtub What You Need To Know Hometalk

Super Simple How To Paint A Bathtub


