Painting A Fiberglass Bathtub White: A Comprehensive Guide
Fiberglass bathtubs, known for their affordability and lightweight properties, can become stained, discolored, or simply outdated over time. While replacement is an option, painting offers a cost-effective and relatively simple alternative. This article provides a comprehensive guide to painting a fiberglass bathtub white, covering necessary preparations, appropriate materials, and the step-by-step process to achieve a durable and aesthetically pleasing finish.
The success of painting a fiberglass bathtub hinges on meticulous preparation and the use of specialized paints formulated for non-porous surfaces. Standard house paints are unsuitable and will likely peel or chip quickly due to the constant exposure to moisture and temperature fluctuations in a bathroom environment. This guide focuses on durable, two-part epoxy acrylic coatings, offering a resilient and long-lasting finish for fiberglass bathtubs.
Key Point 1: Essential Preparations for a Successful Paint Job
Proper preparation is the most critical phase in painting a fiberglass bathtub. Inadequate preparation will lead to paint failure, regardless of the quality of the paint used. The process involves thorough cleaning, sanding, and priming to ensure optimal adhesion of the new coating.
Cleaning and Repair: The first step is to thoroughly clean the bathtub. Remove all soap scum, mildew, and grime using a specialized bathroom cleaner designed to remove tough stains. For stubborn stains, a paste of baking soda and water can be applied and scrubbed gently. Rinse the bathtub thoroughly with water and allow it to dry completely. Address any chips, cracks, or other damage before proceeding. Use a fiberglass repair kit to fill in these imperfections, following the manufacturer's instructions carefully. Allow the repair material to cure completely before moving on to sanding.
Sanding: Sanding is essential for creating a surface that the new paint can adhere to. Use 320-grit wet/dry sandpaper for the initial sanding. Wet the sandpaper and the bathtub surface frequently during sanding to prevent clogging and reduce dust. Apply moderate pressure and sand the entire surface evenly, focusing on areas with existing imperfections or glossy finishes. The goal is to create a slightly roughened surface without removing the existing gel coat completely. After the initial sanding, rinse the bathtub thoroughly and allow it to dry. Repeat the sanding process with 400-grit wet/dry sandpaper for a smoother finish. This final sanding will further refine the surface and prepare it for priming. Rinse the bathtub thoroughly and ensure it is completely dry before moving on to the next step.
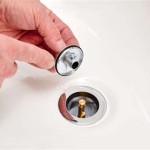
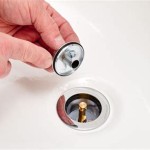
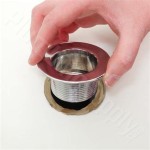
Masking and Ventilation: Before applying any primer or paint, protect surrounding surfaces with painter's tape and plastic sheeting. Mask off the faucets, drain, and any other fixtures that you do not want to paint. Cover the bathroom floor and walls to prevent overspray. Ensure adequate ventilation in the bathroom. Open windows and doors, and use a fan to circulate air. A respirator mask is crucial to protect yourself from harmful fumes emitted by the primer and paint. Wear gloves and eye protection throughout the entire process.
Applying Primer: Once the bathtub is clean, sanded, and masked, apply a high-quality epoxy primer specifically designed for fiberglass surfaces. A two-part epoxy primer is recommended for its superior adhesion and durability. Mix the primer according to the manufacturer's instructions and apply it using a high-density foam roller or a paint sprayer. Apply a thin, even coat of primer, avoiding drips and runs. Allow the primer to dry completely according to the manufacturer’s recommended drying time. After the primer has dried, inspect the surface for any imperfections, such as drips or unevenness. Lightly sand these areas with 400-grit wet/dry sandpaper to create a smooth surface for the topcoat. Wipe away any sanding dust with a tack cloth before proceeding to the next step.
Key Point 2: Selecting the Right Paint and Application Techniques
Choosing the correct type of paint and employing proper application techniques are crucial for a professional-looking and long-lasting finish. The selection should focus on paints specifically designed for fiberglass and exposure to wet environments.
Choosing the Right Paint: Two-part epoxy acrylic paints are the most suitable option for painting fiberglass bathtubs. These paints offer excellent adhesion, durability, and resistance to water, chemicals, and abrasion. They form a hard, non-porous surface that is easy to clean and maintain. Avoid using standard latex or oil-based paints, as they are not designed for the specific conditions of a bathroom and will likely fail over time. Ensure that the chosen paint is specifically formulated for use on fiberglass and is compatible with the primer used. Always follow the manufacturer's instructions regarding mixing ratios, drying times, and application methods.
Mixing and Preparing the Paint: Two-part epoxy acrylic paints require careful mixing of the base and activator components. Follow the manufacturer's instructions precisely to ensure the correct mixing ratio. Use a clean mixing container and a stirring stick to thoroughly combine the two components. Stir the mixture for the recommended time, ensuring that the base and activator are completely blended. Allow the mixture to stand for a few minutes to allow any air bubbles to dissipate. Once the paint is mixed, it has a limited pot life, so it is important to be prepared to apply it immediately.
Applying the Paint: The paint can be applied using a high-density foam roller, a brush, or a paint sprayer. A paint sprayer is generally recommended for achieving the smoothest and most even finish. If using a roller, choose a high-quality foam roller designed for use with epoxy paints. Apply the paint in thin, even coats, overlapping each stroke slightly to avoid leaving any gaps. Avoid applying too much paint in one coat, as this can lead to drips and runs. If using a brush, choose a high-quality synthetic brush designed for use with epoxy paints. Apply the paint in long, even strokes, following the contours of the bathtub. Avoid applying too much pressure, as this can leave brush marks. If using a paint sprayer, follow the manufacturer's instructions for adjusting the sprayer settings. Apply the paint in thin, even coats, overlapping each pass slightly. Maintain a consistent distance from the bathtub surface to ensure an even application. Allow each coat of paint to dry completely according to the manufacturer's recommended drying time before applying the next coat.
Applying Multiple Coats: Typically, two to three coats of paint are required to achieve full coverage and a durable finish. Allow each coat to dry completely before applying the next, following the manufacturer's instructions for drying times. After each coat has dried, inspect the surface for any imperfections, such as drips, runs, or orange peel texture. Lightly sand these areas with 600-grit wet/dry sandpaper to create a smooth surface for the next coat. Wipe away any sanding dust with a tack cloth before proceeding.
Key Point 3: Achieving a Durable and Flawless Finish
The final stages of the painting process determine the overall quality and longevity of the finished product. Careful attention to detail, proper curing, and meticulous cleanup contribute to a durable and aesthetically pleasing result.
Curing Time: After applying the final coat of paint, it is crucial to allow the bathtub to cure completely before using it. The curing time varies depending on the type of paint used and the ambient temperature and humidity. Refer to the manufacturer's instructions for the recommended curing time. Avoid using the bathtub during the curing period, as this can damage the finish. The curing process allows the paint to fully harden and develop its maximum durability and resistance to water and chemicals.
Removing Masking Tape: Once the paint has cured, carefully remove the masking tape and plastic sheeting. Use a sharp utility knife to score along the edges of the tape before pulling it away. This will prevent the paint from chipping or peeling off with the tape. Remove the tape slowly and carefully, inspecting the edges for any imperfections. If any paint has seeped under the tape, carefully scrape it away with a razor blade or a utility knife. Be careful not to scratch the surrounding surfaces.
Caulking: After removing the masking tape, apply a fresh bead of caulk around the edges of the bathtub where it meets the walls and floor. Use a high-quality silicone caulk specifically designed for bathrooms. Apply the caulk evenly and smoothly, and use a wet finger or a caulking tool to create a clean, professional-looking seal. The caulk will prevent water from seeping behind the bathtub and causing mold or mildew growth.
Cleaning and Maintenance: After the caulk has dried, clean the bathtub with a mild soap and water. Avoid using abrasive cleaners or scouring pads, as these can scratch the finish. Wipe the bathtub dry with a soft cloth. To maintain the finish, clean the bathtub regularly and avoid using harsh chemicals or abrasive cleaners. Repair any chips or scratches immediately to prevent further damage.
Painting a fiberglass bathtub white is a viable option for updating its appearance and extending its lifespan. By following these detailed steps, selecting appropriate materials, and paying close attention to preparation and application, a homeowner can achieve professional-level results. However, it's important to acknowledge that even with proper technique, a painted finish may not be as durable as the original gel coat. Periodic maintenance and careful cleaning will be necessary to preserve the appearance and integrity of the painted surface.
Furthermore, the choice of paint color, while often driven by aesthetic preferences, can also impact the perceived cleanliness of the bathtub. White, while classic and versatile, can highlight stains and imperfections more readily than darker colors. Considering these factors before commencing the project can lead to a more satisfactory and long-lasting outcome.
Finally, it is advised to consult with professionals if unsure about any aspect of the painting process. Experienced painters can provide valuable insights and guidance, ensuring that the project is completed safely and effectively.

How To Paint A Bathtub Yourself The Nifty Nester

Super Simple How To Paint A Bathtub

How To Paint A Tub With Rustoleum What Not Do

Bathroom Makeover Day 11 How To Paint A Bathtub Addicted 2 Decorating

How To Paint Your Bathtub Yes Seriously Love Renovations

Diy Painted Bathtub Follow Up Your Questions Answered Addicted 2 Decorating

How To Paint A Tub With Rustoleum What Not Do

Painting A Fiberglass Bathtub What You Need To Know Hometalk

How To Refinish Your Bathtub For 50

Before After How To Paint A Bathtub And Clean It Does Last Thrift Diving
Related Posts