Painting a Bathtub DIY: A Comprehensive Guide
Transform your bathroom with a fresh, vibrant bathtub. Painting a bathtub is a cost-effective and rewarding DIY project that can significantly enhance the look and feel of your bathroom. Here's a comprehensive guide to help you tackle this task with ease.
Materials You'll Need
- Tub refinishing kit
- Etching solution
- Primer
- Bathtub paint
- Stir stick
- Foam brush
- Roller and tray
- Caulk gun and caulk
- Safety glasses and gloves
Step 1: Preparation
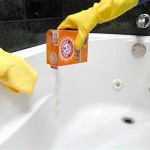
Thoroughly clean the bathtub with a bathtub cleaner and rinse it well. Remove all soap scum, dirt, and debris. Sand the surface lightly using fine-grit sandpaper to create a smooth base for the paint. Apply etching solution to the bathtub and let it sit for the recommended time to remove any remaining oils and dirt.
Step 2: Priming
Apply a coat of bathtub primer to the entire surface of the bathtub. Use a foam brush for corners and edges, and a roller for the larger areas. Allow the primer to dry completely, typically within a few hours.
Step 3: Painting
Stir the bathtub paint thoroughly. Apply the first coat using a foam brush in corners and edges, and use a roller with smooth, even strokes for the larger surfaces. Allow the first coat to dry completely.
Apply a second coat of bathtub paint following the same method. Let it dry completely, which may take several days.
Step 4: Caulk
Once the bathtub paint has fully dried, caulk around the edges where the bathtub meets the wall, tiles, or shower surround. Fill the caulk gun with the caulk and apply it smoothly, following the contours of the bathtub. Use a damp cloth to wipe away any excess caulk.
Step 5: Curing
Allow the bathtub to cure for the recommended time indicated by the paint manufacturer. This can take up to a week. During this time, avoid using the bathtub or exposing it to water to ensure optimal paint adhesion.
Tips for a Professional-Looking Finish
- Ventilate the bathroom well during painting and curing.
- Wear safety glasses and gloves to protect yourself from fumes and solvents.
- Apply thin, even coats of paint for better coverage.
- Remove all excess paint and caulk before it dries.
- Follow the manufacturer's instructions carefully for the best results.
Conclusion
Painting a bathtub DIY is a satisfying project that can dramatically upgrade your bathroom's appearance. By following these steps and tips, you can achieve a professional-looking finish that will last for years to come. Remember to take your time, prepare properly, and pay attention to detail for a stunning result.

Diy Painted Bathtub Follow Up Your Questions Answered Addicted 2 Decorating

Yes You Can Paint Your Bathtub And Tile Here S How Toolbox Divas

How To Paint A Bathtub And Shower For 50 Refinish Tub Painted Diy Bathroom Makeover Remodel

Paint Older Bathtubs Painting Bathtub Diy Bathroom Makeover

How To Paint A Tub With Rustoleum What Not Do

My Painted Bathtub 5 Years Later An Honest Review Of Refinished Jacuzzi Tub

How To Paint Your Bathtub Yes Seriously Love Renovations

Before After How To Paint A Bathtub And Clean It Does Last Thrift Diving

How To Paint Your Bathtub Yes Seriously Love Renovations

My Painted Bathtub 5 Years Later An Honest Review Of Refinished Jacuzzi Tub


