Paint Your Bathtub: A Simple Guide to Refreshing Your Bathroom
Whether your bathtub is chipped, stained, or simply outdated, painting it can be an affordable and effective way to give your bathroom a fresh new look. With the right preparation and materials, you can achieve a professional-looking finish that will last for years to come.
Preparation
Before you start painting, it's crucial to properly prepare your bathtub. Here are some steps:
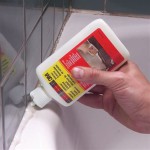
- Clean and Degrease: Remove all dirt and soap residue from the bathtub using a cleaner and degreaser. This will ensure proper adhesion of the paint.
- Sand: Use fine-grit sandpaper to roughen the surface of the tub. This will help the paint adhere better and prevent peeling.
- Mask Off: Protect your bathroom fixtures and walls by masking them off with painter's tape.
Choosing the Paint
Not all paints are suitable for bathtubs. You need to choose a paint specifically designed for bathtub refinishing, such as:
- Epoxies: These paints create a durable and water-resistant finish, making them ideal for bathtubs.
- Urethanes: They offer excellent adhesion and toughness, providing a long-lasting finish.
- Acrylics: They are easy to apply and can be suitable for DIY projects, but may not be as durable as epoxies or urethanes.
Application
Once you have chosen the paint, follow these steps for application:
- Prime the Bathtub: Apply a primer specifically designed for bathtubs to enhance adhesion.
- Apply the First Coat: Using a small brush or roller, apply a thin, even coat of paint to the tub.
- Apply Additional Coats: Allow the first coat to dry completely before applying two or three more coats for a smooth and durable finish.
- Allow ample drying time between coats.
- Use a well-ventilated area and wear a respirator.
- Follow the manufacturer's instructions carefully.
- If you encounter any problems, consult with a professional refinisher.
Finishing Touches
Once the paint has completely dried, you can remove the masking tape and seal the edges with a clear silicone caulk. This will prevent water from seeping into the edges and ensure a finished look.
Tips for Success
By following these steps and taking the necessary precautions, you can successfully paint your bathtub and transform your bathroom into a rejuvenated space.

How To Paint A Bath Tub The Interiors Addict

How To Paint Your Bathtub Yes Seriously Love Renovations

How To Paint Your Bathtub Yes Seriously Love Renovations

Can You Paint A Bathtub Yes And Here S How Bob Vila

Diy Painted Bathtub Follow Up Your Questions Answered Addicted 2 Decorating

My Painted Bathtub 5 Years Later An Honest Review Of Refinished Jacuzzi Tub

Yes You Can Paint Your Bathtub And Tile Here S How Toolbox Divas

Painted Bathub

How To Change The Color Of Your Bathtub With And Without Paint 2024

Yes You Can Paint Your Bathtub And Tile Here S How Toolbox Divas