Painting a Plastic Bathtub Surround: A Comprehensive Guide
Bathtub surrounds, often constructed from plastic or acrylic, can become dull and discolored over time. Replacing them can be a costly and labor-intensive process. Painting offers a viable alternative for refreshing the appearance of a plastic bathtub surround, providing a cost-effective way to update a bathroom's aesthetic. However, achieving a durable and attractive finish requires careful preparation and the correct materials.
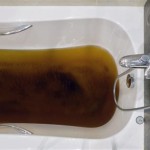
Before embarking on the project, it's essential to assess the current condition of the bathtub surround. Look for signs of mildew, mold, or water damage. Address these issues before painting, as painting over them will only exacerbate the problem and lead to premature paint failure. Existing caulk should be inspected and removed if cracked or peeling.
Cleaning the surface thoroughly is paramount to achieving a professional-looking result. A combination of warm water and a mild detergent can be used to remove soap scum and grime. A degreasing cleaner, specifically designed for bathroom use, can further ensure the removal of any residual oils and soap film. Abrasive cleaners should be avoided as they can scratch the plastic surface, creating imperfections that will show through the paint.
After cleaning, rinsing the surface thoroughly with clean water is essential to remove any remaining detergent residue. Allow the surround to dry completely before proceeding to the next step. Proper ventilation can expedite the drying process.
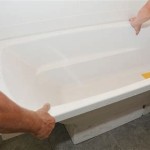
Repairing any imperfections in the plastic surround is the next crucial stage. Small cracks or chips can be filled with an epoxy-based filler, specifically designed for use in wet environments. Larger damage may require patching with a fiberglass repair kit. Follow the manufacturer's instructions carefully for each product and allow ample drying time before sanding.
Once the filler or patches are dry, sanding the entire surface of the bathtub surround is necessary to create a smooth, even surface for the paint to adhere to. Start with a coarser grit sandpaper (e.g., 180-grit) to smooth out any imperfections and then progress to a finer grit (e.g., 220-grit) to create a uniformly smooth finish. After sanding, thoroughly clean the surface again to remove any dust particles.
Applying a specialized primer designed for adhesion to plastic is a vital step in ensuring the paint adheres properly and provides a long-lasting finish. These primers are formulated to create a bond between the smooth plastic surface and the paint. Apply the primer evenly across the entire surface of the bathtub surround using a brush, roller, or spray application, following the manufacturer's instructions. Allow the primer to dry completely according to the manufacturer's recommendations.
Selecting the appropriate paint for a plastic bathtub surround requires careful consideration. Epoxy-based paints are often recommended for their durability and resistance to moisture and chemicals. These paints are specifically formulated to withstand the harsh conditions of a bathroom environment. Alternatively, acrylic latex paints designed for bathroom use can also be considered. Ensure the chosen paint is compatible with the primer used.
When applying the paint, multiple thin coats are generally preferred to one thick coat. Thin coats dry more evenly and reduce the risk of drips and runs. Allow each coat to dry thoroughly before applying the next. Follow the manufacturer's instructions regarding drying times and the number of coats recommended for optimal coverage and durability.
Proper ventilation during the painting process is essential to prevent the buildup of fumes and ensure proper drying. Open windows and doors or use a ventilation fan to maintain adequate airflow. Wearing a respirator mask is also recommended as a safety precaution.
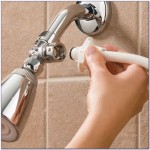
Once the final coat of paint has dried completely, the new caulk can be applied around the edges of the bathtub surround where it meets the wall and other fixtures. This creates a watertight seal and prevents moisture from seeping behind the painted surface, which can lead to peeling and mildew growth. Use a high-quality silicone caulk designed for bathroom use. Smooth the caulk with a wet finger or caulk tool for a professional finish.
Protecting the newly painted bathtub surround during the initial curing period is crucial. Avoid using the shower or bathtub for the time recommended by the paint manufacturer. This allows the paint to fully cure and harden, ensuring maximum durability and longevity.
Maintaining the painted surface properly will help prolong its lifespan. Regular cleaning with mild, non-abrasive cleaners is recommended. Avoid using harsh chemicals or abrasive scrubbing pads, which can damage the paint finish. Promptly addressing any chips or scratches can prevent further damage and maintain the aesthetic appeal of the refinished bathtub surround.

How To Paint A Bathtub Yourself The Nifty Nester

Diy Painted Bathtub Follow Up Your Questions Answered Addicted 2 Decorating

Bathroom Makeover Day 11 How To Paint A Bathtub Addicted 2 Decorating

How To Refinish Your Bathtub For 50

How To Paint Your Bathtub Yes Seriously Love Renovations

Painting A Plastic Fibreglass Tub And Surround Using Marine Paint

Yes You Can Paint Your Bathtub And Tile Here S How Toolbox Divas

How To Paint Your Bathtub Yes Seriously Love Renovations

How To Paint A Tub With Rustoleum What Not Do Bathroom Remodel Refinishing

My Painted Bathtub 5 Years Later An Honest Review Of Refinished Jacuzzi Tub
Related Posts