My Bathtub Faucet Is Dripping: A Comprehensive Guide to Diagnosis and Repair
A dripping bathtub faucet is more than just an irritating sound; it represents a continuous waste of water and, consequently, an increase in water bills. Ignoring the issue can lead to further problems, such as mineral buildup, corrosion, and even damage to the surrounding surfaces. This article provides a comprehensive guide to understanding the common causes of a dripping bathtub faucet and offers practical steps for diagnosis and repair, empowering individuals to tackle the problem effectively.
Identifying the Type of Faucet
Before attempting any repair, it’s crucial to identify the type of faucet installed. Bathtub faucets generally fall into four main categories: compression faucets, cartridge faucets, ball faucets, and ceramic disc faucets. Each type employs a different mechanism for controlling water flow, and therefore, requires a specific approach to repair. Understanding the faucet type will ensure the correct parts are obtained and the repair process is executed efficiently.
Compression Faucets: These are the oldest and simplest type of faucet. They are characterized by two separate handles, one for hot water and one for cold. Turning the handle tightens a rubber washer against a valve seat, shutting off the water flow. The most common cause of a drip in a compression faucet is a worn or damaged washer.
Cartridge Faucets: These faucets usually have a single handle that controls both temperature and water flow. Moving the handle up and down controls the water volume, while moving it left and right controls the temperature. Inside the faucet body is a cartridge – a cylindrical component that regulates the water flow. Drips in cartridge faucets are typically caused by a worn or damaged cartridge or O-rings.
Ball Faucets: Similar to cartridge faucets, ball faucets also have a single handle. However, they utilize a ball valve to control water flow and temperature. The handle operates a slotted ball that moves within the faucet body, aligning holes in the ball with inlets for hot and cold water. Leaks in ball faucets are often attributed to worn springs, seats, or the ball itself.
Ceramic Disc Faucets: These are the most modern and often the most expensive type of faucet. They also have a single handle, but instead of a cartridge or ball, they use two ceramic discs that slide against each other. When aligned, the discs allow water to flow; when misaligned, they shut off the water supply. Drips in ceramic disc faucets are relatively uncommon but are usually caused by debris lodged between the ceramic discs or damage to the discs themselves.
Diagnosing the Cause of the Drip
Once the faucet type has been identified, the next step is to pinpoint the cause of the drip. While simple wear and tear of components is the most frequent culprit, other factors can contribute to the problem. A careful inspection of the faucet and its components is essential for accurate diagnosis.
Examining the Handle and Spout: Begin by visually inspecting the faucet handle and spout for any signs of damage, such as cracks, corrosion, or mineral buildup. Mineral deposits can accumulate around the handle and spout, hindering proper sealing and contributing to leaks. If visible damage is present, replacing the affected part may be necessary.
Listening for Water Flow: With the faucet completely shut off, listen carefully for any faint hissing or gurgling sounds coming from the spout. These sounds may indicate that water is still flowing through the faucet, even when it is in the closed position. Such sounds often point to a faulty valve seat or a worn washer.
Checking for Loose Connections: Examine the connections between the faucet body and the water supply lines. Loose connections can allow water to seep through, creating a drip that may be mistaken for a problem within the faucet itself. Use a wrench to gently tighten any loose connections, being careful not to overtighten and damage the pipes.
Testing for Hard Water Issues: Hard water, which contains high levels of minerals like calcium and magnesium, can accelerate the wear and tear of faucet components. Over time, mineral deposits can build up on washers, O-rings, and valve seats, causing them to lose their sealing ability. If hard water is suspected, consider installing a water softener to protect plumbing fixtures from mineral damage.
Considering Water Pressure: Excessively high water pressure can also contribute to dripping faucets. High pressure can put undue stress on faucet components, causing them to wear out prematurely. A pressure regulator can be installed on the main water supply line to maintain a safe and consistent water pressure.
Repairing a Dripping Bathtub Faucet: Step-by-Step Instructions
After identifying the type and cause of the drip, the repair process can begin. It is imperative to turn off the water supply to the faucet before disassembling it. Typically, shut-off valves are located beneath the sink or in the basement near the water meter. If individual shut-off valves are not present, the main water supply to the house must be turned off. Once the water is shut off, open the faucet to relieve any remaining pressure in the pipes.
Repairing a Compression Faucet: Typically, the issue stems from a worn washer. First, remove the decorative handle cap and unscrew the handle screw. Pull off the handle. Next, unscrew the packing nut and remove the stem. At the end of the stem, you will find the washer held in place by a screw. Remove the screw and replace the old washer with a new one. Reassemble the faucet in reverse order, ensuring all parts are securely tightened. When tightening the packing nut, avoid overtightening, as this can make the handle difficult to turn.
Repairing a Cartridge Faucet: This process requires obtaining a replacement cartridge that matches the faucet model. Start by removing the handle. This may involve prying off a decorative cap or loosening a set screw. Once the handle is removed, use pliers to remove the retaining clip that holds the cartridge in place. Carefully pull out the old cartridge. Install the new cartridge, ensuring it is properly aligned. Replace the retaining clip and reattach the handle.
Repairing a Ball Faucet: Ball faucets are more complex than compression or cartridge faucets. The repair typically involves replacing the springs, seats, and O-rings. Begin by removing the handle and loosening the set screw. Unscrew the cap and collar assembly. Remove the ball and inspect it for damage. Using a specialized tool, remove the springs and seats. Replace the springs, seats, and O-rings. Reassemble the faucet in reverse order, ensuring the ball aligns correctly with the slots in the faucet body.
Repairing a Ceramic Disc Faucet: These faucets are best left to professionals due to their intricate design and fragile components. However, if attempting a repair, the process generally involves removing the handle, unscrewing the escutcheon cap, and removing the cylinder assembly. Carefully inspect the ceramic discs for damage or debris. Clean the discs thoroughly and reassemble the faucet. If the drip persists, the ceramic discs may need to be replaced.
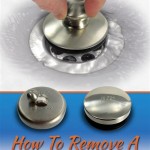
Replacing O-Rings and Washers: Regardless of the faucet type, replacing worn O-rings and washers is a common repair. O-rings are small rubber rings that create a seal between faucet components. Washers are flat rubber or plastic discs that provide a sealing surface against a valve seat. Over time, these components can become brittle, cracked, or worn, leading to leaks. To replace O-rings and washers, disassemble the faucet, remove the old O-rings and washers, and install new ones of the same size and type. Lubricate the new O-rings with plumber’s grease to ensure a proper seal and prevent premature wear.
Cleaning and Inspecting Valve Seats: The valve seat is the surface that the washer presses against to shut off the water flow. Over time, mineral deposits and corrosion can accumulate on the valve seat, preventing the washer from sealing properly. Clean the valve seat with a valve seat wrench or a specialized cleaning tool. If the valve seat is severely damaged, it may need to be resurfaced or replaced. Resurfacing can be done with a valve seat grinding tool. Replacement requires removing the old valve seat and installing a new one using a sealant.
Tightening Loose Connections: Inspect all connections between the faucet body, water supply lines, and drainpipes. Loose connections can cause leaks that are often mistaken for dripping faucets. Use a wrench to gently tighten any loose connections. Be careful not to overtighten, as this can damage the pipes or fittings. Wrap pipe threads with Teflon tape before tightening connections to ensure a watertight seal.
Seeking Professional Assistance: While many faucet repairs can be performed by homeowners, some situations require the expertise of a licensed plumber. If the repair is complex, if the faucet is severely damaged, or if the homeowner is uncomfortable performing the repair, seeking professional assistance is recommended. A plumber has the tools, knowledge, and experience to diagnose and repair faucet problems effectively and safely.

How To Fix A Leaking Bathtub Faucet The Home Depot

How To Fix A Leaking Bathtub Faucet Diy Family Handyman

How To Fix A Leaking Bathtub Faucet The Home Depot

How To Fix A Leaking Bathtub Faucet The Home Depot

Moen Bathtub Faucet Dripping Wasting Water How To Repair A Leaking Single Handle Bath Shower

How To Fix A Leaking Bathtub Faucet The Home Depot

How To Fix A Leaky Bathtub Faucet 6 Ways Stop Drips

How To Fix A Leaking Bathtub Faucet The Home Depot

5 Reasons Your Faucet Is Dripping Water How To Fix It

How To Fix A Leaking Bathtub Faucet Diy Family Handyman