Replacing a Moen Bathtub Faucet Valve: A Step-by-Step Guide
Over time, bathtub faucet valves can wear out, leading to leaks, drips, or even complete failure. These issues can be frustrating and inconvenient, and they can also lead to higher water bills. Fortunately, replacing a Moen bathtub faucet valve is a relatively straightforward DIY project that most homeowners can tackle with the right tools and a little bit of patience. This guide will walk you through the process step-by-step, providing you with the information and instructions needed to ensure a successful replacement.
1. Gathering the Necessary Tools and Materials
Before you start, make sure you have all the necessary tools and materials readily available. This will help to ensure a smooth and efficient replacement process. Here's a comprehensive list of what you'll need: *
New Moen bathtub faucet valve:
Choose a valve compatible with your existing faucet type. *Adjustable wrench:
This will be used to loosen and tighten nuts and bolts on the faucet. *Channel-lock pliers:
These pliers are helpful for gripping and turning pipes and fittings. *Pipe wrench:
Required for tightening pipe connections. *Plumber's tape:
This tape is used to seal pipe threads and prevent leaks. *Safety glasses:
Essential for protecting your eyes from debris and potential splashes. *Gloves:
Wearing gloves helps protect your hands from sharp edges and potential water exposure. *Towel:
Useful for wiping up spills and keeping the work area clean. *Bucket or container:
Required for catching water when draining the pipes. *Screwdriver:
For removing the faucet handle and any mounting screws. *Optional: Tub spout wrench:
This specialized wrench is helpful for removing and installing tub spouts with locking nuts. *Optional: Pipe cutter:
If the supply lines need to be shortened, a pipe cutter is necessary.2. Shutting Off The Water Supply
Safety is paramount. Ensure you shut off the water supply to your bathtub before you start working on the valve. This will prevent flooding and minimize water damage. The water supply valve for your bathtub is usually located near the water heater or on the wall adjacent to the tub. Identify the correct valve and turn it fully clockwise to shut off the water.
3. Draining the Water Lines
After turning off the water supply, you need to drain the water lines connected to the faucet. This will help to prevent water from spilling out during the replacement process. Open the bathtub faucet to release any remaining water pressure. You may need to use a small container or towel to absorb any drips.
4. Removing the Old Valve
Now, you can begin removing the old valve. This process will vary slightly depending on the specific type of Moen faucet you have. Follow these general steps: *
Remove the Faucet Handle:
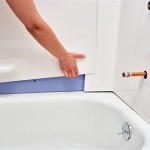
Unscrew the handle using a screwdriver. Some handles may have a set screw that needs to be loosened first. *Remove the Spout:
Locate the tub spout and remove it. It may be secured with a locking nut that can be loosened with a spout wrench. *Disconnect the Supply Lines:
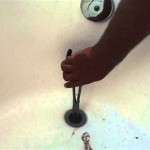
Use adjustable wrenches or channel-lock pliers to disconnect the supply lines from the old valve. Take note of the orientation of the supply lines to ensure they are reconnected correctly later. *Loosen and Remove the Valve:
After disconnecting the supply lines, you can loosen the valve from the tub. Carefully pry the valve out of the tub using a screwdriver or pliers.5. Installing the New Valve
Once the old valve is removed, you can install the new valve. Here's how: *
Inspect the Tub Threads:
Ensure the tub threads are clean and free of any debris or corrosion. *Install the Valve:
Align the new valve with the tub spout opening and carefully thread it into place. Tighten the valve using a pipe wrench, but avoid overtightening, which could damage the threads. *Reconnect the Supply Lines:
Attach the supply lines to the new valve, paying careful attention to the correct orientation of the hot and cold lines. Use plumber's tape to seal the threads and prevent leaks. *Reinstall the Spout:
Place the tub spout back on the valve and tighten the locking nut if applicable. *Reinstall the Faucet Handle:
Attach the faucet handle to the new valve and tighten it securely.6. Testing for Leaks
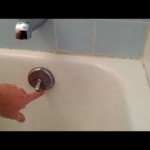
After installing the new valve, it's crucial to test for any leaks. Turn the water supply back on slowly, keeping an eye out for any drips or leaks from the new valve, supply lines, or tub spout. If you find any leaks, carefully re-tighten the connections or replace any faulty components.

Replacing A Stuck Moen Shower Valve Cartridge

Faucet Cartridges Shower Moen Solutions

Lvuzo 1222 Replacement Cartridge With Removal Tool 104421 For Moen And Compatible One Handle Posi Temp Faucet Hssa04 2fs057

How To Replace A Moen Shower Cartridge

How To Repair A Moen Shower Tub Valve

1225 Cartridge Single Handle Shower Moentrol Valve Moen Solutions

Lvuzo 1222 Replacement Cartridge With Removal Tool 104421 For Moen And Compatible One Handle Posi Temp Faucet Hssa04 2fs057

Moen 1 Handle Brass And Plastic Tub Shower Valve Cartridge 1222 At Com

Diy Bath And Shower Mixer Valve Repair Moen 1222 Posi Temp Cartridge Replacement It S Easy

Moen 1 Handle Brass And Plastic Faucet Tub Shower Cartridge 1225 At Com