How to Install a Bathtub Faucet: A Step-by-Step Guide
Upgrading your bathtub faucet is a great way to refresh the look and functionality of your bathroom. Whether you're replacing an old, leaky faucet or simply want to give your space a new style, installing a bathtub faucet is a DIY project that can be completed in a few hours with the right tools and materials. ### Step 1: Gather Tools and Materials Before you begin, make sure you have all the necessary tools and materials on hand: -Tools:
- Adjustable wrench - Basin wrench - Pliers - Screwdriver - Tape measure -Materials:
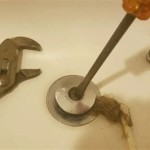
- New bathtub faucet - Faucet mounting kit (usually included with the faucet) - Plumber's putty - Teflon tape - Shut-off valves (if not included with the faucet) ### Step 2: Prepare the Work Area Begin by turning off the water supply to the bathtub. There should be a shut-off valve located near the bathtub or under the sink. If there isn't one, you will need to turn off the main water supply to your home. Once the water is turned off, remove the old faucet. Use the adjustable wrench to loosen the nuts that hold the faucet in place. If the nuts are difficult to remove, you can use a basin wrench to get a better grip. Once the nuts are removed, you can pull the faucet out of the wall. ### Step 3: Install the New Faucet Clean the area where the old faucet was installed. Use a damp cloth to wipe away any dirt or debris. Apply a bead of plumber's putty around the base of the new faucet. This will help to create a watertight seal. Insert the new faucet into the mounting holes. Make sure that the faucet is properly aligned and that the spout is pointing in the desired direction. Secure the faucet in place with the mounting nuts. Tighten the nuts until they are snug. ### Step 4: Connect the Water Supply Lines Connect the water supply lines to the faucet. Use Teflon tape to wrap the threads of the water supply lines before connecting them to the faucet. This will help to prevent leaks. Turn on the water supply and check for leaks. If you see any leaks, tighten the connections until the leaks stop. ### Step 5: Install the Escutcheon Plate The escutcheon plate is the decorative cover that goes around the base of the faucet. Position the escutcheon plate over the mounting nuts and secure it in place with the screws provided. ### Step 6: Enjoy Your New Bathtub Faucet Your new bathtub faucet is now installed and ready to use. Turn on the water and check the temperature and water pressure. Make any necessary adjustments to the faucet controls. With a little care and maintenance, your new bathtub faucet will provide you with years of trouble-free use.
Installing A Tub Faucet Fine Homebuilding

Learn How To Remove And Install Various Tub Spouts

Installing A Tub Faucet Fine Homebuilding

Learn How To Remove And Install Various Tub Spouts

How To Replace A Bathtub Faucet Simply Designing With Ashley

Learn How To Remove And Install Various Tub Spouts

How To Replace A Bathtub Spout Diy Family Handyman

Installing A Tub Faucet Fine Homebuilding

Installation Instructions For Bathselect Crimea Antique Brass Dual Handled Bathroom Sink Faucet

Installing A Tub Faucet Fine Homebuilding

