Essential Aspects of Installing a Bathtub Drain
Installing a bathtub drain can seem like a daunting task, but with the right preparation and knowledge, it can be a relatively straightforward process. Here's a comprehensive guide to help you get the job done efficiently and effectively:
Prepare and Gather Materials:
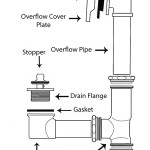
Before you begin, ensure you have all the necessary tools and materials: - Bathtub drain assembly (including drain flange, strainer, and overflow plate) - Plumber's putty - Teflon tape - Adjustable wrench - Screwdriver - Utility knife - Measuring tape
Disconnect the Previous Drain:
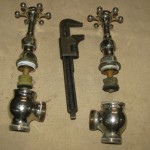
If replacing an existing drain, start by disconnecting the old assembly. Use an adjustable wrench to loosen the drain flange and carefully remove it. If there is any caulk or adhesive, use a utility knife to remove it.
Install the Overflow Plate:
Apply a thin bead of plumber's putty around the base of the overflow plate. Position the plate over the overflow hole and press it into place, ensuring it is level. Screw in the mounting screws to secure it.
Install the Drain Flange:
Apply a generous amount of plumber's putty to the bottom of the drain flange. Insert the flange into the drain hole and press it down firmly. Use an adjustable wrench to tighten the flange's locknut, ensuring a snug fit.
Wrap the Strainer with Teflon Tape:
Take the bathtub strainer and wrap several layers of Teflon tape around the threads at the bottom. This will help create a watertight seal.
Install the Strainer:
Insert the taped strainer into the drain flange and screw it down by hand until it becomes snug. Use the adjustable wrench to further tighten it, but be careful not to overtighten.
Test for Leaks:
Connect the bathtub drain to the drain line and turn on the water. Check for any leaks around the drain flange, overflow plate, and strainer. If you notice any, tighten the connections further.
Clean and Caulk:
Use a damp cloth to wipe away any excess putty or Teflon tape. Apply a line of caulk around the base of the drain flange and overflow plate for added protection against leaks. Allow the caulk to cure according to the manufacturer's instructions.
By following these steps carefully, you can successfully install a bathtub drain and enjoy a leak-free bathing experience. Remember to take safety precautions, such as wearing gloves and eye protection during the process.

How To Install A Bathtub Toolrev

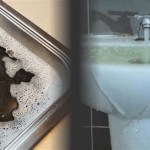
Tub Drain How To Seal And Unclog A Bathtub Knoxville Plumbing

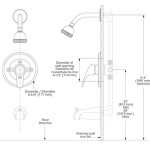
Bathtub Plumbing Installation Drain Diagrams

Replacing A Bathtub Fine Homebuilding

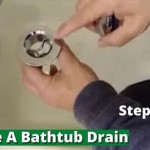
How To Remove A Bathtub Drain Forbes Home

How To Replace Bathtub Drain Stopper With A Lift And Turn Diy

7 Bathtub Plumbing Installation Drain Diagrams

How To Replace A Bathtub Drain

Bathtub Plumbing Installation Drain Diagrams Shower

Bathtub Drain Replacement How To Replace Or Install A Homeserve Usa
Related Posts