How To Stop A Dripping Bathtub Faucet
A dripping bathtub faucet is not just annoying, but it can also waste a lot of water. If you're dealing with a leaky faucet, there are a few things you can do to stop the dripping.
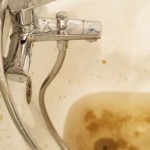
The first step is to determine the source of the leak. If the water is dripping from the handle, then the problem is likely with the washer. If the water is dripping from the spout, then the problem is likely with the O-ring. Once you know the source of the leak, you can start to fix it.
Replacing a Washer
To replace a washer, you will need a new washer, a screwdriver, and a pair of pliers. First, turn off the water supply to the faucet. Next, remove the handle by unscrewing the screws that hold it in place. Once the handle is removed, you will be able to see the washer. Use the pliers to remove the old washer and replace it with the new one. Finally, reassemble the faucet and turn on the water supply.
Replacing an O-ring
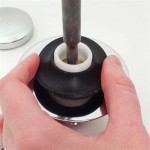
To replace an O-ring, you will need a new O-ring, a screwdriver, and a pair of pliers. First, turn off the water supply to the faucet. Next, remove the aerator by unscrewing it from the spout. Once the aerator is removed, you will be able to see the O-ring. Use the pliers to remove the old O-ring and replace it with the new one. Finally, reassemble the faucet and turn on the water supply.
Other Causes of Leaky Faucets
In some cases, a leaky faucet may be caused by a problem with the faucet body. If the faucet body is cracked or damaged, it will need to be replaced. This is a more complex repair that should be performed by a qualified plumber.
If you have tried all of the above steps and you are still unable to stop the leak, then you may need to call a plumber. A plumber will be able to diagnose the problem and make the necessary repairs.

How To Fix A Leaky Bathtub Faucet 6 Ways Stop Drips

How To Fix A Leaking Bathtub Faucet Diy Family Handyman

How To Fix A Leaky Bathtub Faucet 6 Ways Stop Drips

How To Fix A Leaking Bathtub Faucet Diy Family Handyman

How To Fix A Leaky Bathtub Faucet Removing The Spout From

How To Stop A Dripping Bathtub Faucet Nj Plumbing Repair Replacement And Maintenance

How To Fix A Leaking Bathtub Faucet The Home Depot

How To Fix A Leaky Bathtub Faucet 6 Ways Stop Drips

How To Fix A Leaking Bathtub Faucet The Home Depot

How To Fix A Leaking Bathtub Faucet Diy Family Handyman
Related Posts