How to Resurface a Bathtub Like a Pro
Whether it's a bathtub, sink, or countertop, resurfacing is a simple and cost-effective way to give your bathroom a fresh, updated look. While there are some that opt to hire a professional, resurfacing is a DIY project that can be easily accomplished with the right tools and materials.
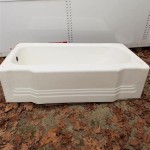
Before you begin, it's important to assess the condition of your bathtub. If the damage is severe, such as chips, cracks or holes, it may be necessary to replace the tub entirely. However, if the damage is minor, such as scratches or surface stains, resurfacing can restore your tub to its former glory.
Materials You'll Need:
- Resurfacing kit (includes cleaner, primer, and resurfacing compound)
- Sandpaper (coarse and fine grits)
- Tack cloth
- Paintbrush or roller
- Safety glasses and gloves
Step-by-Step Instructions:
Step 1: Prepare the Surface
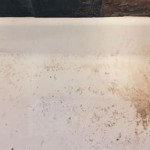
Clean the tub thoroughly with the provided cleaner. Remove all soap scum, mildew, and dirt. Allow the tub to dry completely.
Step 2: Sand the Surface
Use coarse sandpaper to scuff up the surface of the tub, creating a rough texture for the resurfacing compound to adhere to. Once the surface is rough, switch to fine sandpaper to smooth it out.
Step 3: Apply the Primer
With a paintbrush or roller, apply a thin layer of primer to the entire surface of the tub. Allow the primer to dry completely according to the manufacturer's instructions.
Step 4: Apply the Resurfacing Compound
Mix the resurfacing compound according to the manufacturer's directions. Using a paintbrush or roller, apply a thin, even coat to the entire surface of the tub. Allow the first coat to dry partially (about 30 minutes).
Step 5: Apply a Second Coat
Once the first coat is partially dry, apply a second coat of resurfacing compound. This time, work in small sections, blending the edges as you go.
Step 6: Smooth the Surface
While the second coat is still wet, use a damp sponge or brush to smooth out any bumps or imperfections.
Step 7: Allow to Cure
Allow the resurfacing compound to cure for at least 24 hours before using the tub. Refer to the manufacturer's instructions for specific curing times.
Tips for Success:
- Wear safety glasses and gloves to protect yourself from chemicals.
- Open up windows or use a fan to ventilate the area while working with chemicals.
- Follow the manufacturer's instructions carefully.
- If you're not confident in your DIY skills, consult a professional.
- Regular cleaning and maintenance will help extend the life of your resurfaced tub.
With careful preparation and attention to detail, you can resurface your bathtub like a pro, saving time, money, and giving your bathroom a stunning upgrade.

Bathroom Resurfacing Resurface Old Bathtub Alaska Superior Refinishing Of

Bathtub Resurfacing Custom Tub And Tile

Bathtub Refinishing Todds Porcelain Fiberglass Repair

How Long Does Reglazing A Bathtub Last

Should I Buy A New Bathtub Or Resurface Artistic Refinishing

Is It Time To Refinish Your Tub Find Out Bay State Refinishing

Bathtub Refinishing Chip Repair Tile Steam Cleaning In Fresno Ca The Medic

Bathtub Refinishing In Dallas Tx Happy Tubs Repair

Bathtub Refinishing Service For Fort Smith Arkansas

Bathroom Reglazing Rhode Island We Refinish Bathtubs Tiles Sinks Countertops In Ri Ma Ct