The article should contain a disclaimer. Disclaimer: Plumbing repairs can be complex and may require specific skills and knowledge. Mishandling plumbing can lead to water damage, property damage, and personal injury. If you are not comfortable completing this project yourself, it is strongly recommended to consult a qualified and licensed plumber. This article is for informational purposes only and should not be considered a substitute for professional advice. The author and publisher are not responsible for any damages or injuries resulting from the use of this information.
How To Replace a Delta Bathtub Faucet Stem
Replacing a worn or damaged Delta bathtub faucet stem is a common plumbing repair that can often be accomplished by homeowners with basic tools and a little patience. A leaky or difficult-to-turn bathtub faucet is a strong indicator that the stem assembly within the faucet handle needs replacement. By replacing the stem, you can resolve dripping issues, restore smooth handle operation, and prevent further water damage.
This article provides a comprehensive guide to replacing a Delta bathtub faucet stem. It covers the necessary tools and safety precautions and offers step-by-step instructions to ensure a successful repair. Understanding the components of a Delta faucet and identifying the correct replacement stem are crucial steps in this process.
Before beginning the process, it's important to identify the specific type of Delta faucet you have. Delta has manufactured various faucet styles over the years, and the stem replacement process may differ slightly depending on the model. Common Delta faucet types include two-handle faucets, single-handle faucets, and cartridge-style faucets. This guide primarily focuses on the two-handle faucet, as it is one of the most common types found in homes.
Gathering Necessary Tools and Materials
Before you begin the faucet stem replacement, you need to assemble all the required tools and materials. Preparing everything in advance will streamline the process and minimize interruptions.
Here's a list of the tools and materials you will likely need:
* New Delta Faucet Stem(s): Purchase the correct replacement stem(s) for your specific Delta faucet model. It's often best to bring the old stem with you to the hardware store to ensure a proper match. Consider replacing both the hot and cold water stems at the same time, even if only one is leaking. This ensures consistent operation and prevents future issues. * Screwdrivers: You'll need both Phillips-head and flat-head screwdrivers in various sizes. The specific sizes will depend on the model of your Delta faucet. * Adjustable Wrench: An adjustable wrench is essential for loosening and tightening the packing nut that holds the stem in place. * Penetrating Oil: Penetrating oil helps loosen corroded or stuck parts, making the disassembly process much easier. * Needle-Nose Pliers: These pliers can be useful for removing small parts or debris from inside the faucet housing. * Seat Wrench (Optional): A seat wrench may be needed to remove and replace the valve seat if it is damaged or worn. The valve seat is the small, removable component that the faucet stem seals against. * Plumber's Grease: Applying plumber's grease to the new stem's threads and washers ensures smooth operation and prevents leaks. * Clean Rags or Towels: These are essential for cleaning up water spills and wiping down faucet components. * Flashlight or Headlamp: Provides adequate lighting to see inside the faucet housing and work effectively. * Basin Wrench (Optional): A basin wrench is useful for accessing and loosening nuts in tight spaces, particularly under the sink. While not always necessary for tub faucets, it can be helpful in some installations. * Safety Glasses: Protect your eyes from debris or splashing water. * Gloves: Protect your hands and provide a better grip on tools.Having these tools and materials readily available will make the replacement process more efficient and less frustrating.
Step-by-Step Guide to Replacing the Faucet Stem
With the tools and materials prepared, you can proceed with replacing the Delta bathtub faucet stem. Follow these steps carefully to ensure a successful repair.
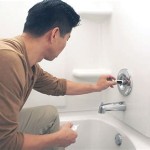
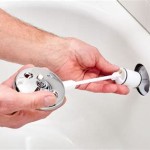
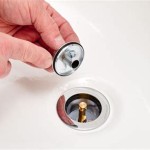
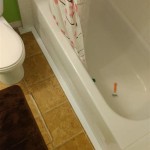
1. Turn Off the Water Supply: Locate the shut-off valves for both the hot and cold water lines that supply the bathtub faucet. These valves are typically located in the basement, under the sink, or in an access panel behind the tub. Turn both valves clockwise until they are completely closed. After turning off the water supply, turn on the faucet to relieve any remaining pressure in the pipes. 2. Protect the Tub Surface: Place a towel or drop cloth over the bathtub surface around the faucet to prevent scratches or damage from dropped tools. 3. Remove the Faucet Handles: The method for removing the faucet handles varies depending on the faucet style. Some handles are held in place by a visible screw, while others have a decorative cap that conceals the screw. If there is a decorative cap, carefully pry it off with a flat-head screwdriver. Once the screw is exposed, use the appropriate screwdriver (Phillips-head or flat-head) to remove it. After removing the screw, gently pull the handle straight off the faucet stem. Repeat this process for both the hot and cold water handles. 4. Remove the Handle Escutcheons: The escutcheon is the decorative plate that sits behind the handle and covers the faucet valve. Similar to the handles, escutcheons may be held in place by screws or may simply be threaded onto the valve body. If there are screws, remove them. If the escutcheons are threaded, turn them counterclockwise to unscrew them from the faucet body. 5. Loosen the Packing Nut: The packing nut is the large nut that holds the faucet stem in place within the faucet body. Use an adjustable wrench to loosen the packing nut. Apply penetrating oil to the threads of the packing nut if it is difficult to turn. Allow the oil to soak in for a few minutes before attempting to loosen the nut again. 6. Remove the Old Faucet Stem: Once the packing nut is loosened, carefully pull the old faucet stem straight out of the faucet body. If the stem is stuck, gently wiggle it back and forth while pulling. Avoid using excessive force, as this could damage the faucet body. 7. Inspect the Valve Seat: After removing the faucet stem, inspect the valve seat inside the faucet body. The valve seat is the small, removable component that the faucet stem seals against. If the valve seat is corroded, damaged, or worn, it should be replaced. Use a seat wrench to remove the old valve seat and install a new one. If you're unsure whether to replace the seat, it's generally a good practice to do so, as it can contribute to leaks even with a new stem. 8. Clean the Faucet Body: Before installing the new faucet stem, thoroughly clean the inside of the faucet body to remove any debris or corrosion. Use a clean rag to wipe down the interior surfaces. 9. Apply Plumber's Grease: Apply a thin layer of plumber's grease to the threads of the new faucet stem and to the rubber washers. This will ensure smooth operation and prevent leaks. 10. Install the New Faucet Stem: Carefully insert the new faucet stem into the faucet body. Ensure that it is properly aligned and seated correctly. 11. Tighten the Packing Nut: Tighten the packing nut with the adjustable wrench. Do not overtighten the nut, as this could damage the stem or the faucet body. Tighten the nut until it is snug but not excessively tight. 12. Reassemble the Faucet: Replace the handle escutcheons and secure them with screws or by threading them onto the faucet body. Reinstall the faucet handles and secure them with screws. 13. Turn On the Water Supply: Slowly turn the water supply valves back on, one at a time. Check for leaks around the faucet stems and handles. If you detect any leaks, tighten the packing nuts slightly. 14. Test the Faucet: Turn the faucet handles on and off to test the operation of the new faucet stems. Ensure that the water flows smoothly and that there are no drips or leaks.By following these steps carefully, you should be able to successfully replace a Delta bathtub faucet stem and restore proper operation to your faucet.
Troubleshooting Common Problems
While the faucet stem replacement process is generally straightforward, some common problems may arise. Here are some troubleshooting tips to help you resolve these issues.
* Packing Nut is Stuck: If the packing nut is difficult to loosen, apply penetrating oil to the threads and allow it to soak in for several minutes. You can also try gently tapping the nut with a hammer to help loosen it. Avoid using excessive force, as this could damage the nut or the faucet body. * Faucet Stem is Stuck: If the faucet stem is stuck in the faucet body, gently wiggle it back and forth while pulling. You can also try using needle-nose pliers to grip the stem and pull it out. Apply penetrating oil around the stem to help loosen it. * New Faucet Still Leaks: If the new faucet stem leaks after installation, check the packing nut to ensure that it is properly tightened. Also, inspect the valve seat to make sure that it is not damaged or corroded. If the valve seat is damaged, replace it. Make sure all washers on the new stem are seated properly. * Handle is Difficult to Turn: If the handle is difficult to turn after installing the new faucet stem, apply plumber's grease to the stem's threads and washers. This will ensure smooth operation. Over tightening the packing nut can also contribute to this problem. Loosen it slightly. * Identifying the Correct Stem: Take the old stem with you when you go to purchase a replacement stem. If that is not possible, carefully note the length and diameter of the stem, as well as the number of splines on the stem's broach. Cross-reference this information with the specifications of the new stem.Addressing these potential issues proactively will help ensure a smooth and successful faucet stem replacement.

How To Replace A Delta Tub Spout

How To Install Or Remove A Tub Spout Delta Bathtub Filler

How To Repair A Delta Tub Shower Valve

How To Replace A Delta Cartridge And Fix Leaky Bathtub Faucet It Tutorials

How To Replace The Stem Unit Assembly In A Delta Faucet

Delta Shower Faucet Cartridge Replacement 1700 Monitor Leak Repair

Lvuzo 2 35 Cm Faucet Stem Assembly And Replacement Stems Cartridges For Delta Bathtub Shower Sink Bathroom Pack Hssa04 4fs039

Delta Monitor Shower Valve Cartridge Replacement

How To Remove Bathtub Faucet Stems Quick And Easy

How To Repair A Shower Valve Stem Ask This Old House