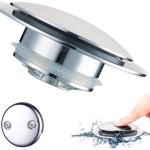
How To Replace a Bathtub Overflow Plate
The bathtub overflow plate, often a small, circular or rectangular fixture located near the top of the tub, plays a crucial role in preventing water from overflowing onto the bathroom floor. Over time, these plates can become corroded, damaged, or simply outdated in appearance. Replacing the overflow plate is a relatively simple plumbing task that most homeowners can undertake without needing to call a professional. This article provides a detailed, step-by-step guide on how to replace a bathtub overflow plate effectively and safely.
Identifying the Type of Overflow Plate Mechanism
Before embarking on the replacement process, accurately identifying the type of overflow plate mechanism is essential. Although the external appearance of the plate may seem uniform, the underlying mechanisms can differ significantly. The two primary types are the toggle linkage and the cable-operated drain. Misidentification can lead to the purchase of an incompatible replacement and potential complications during installation.
The toggle linkage system is one of the earlier versions and works by using a lever connected to a stopper at the bottom of the tub. Turning the overflow plate activates the lever, raising or lowering the stopper to control drainage. Visual cues that indicate a toggle linkage system include a more rigid feel when turning the overflow plate lever and often a distinct 'click' sound as the lever engages.
Cable-operated drains, also known as trip lever drains, utilize a cable to control the drain stopper. Turning the overflow plate mechanism pulls or releases the cable, which, in turn, opens or closes the drain. This type is generally more modern and offers smoother operation compared to toggle linkage systems. Identifying a cable-operated drain often involves a smoother turning motion of the overflow plate and less resistance. Careful examination of the drain assembly, if accessible from beneath the tub, will also reveal the presence of a cable connected to the drain stopper.
Understanding the existing mechanism is critical for selecting the correct replacement. When purchasing a new overflow plate, be sure to specify the type of drain system – toggle linkage or cable-operated – to ensure compatibility. Many replacement kits are specifically designed for one type or the other. Failure to do so can result in a new overflow plate that is incompatible with the existing drain system.
Gathering the Necessary Tools and Materials
Proper preparation is essential for a successful overflow plate replacement. Having the right tools and materials readily available can significantly streamline the process, minimize potential delays, and prevent damage to the surrounding area. The following is a comprehensive list of the items typically required for the task:
- New Overflow Plate and Stopper Assembly: Purchase a replacement overflow plate and stopper assembly that is compatible with the identified drain type (toggle linkage or cable-operated). It is generally advisable to replace the entire assembly, including the stopper, to ensure proper functionality and prevent future issues.
- Screwdrivers: A set of screwdrivers, including both Phillips head and flathead types, is necessary to loosen and tighten the screws holding the overflow plate in place. The size of the screwdriver should match the size of the screw heads to prevent stripping.
- Pliers: Pliers can be useful for gripping and manipulating small parts, such as the linkage or cable within the drain assembly. Needle-nose pliers are particularly helpful for accessing tight spaces.
- Penetrating Oil: Applying penetrating oil to the screws of the old overflow plate can help to loosen them if they are corroded or stuck. Allow the oil to soak for several minutes before attempting to remove the screws.
- Clean Rags or Sponges: Rags or sponges are essential for cleaning the area around the overflow plate and for wiping up any spills or debris during the replacement process.
- Plumber's Putty or Silicone Caulk: Plumber's putty or silicone caulk can be used to create a watertight seal between the new overflow plate and the bathtub surface. This is particularly important to prevent water from leaking behind the plate and causing damage to the surrounding wall.
- Work Light: A work light can provide better visibility, especially in dimly lit bathrooms or when working under the tub (if access is available).
Having all these items prepared and within easy reach will contribute to a smoother and more efficient replacement process. Before starting, visually inspect the new overflow plate assembly to ensure all necessary components are present and undamaged.
Step-by-Step Replacement Procedure
With the proper tools and materials gathered and the type of overflow drain identified, the actual replacement process can begin. The following steps outline how to safely and effectively replace a bathtub overflow plate:
- Prepare the Work Area: Place a drop cloth or old towel around the bathtub drain area to protect the tub surface from scratches or damage. Ensure the area is well-lit.
- Remove the Old Overflow Plate: Use a screwdriver to carefully loosen and remove the screws holding the old overflow plate in place. If the screws are corroded or stuck, apply penetrating oil and allow it to soak for several minutes before attempting to remove them. Be patient and avoid forcing the screws, as this can strip the heads or break the screws.
- Remove the Old Stopper Assembly: Once the overflow plate is removed, carefully extract the old stopper assembly from the drain. This may involve pulling out a linkage mechanism or disconnecting a cable from the drain stopper. Take note of how the old assembly is connected, as this will help with installing the new assembly. For toggle linkage systems, the linkage arm will need to be disconnected. For cable-operated systems, the cable should be detached from the stopper.
- Clean the Area: Thoroughly clean the area around the drain opening and the bathtub surface where the new overflow plate will be installed. Remove any old putty, caulk, or debris. A clean surface is essential for creating a watertight seal.
- Install the New Stopper Assembly: Insert the new stopper assembly into the drain, ensuring it is properly aligned. For toggle linkage systems, connect the linkage arm to the stopper and align it with the overflow opening. For cable-operated systems, carefully thread the cable through the overflow opening and connect it to the stopper according to the manufacturer's instructions. Ensure the cable is properly seated and adjusted to allow the stopper to fully open and close.
- Apply Plumber's Putty or Silicone Caulk: Apply a thin bead of plumber's putty or silicone caulk to the back of the new overflow plate, around the area that will contact the bathtub surface. This will create a watertight seal and prevent leaks.
- Install the New Overflow Plate: Carefully align the new overflow plate with the screw holes and press it firmly against the bathtub surface. Ensure the plate is centered and level.
- Secure the Overflow Plate: Insert the screws into the screw holes and tighten them gently. Avoid over-tightening, as this can crack the overflow plate or damage the bathtub. Tighten the screws evenly to ensure the plate is properly seated and sealed.
- Test the Drain: Fill the bathtub with a small amount of water and test the drain by activating the overflow plate mechanism. Ensure the stopper opens and closes properly and that water drains freely. Check for any leaks around the overflow plate and the drain opening. If leaks are detected, tighten the screws further or reapply plumber's putty or silicone caulk if necessary.
- Clean Up: Remove any excess putty or caulk from around the overflow plate. Dispose of the old overflow plate and stopper assembly properly. Clean the work area and remove any tools or materials.
Following these steps carefully will ensure a successful replacement of the bathtub overflow plate. In some cases, specialized tools or techniques may be required, depending on the specific type of drain system and the condition of the existing plumbing components.
If faced with difficulties in removing the old components or doubt exists regarding the proper installation of the new assembly, consulting a qualified plumber is recommended. Attempting to force components or using improper techniques can potentially damage the drain system or the bathtub itself, resulting in more costly repairs.
Regular maintenance, such as cleaning the drain stopper and overflow opening, can help to prolong the life of the overflow plate and prevent issues such as clogs and leaks. Periodically inspecting the overflow plate for signs of corrosion or damage is also recommended. Addressing minor issues promptly can prevent more significant problems from developing over time.
Selecting the right replacement overflow plate and stopper assembly is crucial for ensuring proper functionality and preventing leaks. Before purchasing a replacement, carefully measure the existing components and consult with a knowledgeable salesperson to ensure compatibility. Choosing high-quality materials can also contribute to a longer lifespan and improved performance.
Replacing a bathtub overflow plate is a manageable task for most homeowners. By taking the time to accurately identify the type of drain mechanism, gathering the necessary tools and materials, and following the step-by-step instructions, a properly functioning and aesthetically pleasing overflow drain can be achieved. When in doubt, seeking professional assistance is always a prudent course of action.

How To Install A New Bathtub Overflow Plate Assembly

How To Replace Bathtub Overflow Plate With Trip Lever Easy Simple

Bathtub Drain And Overflow Connection Слив в ванне

Here S The Best Way To Replace Your Tub Overflow Plate Eagle Mountain Woodford Watco Blog

How To Replace A Bathtub Drain

Plumbing Can T Remove Twist Style Turn Knob Cap On Overflow Drain In Tub Home Improvement Stack Exchange

How To Replace Bathtub Drain Stopper With A Lift And Turn Diy

Replace A Bathtub Overflow Drain Plate

Plumbing Can I Replace This Trip Lever Drain Stopper Combo By Myself Home Improvement Stack Exchange

How To Fix A Trip Lever Bathtub Drain Stopper Hofen
Related Posts


