How to Replace a Two-Handle Bathtub Faucet Cartridge: A Step-by-Step Guide
A leaky two-handle bathtub faucet can be a persistent annoyance, wasting water and increasing water bills. Often, the culprit behind the leak is a worn-out cartridge. Replacing the cartridges in a two-handle faucet is a manageable DIY project for many homeowners, potentially saving the cost of a professional plumber. This article provides a comprehensive, step-by-step guide on how to replace a two-handle bathtub faucet cartridge, ensuring a successful repair and a leak-free bathtub.
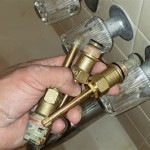
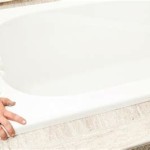
Before beginning any plumbing repair, safety is paramount. The first and most crucial step is to shut off the water supply to the bathtub faucet. Typically, there are shut-off valves located near the faucet, often beneath the bathtub access panel or in the basement directly below the bathroom. If individual shut-off valves are not present, the main water supply to the entire house must be turned off. Once the water is shut off, turn on the bathtub faucet to relieve any residual pressure in the pipes. It is recommended to place a towel or cloth in the bathtub to protect the finish from scratches and to catch any stray parts.
Key Point 1: Proper Preparation and Identification
This initial stage involves not only shutting off the water but also correctly identifying the type of faucet cartridge needed. Faucet cartridges come in various shapes and sizes, and purchasing the wrong type can lead to frustration and delays. The best approach is to identify the faucet manufacturer and model number. This information is often found on the faucet itself, on the original packaging, or in the homeowner’s manual. With this information, a replacement cartridge can be purchased from a local hardware store or online retailer.
If the manufacturer and model number are unknown, the old cartridge will need to be removed and taken to the hardware store for comparison. Before removing the existing cartridge, take a picture of the faucet assembly, especially the handle orientation and the position of any screws or clips. This photograph will serve as a valuable reference during the reassembly process. Gather the necessary tools: a flathead screwdriver, a Phillips head screwdriver, a cartridge puller (optional but often helpful), penetrating oil, adjustable pliers, and possibly an Allen wrench set.
Penetrating oil can be particularly useful if the faucet is old or the cartridge is stuck due to mineral buildup. Apply a small amount of penetrating oil around the cartridge stem and allow it to sit for several minutes. This will help to loosen the cartridge and make removal easier. Always test the penetrating oil on an inconspicuous area of the faucet finish first to ensure it does not cause discoloration or damage.
Once the water is shut off, the handles will need to be removed. The method for removing handles varies depending on the faucet design. Some handles are held in place by a visible screw, either on the front of the handle or concealed beneath a decorative cap. Use a flathead screwdriver to gently pry off the cap, revealing the screw. Other handles are secured with a hidden set screw, usually located on the side of the handle. An Allen wrench is needed to loosen this type of screw. After removing the screw, the handle should pull straight off. If the handle is stuck, gently rock it back and forth while pulling. Avoid using excessive force, as this could damage the faucet or the handle.
With the handles removed, the faucet escutcheon (the decorative plate behind the handles) may need to be removed. These escutcheons are often held in place by screws or a threaded collar. Remove any visible screws or loosen the collar by turning it counterclockwise. Once the escutcheon is removed, the cartridge will be accessible. Note the position of any stops or alignment features on the cartridge before removing it. This will ensure that the new cartridge is installed correctly.
Key Point 2: Cartridge Removal and Cleaning
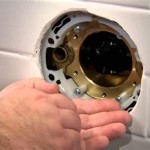
Removing the old cartridge is often the most challenging part of the process. Many cartridges are held in place by a retaining clip or nut. Identify the retention mechanism and remove it using the appropriate tool. A small, pointed tool can be used to carefully remove the retaining clip. If a retaining nut is present, use adjustable pliers to loosen and remove it. Be careful not to damage the surrounding faucet body.
If the cartridge is stuck, a cartridge puller can be used. This tool is designed to grip the cartridge and apply force to remove it without damaging the faucet. Follow the instructions that come with the cartridge puller. If a cartridge puller is not available, carefully try to wiggle the cartridge back and forth while pulling on it. Avoid using excessive force, as this could break the cartridge and make removal even more difficult. If necessary, apply more penetrating oil and let it sit for a longer period.
Once the old cartridge is removed, inspect the faucet body for any debris or mineral buildup. Use a clean cloth or brush to remove any dirt or scale. A solution of vinegar and water can be used to dissolve mineral deposits. Rinse the faucet body thoroughly with clean water before installing the new cartridge. Inspect the valve seat for any damage. If the valve seat is worn or corroded, it may need to be replaced or resurfaced to ensure a leak-free seal. A valve seat wrench can be used to remove and replace the valve seat.
Compare the old cartridge to the new cartridge to ensure they are identical. Pay close attention to the length, diameter, and the position of any alignment features. A slight variation in size or shape can prevent the new cartridge from fitting properly. If the new cartridge is slightly different from the old cartridge, double-check the manufacturer and model number to ensure that it is the correct replacement.
Key Point 3: Cartridge Installation and Reassembly
Before installing the new cartridge, apply a small amount of plumber's grease to the O-rings on the cartridge. This will help to create a watertight seal and make it easier to insert the cartridge into the faucet body. Align the cartridge with the corresponding slots or grooves in the faucet body. Push the cartridge firmly into place until it is fully seated. Reinstall the retaining clip or nut that secures the cartridge. Ensure that the retaining clip is properly seated and that the retaining nut is tightened securely.
Reassemble the faucet in the reverse order of disassembly. Replace the escutcheon, ensuring that it is properly aligned and secured. Reinstall the handles, aligning them in the correct orientation. Tighten the screws or set screws that hold the handles in place. Be careful not to overtighten the screws, as this could damage the handles or the faucet body. Turn the water supply back on slowly. Inspect the faucet for leaks around the handles and the spout. If any leaks are present, tighten the screws or nuts slightly. If the leaks persist, double-check the installation of the cartridges and ensure that they are properly seated and secured.
After turning the water back on, flush the faucet lines for a few minutes to remove any air or debris. This will also help to ensure that the new cartridges are properly seated. Check the water temperature to ensure that the hot and cold handles are functioning correctly. If the water temperature is reversed, the cartridges may have been installed incorrectly. Remove the handles and cartridges and reinstall them, paying close attention to the orientation. Dispose of the old cartridges and any used materials properly.
By following these steps, a homeowner can confidently tackle the task of replacing a two-handle bathtub faucet cartridge, effectively resolving leaks and extending the life of the faucet. Remember to exercise caution and patience throughout the process, and consult a professional plumber if any difficulties arise.

Fast Way To Replace Or Retrofit A Two Handle Shower System With One

2 Handle Shower Faucet Replacement 1 Tom Plumber

Fast Way To Replace Or Retrofit A Two Handle Shower System With One

Repairing A Leaky Two Three Handle Tub Shower Faucet

2 Handle Shower Faucet Replacement 1 Tom Plumber

How To Fix A Leaking Dripping Delta Bathtub Faucet 2

How To Repair Replace A Shower Faucet Valve Easy Diy Fix

How To Fix A Leaking Bathtub Faucet Diy Family Handyman

Delta Shower Faucet Cartridge Replacement 1700 Monitor Leak Repair

Moen 2 Handle Replacement Cartridge 1224 The Home Depot
Related Posts