Replacing a Single Bathtub Faucet Valve: A Step-by-Step Guide
A bathtub faucet valve, also known as a cartridge, is responsible for controlling the flow of water from the faucet. Over time, these valves can wear down, causing leaks, reduced water pressure, or even a complete failure. When this happens, replacing the valve is necessary to restore the functionality of your bathtub faucet. This guide will provide a comprehensive step-by-step process, outlining the necessary tools, materials, and procedures to replace a single bathtub faucet valve.
Prepare for the Replacement
Before starting the replacement process, it's crucial to gather the necessary tools and materials. This will ensure a smooth and efficient operation.
- New bathtub faucet valve: Ensure that you purchase a replacement valve that is compatible with your existing faucet.
- Adjustable wrench: This tool is essential for loosening and tightening nuts and fittings.
- Channel-lock pliers: These pliers can provide extra grip for stubborn fittings.
- Phillips screwdriver: Used for removing and installing screws securing the faucet handle.
- Basin wrench: This specialized tool is specifically designed to access and remove nuts located below the faucet, allowing for easy removal of the valve.
- Plumber's tape: This tape helps to seal threaded connections, preventing leaks.
- Bucket: This will collect any water that may leak during the replacement process.
- Towels: These will help to absorb any spills or drips.
- Safety Glasses: Protect your eyes from potential debris or water splashes.
Once you have gathered the necessary tools and materials, it's time to shut off the water supply to the faucet. Locate the shut-off valve for the bathtub, typically found near the bathtub or in the basement. Turn the valve clockwise to completely cut off the water supply. To ensure the water is completely off, turn on the faucet, confirming that no water flows.
Removing the Old Valve
With the water supply shut off, you can now proceed to remove the old bathtub faucet valve.
- Remove the faucet handle: Use a Phillips screwdriver to remove the screw securing the handle to the faucet body. Carefully lift the handle off the faucet.
- Remove the bonnet: The bonnet is the decorative cover that sits on top of the valve. Use your adjustable wrench to loosen and remove the bonnet.
- Remove the valve stem: The valve stem connects the handle to the valve cartridge. Use your channel-lock pliers to carefully remove the stem.
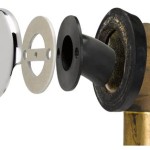
- Remove the valve cartridge: The valve cartridge is the main component that controls the water flow. Access the cartridge with a basin wrench. Grip the valve cartridge firmly with the wrench and twist it counterclockwise to loosen it. Once loose, you can pull the valve cartridge out of the faucet body.
Installing the New Valve
With the old valve removed, you're ready to install the new valve.
- Prepare the new valve: If the new valve comes with a new stem, thread it onto the valve cartridge.
- Install the new valve cartridge: Wrap the threads of the new valve cartridge with plumber's tape. This will create a watertight seal. Carefully insert the new valve cartridge into the faucet body.
- Tighten the new valve cartridge: Using the basin wrench, turn the new valve cartridge clockwise to tighten it securely. Be careful not to overtighten, as this can damage the threads.
- Install the valve stem: Insert the new valve stem into the faucet body, aligning it with the valve cartridge.
- Install the bonnet: Place the bonnet back onto the faucet body and tighten it using the adjustable wrench.
- Install the faucet handle: Align the handle with the valve stem and secure it by tightening the screw with the Phillips screwdriver.
Finishing the Replacement
Once the new valve is installed, you can now turn the water supply back on. Slowly turn the shut-off valve counterclockwise to allow the water to flow back into the faucet. Carefully check for any leaks around the valve cartridge and bonnet. If you find any leaks, tighten the connections using the appropriate wrench.
After confirming that there are no leaks, test the faucet by turning it on and off a few times. Make sure the handle operates smoothly and that the water flow is consistent. If you encounter any problems, it may be helpful to consult a professional plumber for assistance.

How To Replace A Single Handle Shower Cartridge 1 Tom Plumber

Here S How Replace A Shower Mixing Valve

How To Fix A Leaking Bathtub Faucet Diy Family Handyman

How To Fix A Leaking Single Handle Bathtub Faucet Quick And Easy

How To Fix A Leaky Single Handle Tub Shower Faucet Danco

How To Replace A Moen Cartridge And Fix Leaky Bathtub Faucet It Tutorials

How To Fix A Leaking Bathtub Faucet Diy Family Handyman

How To Repair A Delta Tub Shower Valve

How To Replace A Shower Valve Like Professional Plumber

How To Replace Pfister Single Handle Shower Cartridge
Related Posts