How To Replace a Lift And Turn Bathtub Drain
Replacing a lift and turn bathtub drain is a common plumbing task often undertaken by homeowners seeking to address issues such as leaks, corrosion, or simply to update the aesthetics of their bathroom. While it might seem daunting, with the right tools, preparation, and a methodical approach, replacing a lift and turn tub drain is within the capabilities of many DIY enthusiasts. This article provides a comprehensive guide to navigating this project, ensuring a successful and watertight outcome.
Before commencing any plumbing work, it is essential to understand the different components involved and the general process. The lift and turn drain assembly typically comprises a drain flange (the visible part within the tub), a drain body (located beneath the tub), a lift and turn stopper mechanism, and various washers and gaskets to ensure a watertight seal. Replacement involves removing the old drain assembly, cleaning the drain opening, applying plumber's putty or silicone sealant, and installing the new drain assembly. The following sections will delve into each step in detail.
Preparing for the Bathtub Drain Replacement
Proper preparation is paramount for a smooth and efficient drain replacement. Gathering the necessary tools and materials beforehand will minimize interruptions and potential delays.
Tools Required:
* Flathead Screwdriver: Useful for prying and leverage during the removal process. * Adjustable Wrench: Needed for loosening and tightening drain components. * Channel-Lock Pliers: Provides a secure grip on drain pipes and fittings. * Drain Removal Tool (Tub Drain Extractor): Specifically designed for removing stubborn tub drains. Options include internal wrench types and external wrench types. * Putty Knife or Scraper: For removing old plumber's putty or sealant. * Clean Rags or Paper Towels: For cleaning and wiping surfaces. * Bucket or Container: To catch any water or debris. * Gloves: To protect hands. * Safety Glasses: To protect eyes from debris. * Penetrating Oil (Optional): Can help loosen corroded drain components.Materials Required:
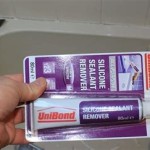
* New Lift and Turn Bathtub Drain Assembly: Ensure it is compatible with the existing tub drain configuration. Check the drain pipe size and the strainer size. * Plumber's Putty or Silicone Sealant: For creating a watertight seal between the drain flange and the tub. Select according to manufacturer's recommendations and personal preference. Plumber's putty is often preferred for its ease of use and cleanup, while silicone offers superior long-term durability and flexibility. * Thread Seal Tape (Teflon Tape): For sealing threaded connections.Shutting off the Water Supply:
Although this project does not directly involve the water supply lines, it is always a good practice to know the location of the main water shut-off valve in case of an unexpected plumbing emergency. While not strictly necessary in this instance, having this knowledge readily available can be invaluable in other plumbing situations.
Workspace Preparation:
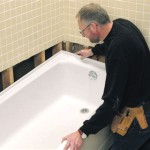
Protect the bathtub surface from scratches and damage by placing a towel or old blanket inside the basin. This also provides a more comfortable surface to work on. Ensure adequate lighting to clearly see the drain assembly and the surrounding area.
Removing the Old Bathtub Drain
The drain removal process requires patience and a systematic approach. Avoid using excessive force, as this can damage the tub or the drain plumbing.
Loosening the Stopper:
Begin by removing the lift and turn stopper. Typically, this involves loosening a small set screw located on the side of the stopper. Use a small Allen wrench or screwdriver to loosen the screw, then lift the stopper straight up and out of the drain flange. If the set screw is corroded or stuck, apply penetrating oil and allow it to soak for a few minutes before attempting to loosen it.
Removing the Drain Flange:
The drain flange is the visible part of the drain assembly situated inside the tub. To remove it, use a tub drain extractor tool. Insert the drain extractor tool into the drain flange and turn it counterclockwise. The tool should grip the internal walls of the flange, allowing you to unscrew it from the drain body below. If a dedicated drain extractor tool is unavailable, an internal pipe wrench may be used as an alternative, exercising caution to avoid damaging the tub surface.
If the drain flange is particularly stubborn and refuses to budge, apply penetrating oil around the edge where the flange meets the tub surface. Allow the oil to soak in for several minutes to help break down any corrosion or sealant. Repeat the extraction process, applying gentle but firm pressure.
Accessing the Drain Body:
Access to the drain body beneath the tub may require removing an access panel if one is present. Otherwise, it may be necessary to access the plumbing from underneath the house, typically in a crawl space or basement. Position a bucket or container beneath the drain body to catch any residual water or debris.
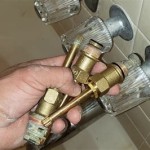
Disconnecting the Drain Body:
Depending on the drain assembly's configuration, the drain body may be connected to the overflow pipe and the main drain pipe using threaded connections or compression fittings. Use adjustable wrenches or channel-lock pliers to carefully loosen these connections. If threaded connections are used, turn them counterclockwise to loosen. Be prepared for water to spill out as the connections are separated. Disconnect the drain body from both the overflow pipe and the main drain pipe.
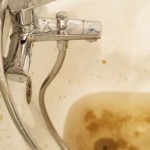
Cleaning the Drain Opening:
Once the old drain assembly has been removed, thoroughly clean the drain opening in the tub. Use a putty knife or scraper to remove any remaining plumber's putty, silicone sealant, or debris. Ensure the surface is clean, dry, and free of any obstructions. A clean surface is essential for creating a proper seal with the new drain assembly.
Installing the New Bathtub Drain
With the old drain removed and the drain opening cleaned, the installation of the new lift and turn bathtub drain can begin.
Preparing the New Drain Flange:
Apply a generous bead of plumber's putty or silicone sealant around the underside of the new drain flange. The sealant should form a continuous ring that will create a watertight seal between the flange and the tub surface. Ensure the sealant is evenly distributed and covers the entire contact area.
Inserting the Drain Flange:
Carefully insert the new drain flange into the drain opening from inside the tub. Press down firmly on the flange to ensure the sealant makes good contact with the tub surface. Remove any excess sealant that squeezes out from around the edges using a putty knife or a clean cloth.
Attaching the Drain Body:
From beneath the tub, attach the new drain body to the drain flange. Align the threads of the drain body with the threads on the underside of the flange and begin tightening the connection by hand. Once the connection is hand-tight, use an adjustable wrench to further tighten the connection. Avoid over-tightening, as this can damage the tub or the drain components. The goal is to achieve a snug and secure connection that will not leak.
Connecting the Overflow and Drain Pipes:
Reconnect the drain body to the overflow pipe and the main drain pipe. If using threaded connections, apply thread seal tape (Teflon tape) to the threads before making the connections. Wrap the tape clockwise around the threads, overlapping each layer. Tighten the connections using adjustable wrenches, ensuring they are snug and secure. If using compression fittings, follow the manufacturer's instructions for proper installation. Compression fittings typically require tightening a nut to compress a ferrule, creating a watertight seal.
Installing the Stopper Mechanism:
Insert the lift and turn stopper mechanism into the drain flange. Tighten the set screw on the side of the stopper to secure it in place. Adjust the stopper mechanism as needed to ensure it properly seals the drain when closed and allows water to drain freely when open. Test the stopper by filling the tub with a small amount of water and checking for leaks.
Testing for Leaks:
After completing the installation, thoroughly test for leaks. Fill the tub with water to various levels, checking for any drips or leaks around the drain flange, drain body, and pipe connections. Pay close attention to the areas where the drain body connects to the overflow pipe and the main drain pipe. If any leaks are detected, tighten the connections further or reapply sealant as needed. It may be necessary to disassemble the connections and start over if the leaks persist.
Final Inspection and Cleanup:
Once you are confident that the drain assembly is leak-free, perform a final inspection. Ensure all connections are secure and properly tightened. Clean up any excess sealant or debris from the tub and surrounding area. Remove any tools or materials from the workspace.

Cannot Un The Knob From Lift And Turn Bathtub Stopper R Fixit

How To Remove A Bathtub Drain The Home Depot

Removing A Lift Turn Stopper 1 Step

How To Replace Bathtub Drain Stopper With A Lift And Turn Diy

How To Properly Remove A Lift And Turn Bathtub Stopper

How To Remove A Bathtub Drain Stopper Mr Rooter

How To Remove A Bathtub Drain Stopper

Sento Nickel Lift And Turn Bathtub Drain Assembly Stopper Kit Fit Both 1 2 Inch Or 5 8 Strainer Heavy Duty Metal With Matching S Easy Installation Satin Com

How To Replace A Bathtub Drain Stopper With Lift And Turn Repair

How To Replace A Bathtub Drain Stopper With Lift And Turn Old Shower Installation
Related Posts