How To Replace A Bathtub and Wall Surround in a Mobile Home
Replacing a bathtub and its surrounding wall in a mobile home requires careful planning and execution, considering the unique construction characteristics of these dwellings. Mobile homes often have limited space and different plumbing configurations compared to traditional houses. This article provides a detailed guide on how to successfully undertake this replacement project, covering preparation, removal, installation, and finishing touches.
Preparation is Key: Planning and Gathering Materials
Before commencing any demolition, a thorough assessment of the existing bathtub and wall surround is essential. Note the dimensions, materials, and the way they are connected to the plumbing and surrounding structures. Take detailed photographs of the existing setup; these will be valuable references during the installation process. Accurate measurements will prevent costly errors when purchasing the replacement tub and surround.
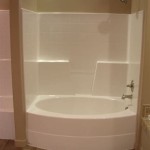
Mobile home bathtubs are often smaller and lighter than standard tubs found in site-built homes. When selecting a replacement, ensure compatibility with the existing space and plumbing connections. Consider the depth and width of the new tub, as well as the location of the drain. Acrylic or fiberglass options are popular due to their lightweight nature and resistance to cracking, which can be beneficial in the somewhat flexible environment of a mobile home.
For the wall surround, options include acrylic, fiberglass, and composite materials. Choose a surround that complements the bathtub and provides adequate waterproofing. Measure the height and width of the existing surround to ensure the new one fits seamlessly. It is also advisable to select a surround with a textured surface, which is more visually appealing and less prone to displaying water spots.
Beyond the tub and surround, gather the necessary tools and materials. These typically include:
- Adjustable wrench
- Pliers
- Screwdrivers (Phillips and flathead)
- Utility knife
- Caulk gun
- Level
- Tape measure
- Drill with various bits
- Putty knife or scraper
- Gloves
- Safety glasses
- Drop cloths or protective sheeting
- Construction adhesive suitable for use with the chosen surround material
- Plumber’s putty
- Silicone caulk
- Shims (if needed)
- New drain assembly (if the old one is damaged or corroded)
- New shut-off valves (optional, but recommended if the existing ones are old)
It is always prudent to have extra materials on hand, such as additional caulk or adhesive, to account for unforeseen circumstances or adjustments during the installation process. Turning off the water supply to the mobile home is a critical preliminary step. Locating the main shut-off valve and testing it to ensure it functions correctly is essential. Drain the water lines to prevent leaks during the bathtub removal.
Removing the Old Bathtub and Wall Surround: A Step-by-Step Guide
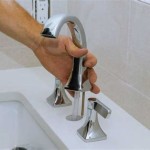
Protect the surrounding floor area with drop cloths or protective sheeting to prevent damage from falling debris or sharp tools.Begin by carefully removing any fixtures attached to the wall surround, such as showerheads, faucets, and soap dishes. Disconnect the plumbing connections to the faucet. This may involve unscrewing fittings or using an adjustable wrench to loosen connections. Cap the water lines immediately after disconnection to prevent water leakage.
Carefully score the perimeter of the wall surround where it meets the bathtub and the surrounding walls using a utility knife. This will help to prevent damage to the adjacent walls when removing the surround. Depending on the type of surround, it may be attached with screws, adhesive, or a combination of both. Locate and remove any screws holding the surround in place. Use a putty knife or scraper to gently separate the surround from the wall. Work slowly and carefully to avoid damaging the wallboard behind the surround.
Once the surround is detached, carefully remove it in sections. It may be necessary to cut the surround into smaller pieces to facilitate removal, especially if it is bonded tightly to the wall. Proceed cautiously to avoid injury from sharp edges.
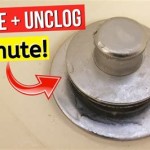
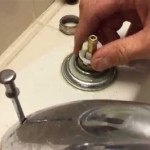
Next, address the bathtub. Begin by disconnecting the drain from the tub. This typically involves loosening a nut located beneath the tub using a wrench. Place a bucket under the drain to catch any remaining water. Once the drain is disconnected, inspect it, if damaged or heavily corroded, replace it. With the drain disconnected, carefully inspect the way the bathtub is secured to the floor and wall studs. Some bathtubs are held in place with nails, screws, or adhesive. Remove any fasteners securing the tub. If adhesive is used, gently pry the tub loose using a pry bar or similar tool. Be mindful of the surrounding walls and floor.
With the bathtub detached, carefully lift it out of the enclosure. If the tub is too heavy to lift safely, enlist the help of another person. Maneuver the tub out of the bathroom, taking care not to damage any doorways or walls. Once the old bathtub and wall surround are removed, thoroughly clean the area. Remove any remaining adhesive, caulk, or debris. Inspect the floor and wall studs for any damage, such as rot or water damage. Repair any damage before proceeding with the installation of the new bathtub and wall surround.
Installing the New Bathtub and Wall Surround: Precision and Accuracy
Before installing the new bathtub, ensure the subfloor is level and structurally sound. Use shims if necessary to level the floor, as an unlevel surface can cause the tub to crack or leak over time. Position the new bathtub in the enclosure. Align it carefully with the drain opening and the wall studs. Connect the drain to the tub. Apply plumber’s putty around the drain flange and tighten the nut underneath the tub. Test the drain for leaks by filling the tub with a small amount of water. Adjust the drain connection as needed to ensure a watertight seal. Secure the bathtub to the wall studs using screws or nails. Ensure the tub is level and plumb before securing it in place.
With the bathtub installed, prepare the wall surface for the new surround. Ensure the walls are clean, dry, and free from any debris. If necessary, apply a layer of primer to the walls to improve adhesion. Measure and cut the wall surround panels to fit the enclosure. Use a utility knife or saw to cut the panels to the required size. Dry-fit the panels to ensure they fit properly before applying adhesive. Apply construction adhesive to the back of the surround panels. Follow the manufacturer’s instructions for adhesive application.
Position the surround panels against the walls, starting with the back panel and working towards the side panels. Press the panels firmly against the wall to ensure good adhesion. Use a level to ensure the panels are plumb. Secure the panels with screws or nails, if required by the manufacturer. Apply silicone caulk along the seams between the panels and the bathtub, as well as along the corners of the enclosure. Smooth the caulk with a wet finger to create a watertight seal. Allow the caulk to dry completely before using the shower.
Install the showerhead, faucet, and any other fixtures. Connect the plumbing connections to the faucet, following the manufacturer’s instructions. Turn on the water supply and check for leaks. Tighten any loose connections as needed. Once all fixtures are installed and tested, clean the bathtub and wall surround thoroughly. Remove any remaining adhesive, caulk, or debris.
Final Steps: Sealing and Finishing Touches
Apply a bead of silicone caulk along the perimeter of the bathtub where it meets the floor. This will help to prevent water from seeping underneath the tub. Inspect the entire installation for any gaps or imperfections. Fill any gaps with caulk or sealant. Ensure that the caulk is smooth and watertight. Allow the caulk to dry completely before using the shower.
Reinstall any trim or molding that was removed during the demolition process. This will help to create a finished look. Clean the bathroom thoroughly. Remove any drop cloths or protective sheeting. Dispose of any waste materials properly. Ensure the surrounding area is clean and tidy. Allow the caulk to dry completely before using the shower. It is typically recommended to wait at least 24 hours before using the shower to allow the caulk and adhesive to fully cure.
Following this detailed guide should enable success in replacing a bathtub and wall surround in a mobile home. Remember to prioritize safety, accuracy, and thoroughness at every step of the process.

Replace Or Repair A Mobile Home Bathtub

How To Remove Tub Surround From Mobile Home

R G Supply Mobile Home Bathtubs And Surrounds

Installing A Bathtub In Our Mobile Home This Trick Will Save You From Having Water Damage

The Basics Of Replacing Your Mobile Home Bathtub Outfitters

Removing A Fiberglass Bath And Surround

Mobile Home Bathroom Guide

Mobile Home Bathroom Guide

How To Install A Shower Surround The Home Depot

Mobile Home Bathroom Guide
Related Posts