How to Repair Leaky Bathtub Faucet Handles: A Comprehensive Guide
A leaky bathtub faucet handle can be a common household annoyance that can lead to water damage if left unattended. Fortunately, it is often possible to repair a leaky faucet handle yourself with a few simple tools and materials. Here is a comprehensive guide to help you repair a leaky bathtub faucet handle.
Step 1: Identify the Type of Faucet
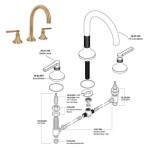
Before you start repairing the faucet, it is important to identify the type of faucet you have. There are three main types of faucets: compression faucets, cartridge faucets, and disk faucets. Compression faucets have a washer that seals against the valve seat when the handle is turned. Cartridge faucets have a removable cartridge that contains both the washer and the valve seat. Disk faucets have two ceramic or plastic disks that slide against each other to control the flow of water.
Step 2: Gather the Necessary Tools and Materials
Once you have identified the type of faucet you have, you can gather the necessary tools and materials. For compression faucets, you will need a wrench, a screwdriver, and a new washer. For cartridge faucets, you will need a wrench or pliers, a new cartridge, and a lubricant. For disk faucets, you will need a wrench or pliers, a new disk, and a lubricant.
Step 3: Turn Off the Water Supply
Before you start working on the faucet, it is important to turn off the water supply. There will be two shut-off valves under the sink, one for the hot water and one for the cold water. Turn both valves clockwise to turn off the water supply.
Step 4: Remove the Handle
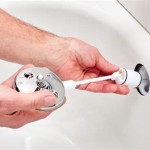
Once the water supply is turned off, you can remove the handle. For compression faucets, there will be a screw on the top of the handle. Use a screwdriver to remove the screw and then pull the handle off. For cartridge faucets, there will be a cap on the top of the handle. Use a wrench or pliers to remove the cap and then pull the handle off. For disk faucets, there will be a small screw on the side of the handle. Use a wrench or pliers to remove the screw and then pull the handle off.
Step 5: Replace the Washer or Cartridge
Once the handle is removed, you can replace the washer or cartridge. For compression faucets, simply remove the old washer and replace it with a new one. For cartridge faucets, remove the old cartridge and replace it with a new one. Be sure to lubricate the new cartridge before inserting it into the faucet.
Step 6: Reinstall the Handle
Once the washer or cartridge is replaced, you can reinstall the handle. For compression faucets, simply push the handle back onto the faucet and tighten the screw. For cartridge faucets, insert the new cartridge into the faucet and then push the handle back onto the faucet. For disk faucets, insert the new disk into the faucet and then push the handle back onto the faucet.
Step 7: Turn on the Water Supply
Once the handle is reinstalled, you can turn on the water supply. Turn both valves under the sink counterclockwise to turn the water supply back on. Check the faucet for leaks. If there are no leaks, the repair is complete.
Tips
Here are a few tips to help you repair a leaky bathtub faucet handle:
- If you are not comfortable repairing the faucet yourself, you can call a plumber.
- Be sure to turn off the water supply before you start working on the faucet.
- Use the correct tools and materials for the type of faucet you have.
- Follow the steps in the guide carefully.
- If you have any questions, consult a professional.

How To Fix A Leaking Bathtub Faucet Diy Family Handyman

How To Fix A Leaky Bathtub Faucet 6 Ways Stop Drips

Diy Bathtub Faucet Repair

How To Fix A Leaking Bathtub Faucet Diy Family Handyman

How To Fix A Leaking Bathtub Faucet The Home Depot

How To Fix A Leaking Bathtub Faucet The Home Depot

How To Fix A Leaking Bathtub Faucet The Home Depot

How To Replace A Moen Cartridge And Fix Leaky Bathtub Faucet It Tutorials

How To Fix A Leaking Bathtub Faucet Diy Family Handyman

How To Fix A Leaking Bathtub Faucet The Home Depot
Related Posts

